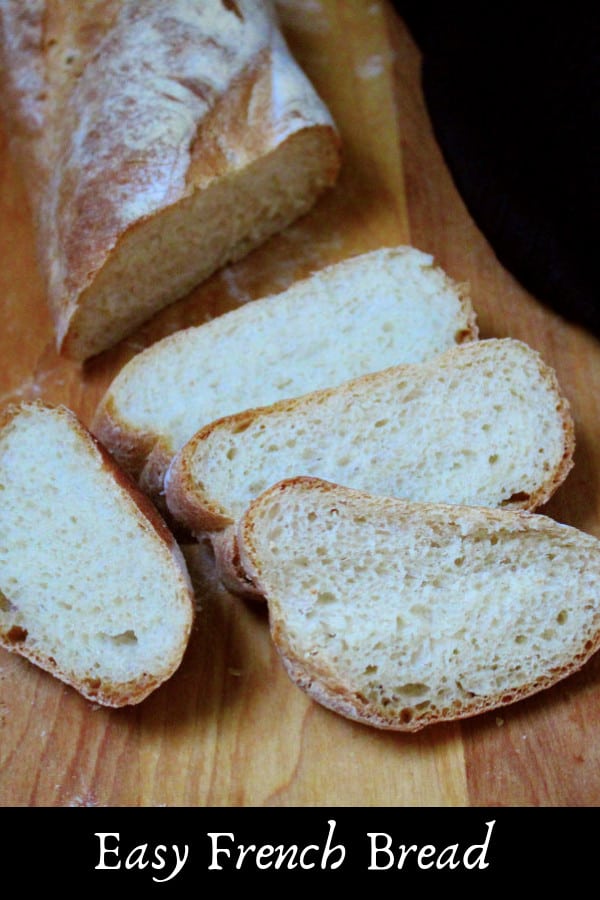
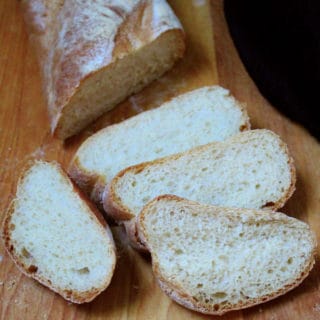
A fluffy, soft crumb and a golden crust will make this easy French Bread your favorite bread to bake and eat. Make fresh, homemade bread even on a weeknight.
I haven't posted a non-sourdough bread in a while, so I thought I'd remind you about this amazing and easy French Bread recipe I shared with you all the way back in 2009. It's my favorite French Bread and I make it ever so often, as do so many of you who have written to tell me all about it.
My recipe's still exactly the same, but I've updated this post with new photographs, because the old ones were, well, to put it nicely, dated.
This is an extremely easy bread to make, with two rather quick rises and just 25 minutes in the oven. And it is quite fool-proof. In fact, if you're a new baker, this is the recipe to give you the confidence you might be looking for as a bread baker.
The wonderful thing about French bread is, it is rather minimalist, with just a few ingredients. So what's stopping you? Let's dive in.
Four ingredients for Easy French Bread:
- Flour. Unbleached all purpose is what you need for this recipe. I have a foolproof whole-wheat French bread recipe on the blog with step-by-step pictures that you can try if you want a wholegrain bread.
- Water. Try and use distilled or filtered water for the best results when you bake bread, because chlorine is not a friend of yeast.
- Sugar. You just need a teaspoon to feed your yeast.
- Salt. For flavor.
How to make the best French Bread you ever baked (or ate):
- I always tell you with bread recipes that baking is a science, so you really, really need to pay attention to proportions and measures and not tweak things, especially if you're new to bread baking.
- When you use active dry yeast, as this recipe requires, always start by "flowering" your yeast. That's just another way of saying that you should ensure your yeast has not passed on into yeast heaven or wherever it is that dead yeast go. The best way to check the health of your yeast is to stir it into some warm water, feed it with a bit of sugar, and if it bubbles and froths up within five minutes, you'll know it's still among us and therefore fine to use. If your yeast shows no activity, it's likely dead, so buy some new yeast and start over. Unless you want a French brick rather than a French bread.
- Once you've ensured your yeast is alive, add the remaining water and two cups of flour, mix it in, and then add salt.
- You want your French bread dough to be just slightly sticky but also very supple. So it should stick just slightly to the surface of your bowl or your kitchen countertop when you put the dough on it, but it should also come off easily, without leaving any dough behind, and you should be able to easily shape it into a ball. The way to ensure you get the right texture is to knead the dough for at least five minutes. This also helps build the gluten in your bread, which gives your bread great structure and helps it rise.
- Your first rise should take 45 minutes to an hour and your dough should visibly double. Make sure you oil the bowl before you put your ball of dough in it, cover it with a kitchen towel or cling wrap, and set it in a warm place, like the inside of the oven with the light turned on, or on the countertop if you're in warm climes.
- Once your dough has risen, turn it out on the countertop, knead it ever so slightly, divide into two, and form each half into a bowl. Punch each half into a circle with your fist, then roll it into a cylinder, making sure you seal the seams with your fingers.
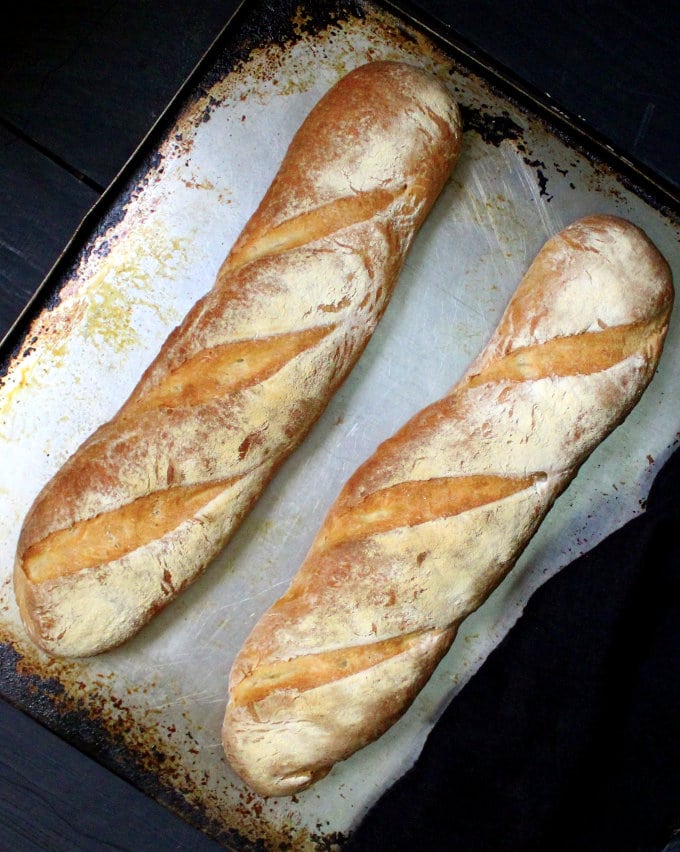
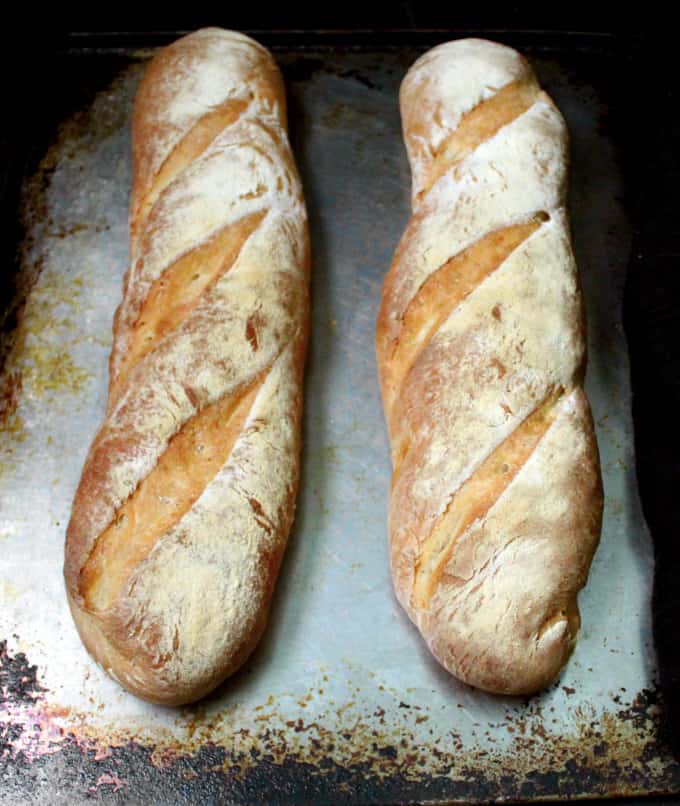
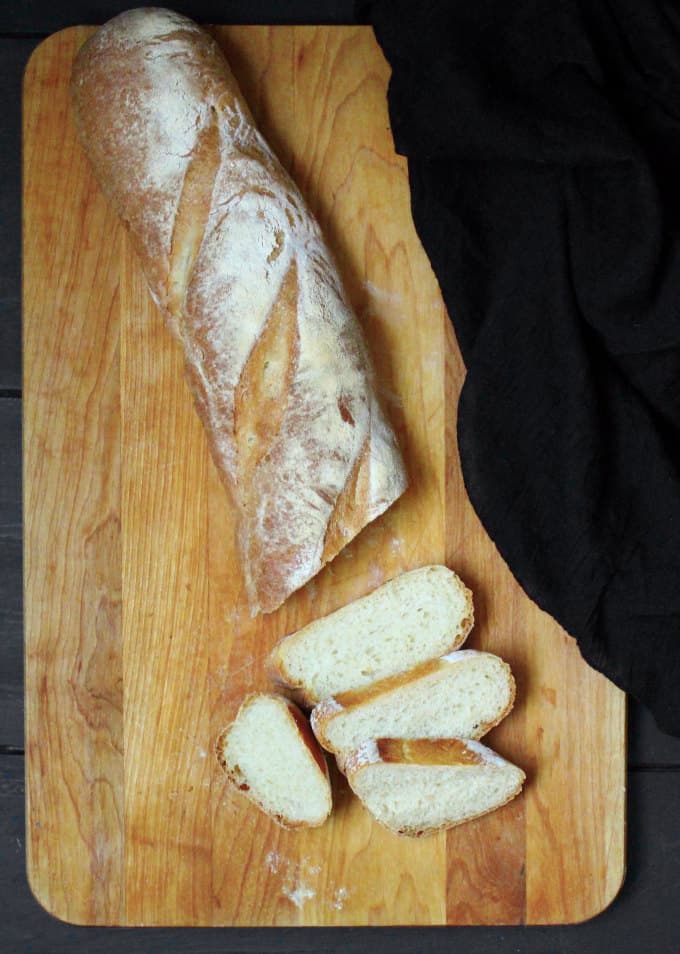
- Finally, roll each cylinder back and forth on the countertop using the palms of your hand to shape it into a baguette about 12 inches long, or as long as your baking sheet will hold. French baguettes are really long and really thin, and I don't have a baking sheet that could hold one that long, so my French breads look halfway like batards, which are shorter, fatter French breads. Equally delicious, though.
- Place your shaped baguettes on a parchment-lined baking sheet or you could just sprinkle the sheet with some coarse cornmeal. Make sure your baguettes are spaced at least three to four inches apart to give them room to rise.
- Dust on some flour on the tops of the baguettes before you set them aside for the second rise. This is because you want to cover the baguettes with a kitchen towel to prevent them from drying as they rise, and you don't want the dough to stick to the kitchen towel. I also like the rather decorative, rustic and artisan-y look the flour gives the bread.
- You will need to slash your bread before you put it in the oven. Now this is the only part that can be a tiny bit challenging because if you use a knife that's not sharp enough, you could cause your baguette to deflate, which would be a pity after that beautiful rise. The easiest way to make a cut, I find, is with a steak knife that has a serrated edge. The knife is not so heavy that its weight could cause the loaf to deflate, especially if you're new at this, and the serrated edge cuts through the dough easily. Be bold and confident -- at least as bold and confident as you can -- when you make the cut, and try and make a clean gash the first time round. Channel your inner surgeon. You don't want to butcher your loaf--you just want to eat it.
- Spray the insides of your oven with water before you bake. You want a nice crust on your French bread, and the water will help with that.
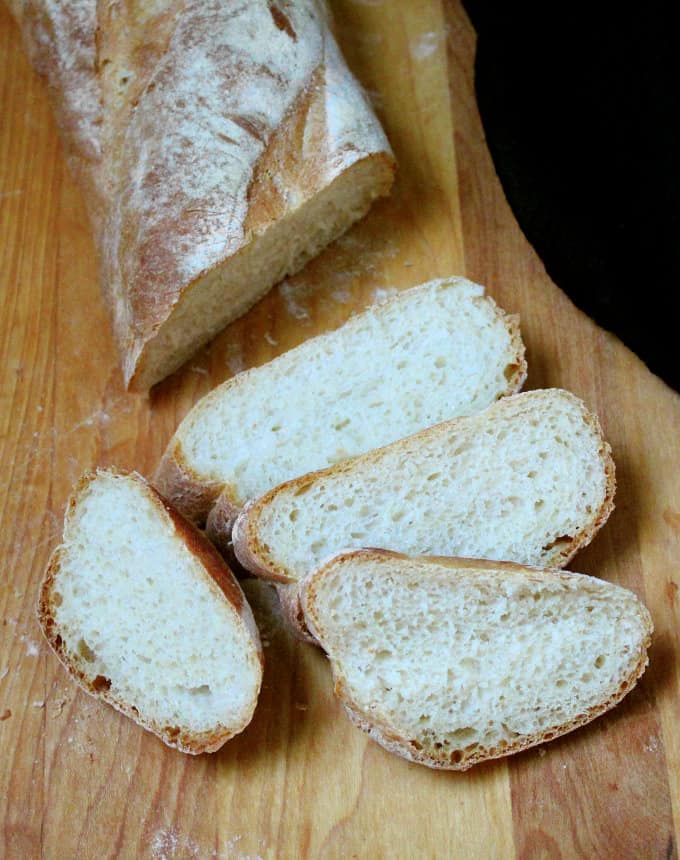
- Finally, make sure you cool your loaves thoroughly on a rack before you slice them.
Now I know that seems like a lot of instructions for an easy bread, but I wanted to make sure you are armed with all of the information you need before you set out to make this amazing bread. It really is easy. And once you've made it, you'll be making it again and again.
Ways to eat your French Bread:
So now you've made the most amazing bread you ever baked, and you've eaten a few slices with a pat of vegan butter and it's so good, but you're wondering what else can I do with it?
Here are some ideas:
- Serve it alongside a soup or stew, like this delicious Vegan Lamb Stew. Crusty bread and soup -- or stew -- are a match made in heaven.
- Use it for avocado toast. Or better still, pile it high with this Chickpea and Avocado Salad for breakfast.
- Use it as a base for a French Bread Pizza! Cut the bread lengthwise down the middle, place it on a baking sheet, top with marinara and vegan cheese and anything else you'd put on your pizza and bake in a 400 degree oven for about 15 minutes. Yum.
- Use it to make French toast! I even have a great recipe for vegan French Toast for you.
- Make sandwiches.
- Make bruschetta-like appetizers. Cut the bread into slices, grill, then top each slice with vegan basil pesto, tomatoes, and vegan cashew parmesan.
I think I can't wait any more, my mouth's watering with all that delicousness. Come along for the ride and bake this easy French Bread with me. And when you do, be sure to let me know in the comments below, or take a photo and tag me @holycowvegan on Instagram.
Bon appetit!
Easy French Bread
Equipment
Ingredients
- 2 ¼ teaspoon active dry yeast
- 1 ½ cup water (lukewarm)
- 1 teaspoon sugar
- 4 cups unbleached all purpose flour (you might not need all of this)
- 1 ½ teaspoon salt
Instructions
- Place the yeast in a large bowl or the bowl of a stand mixer and add the sugar and ½ cup water. The yeast should froth and bubble in five minutes, indicating it's alive.
- Add the remaining water and 2 cups of flour. Mix, and then add the salt. Add 1 ½ cups of flour and continue kneading for five minutes. You want the dough to be just slightly sticky but supple and smooth. If it sticks to the bottom of the bowl in a puddle, add more flour, just a tablespoon at a time, until you get the right consistency.
- Shape the dough into a ball on the countertop. Lightly oil a bowl and place the dough in it, turning over once to coat the top of the dough with some oil. Cover with a kitchen towel or cling wrap and put aside in a warm place to rise for 45 minutes to an hour, or until it has doubled.
- Once the dough has risen, dump it back on the counterop and knead it lightly to deflate for just a few seconds, then divide into two.
- Form each half into a ball. Then, using your fist, punch each ball into a circle about six inches in diameter. Pick up the edge of the circle of dough close to you and start rolling until you form a cylinder. Press the seams in with your fingertips.
- Using the palms of your hand, roll each cylinder into a long rope, about 10-12 inches in length.
- Line a baking sheet with parchment paper or sprinkle it with cornmeal.
- Place the two ropes side by side, with at least 4-5 inches between them, on the baking sheet. Sprinkle on some flour over the tops, using a sieve or a strainer.
- Cover the loaves with a kitchen towel and set them aside to rise for 45 minutes to an hour or until they are very puffy and have doubled in size.
- Preheat the oven to 450 degrees. While the oven is heating up, use a steak knife or a very sharp blade to make three diagonal gashes on each loaf. Make clean cuts and don't saw the bread, or your loaves will deflate.
- Just before you place the bread in the pan, spray the walls of the oven with water.
- Place the baking sheet in the oven and bake 25-30 minutes until the loaves are golden brown.
- Remove the loaves to a rack using mitts and wait until they are thoroughly cool before slicing and eating.
sharon
I make this recipe all the time. Can i make the recipe without baking it and freeze unbaked dough...
Vaishali
Yes!
Thomas
I love how easy this recipe is and it yields wonderful results! Thank you ☮️????????
Vaishali
So happy to hear, Thomas!
Bobbi
I made your sourdough starter recipe thinking there’d be many recipes using your starter. The french bread, sandwich, ciabatta all use active yeast and not your starter. Are there any more recipes using your sourdough starter?
Can some discard be used to make starter for another person?
Vaishali
And yes, the discard can be used to start another batch of starter.
shapelessjourneys
Mixed the dough in a food processor, and only put it in the oven for 20 minutes as per another commentor! I also used a pan with water instead of spraying. DELICIOUS!
Vaishali
Awesome, so happy to hear!
James
We are super happy with this recipe. Fluffy bread with a nice crisp exterior. We made a few slight alterations: 1) we used molasses instead of sugar, 2) used a pan with water instead of spraying the oven, and 3) only baked for 21 minutes. This is going to be our "everyday" bread recipe for a while!
Marianne
I never made bread before. It was not easy as super sticky and loose. I thought I messed up and could not make the logs. Put in as a round mound of mess but oh my...this was gorgeous and incredibly delicious. Thank you for an incredible recipe. It was terrific as a large round bread.
Lindsey
This was absolutely incredible!!! My whole family loved it and it is just PERFECT! it tastes like a bakery, just amazing!
Ela
this came out AMAZING!! I had to add a lot of flour though so I was kinda scared till it came out of the oven, the dough was very sticky. but it is so so good! also, it tastes kinda bland to my tastes, do you think adding more salt will be alright? or will it do something to the yeast?
Vaishali
You can add more salt to your taste, it wouldn't hurt. Happy you tried the recipe!
Nargess
Hi,
It sounds great. I would like to make it very soon but I like to know if all 4 cups of the flour should be used or 3c1/2 ?
unbleached all purpose flour (you might not need all of this). Thanks.
Vaishali
Add more flour only if the dough is too soft.
MICHELLE
I've tried this recipe a couple of times already and its been great. Book marking it as my go to! HELLO FROM NY!
Nicole
Super easy recipe! Perfect to pair with some vegan meatballs and pasta:)
Page Barger
Turned out absolutely incredible!! Me and my family wiped out the first loaf in minutes! I plan to use the other loaf throughout the week! I will definitely make this again!! I do have a few questions
My crust was very hard but didn't develop much color. any tips?
Would this recipe work in loaf pans?
Do you have a recommendation for a good proofing temperature?
Can you make dough in advance and refrigerate it and then bake the next day?
Thank you so much!!
Pym
No tiles, no pizza stone no teeth isvthis bread soft?
Also no oven using countertop convection oven so can't put bowl of water in it.
Claire
I've made this bread multiple times and it always comes out great! I don't have a baking stone or ceramic tile to use. I just make sure the oven is piping hot.
I've used the same recipe to make two small loaves of sandwich bread with great success.
Sandra
Thank you so much for sharing this:-) We are going to make it over the weekend.. My 15 year old son and I have been vegan for a month now.. You are helping to make our lives better.. Hugs From Sandra in Homer, Mi