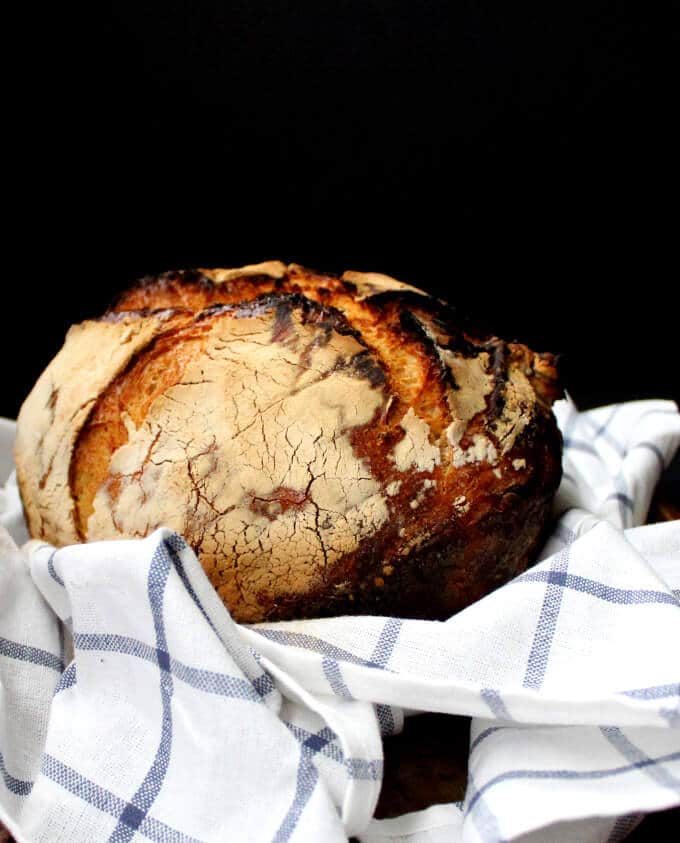
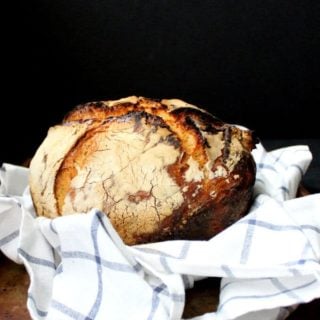
An artisanal loaf of No Knead Sourdough Bread that takes almost no skill and minimal amount of hands-on time. If you love making sourdough breads, this is one you absolutely want to try! All you need for this recipe is two ingredients -- a quality sourdough starter and flour. The bread is crusty with a tender, airy crumb and a delicious flavor.
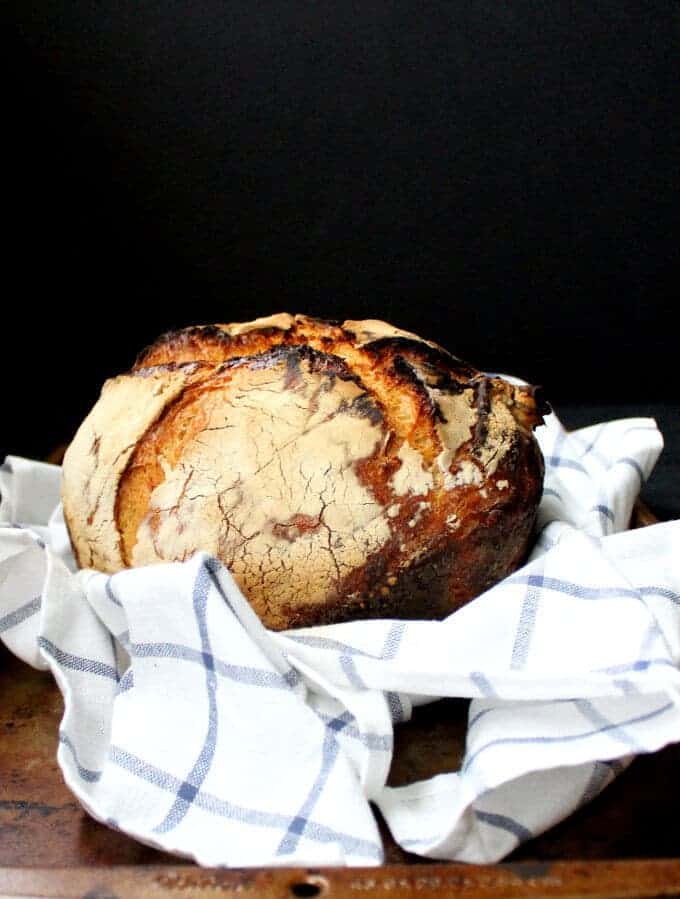
If making bread seems like a lot of work to you, I have for you today the perfect solution: my No Knead Sourdough Bread.
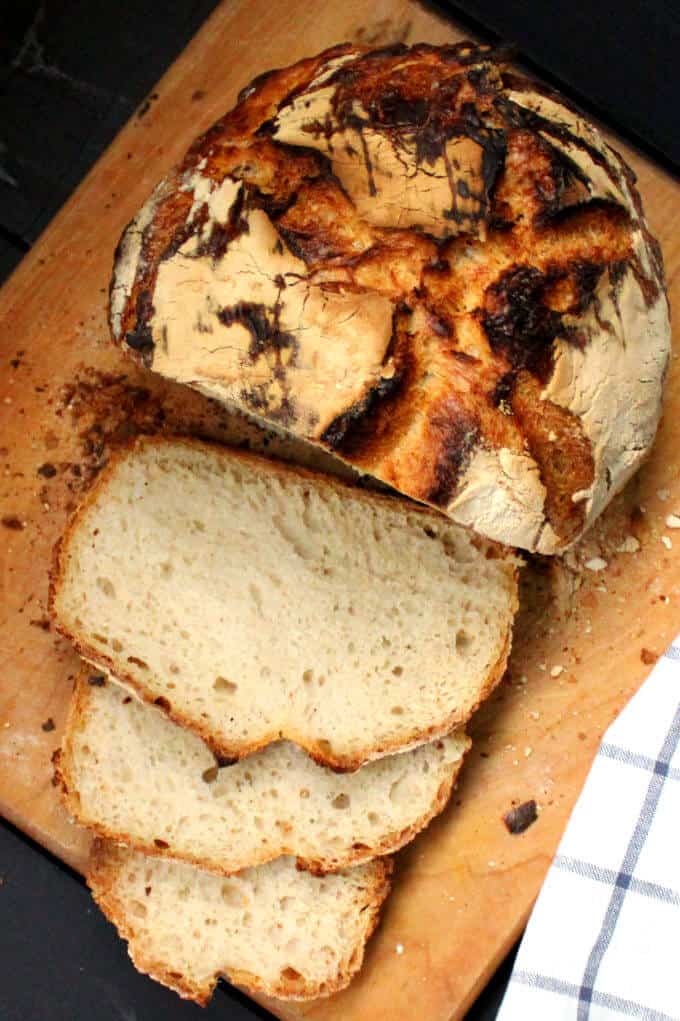
This is really one of my favorite bread recipes, and one everyone at home loves, including my 9-year-old, Jay. He loves eating it fresh and once it's a day old, I toast it up for him and he loves it even more. Because with a dab of vegan butter, this bread is heaven itself.
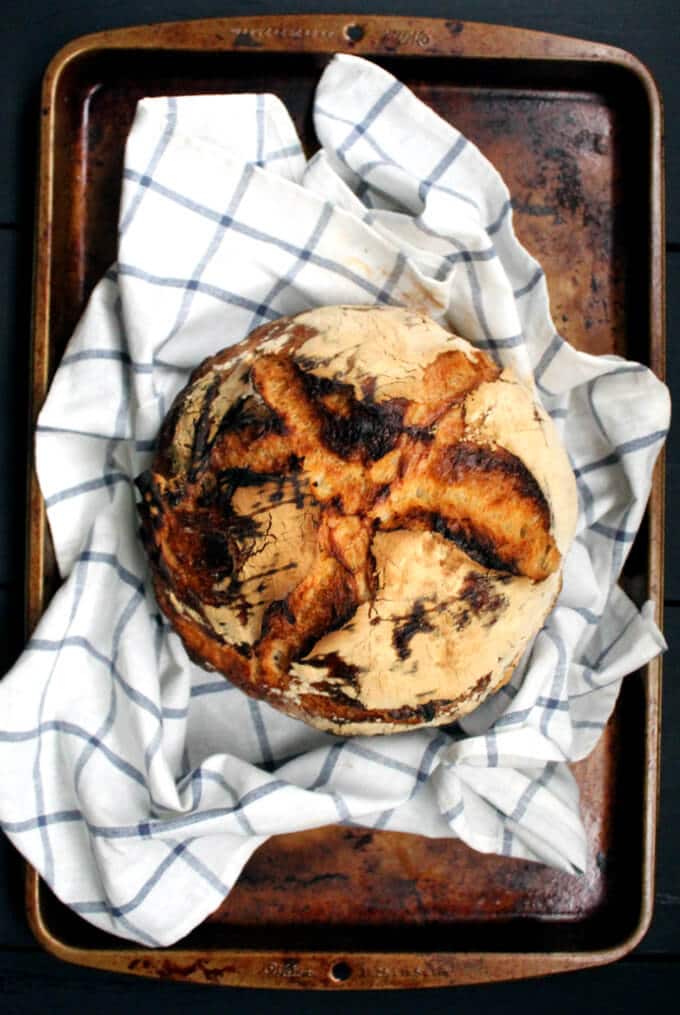
I started out with a recipe from Sam Sifton, but over the weeks I've tried different versions of it, including a part whole-wheat one that is ridiculously good, although not as airy as the version made entirely with white bread flour. It does pack in a ton of flavor, though. You can rest easy even if you make your bread with all white flour because the probiotic microflora in the sourdough slow down the rate at which glucose is released into the blood-stream, making sourdough bread -- yeah even white sourdough bread -- rank lower on the glycemic index.
The best part about making this bread is, I don't even need to refer back to the recipe. The ingredients couldn't be simpler or more basic and therefore easy to remember.
Ingredients for no-knead sourdough bread:
- Sourdough starter (here's the recipe, if you don't already have one. My starter uses ¾th cup of water for each cup of flour).
- Flour
- Salt and water
The only real work is mixing up the ingredients, but you can do it all in one bowl and set it aside to rise. Couldn't be easier. You do need some time for the sourdough to do its magic, but it's all hands-off time and some things are worth waiting for, aren't they?
The dough needs two rises. One is a longer, overnight rise, and the second is a shorter, two-hour rise. You will need a dutch oven or a heavy, oven-safe pot with a lid to bake the bread. My dutch oven is not enameled on the inside, but it works just great. You will also need some parchment paper or a kitchen towel for the second rise, with parchment a much better option.
I won't keep you waiting any longer for the recipe, but I hope you will try this loaf. If you do, I guarantee you'll love it. Be sure, as always, to follow instructions precisely. I am not a stickler for following recipe instructions, and I don't ask that you do that with mine except when you're baking.
Here's the recipe. Happy baking -- and breaking -- some delicious No Knead Sourdough Bread!
Looking for more sourdough and bread recipes:
- The Best Sourdough Sandwich Bread
- Vegan Sourdough Challah
- Vegan Olive Oil Brioche
- Crusty French Bread
- No Knead Whole Wheat Sandwich Bread
- Bread Machine Sourdough Bread
No Knead Sourdough Bread
Ingredients
- ¾ cup sourdough starter (unfed is fine, but it should have been fed at least within a week of baking the bread)
- 1 ¼ cups water (use distilled or non-chlorinated water for bread, especially sourdough breads)
- 3 ½ cups bread flour (can replace 1 cup of the bread flour with whole wheat flour. The bread will be less airy but still delicious)
- 1 teaspoon sea salt or kosher salt
Instructions
- In a large bowl, mix the sourdough starter with the water, then add the flour and salt and mix until a consistent but sticky dough forms. You can do this by hand or in your stand mixer.
- Cover the bowl with cling wrap and let the dough rise overnight or 8-10 hours.
- Turn the risen dough onto the kitchen counter and form it into a ball as best as you can. If the dough is hard to handle, flour your hands but resist the temptation to add more flour. You want a dough with higher hydration or water content for a light, airy loaf. Adding too much flour will make your bread dense. Even if your dough doesn't form into a perfect loaf, it will shape up nicely during baking in the dutch oven.
- Prepare a sheet of parchment paper by sprinkling liberally with flour. If you don't have parchment, you can use a kitchen towel sprinkled with flour, but keep in mind that there is a much higher chance of your dough deflating when it rises on a kitchen towel because it will more likely stick to the towel. Place the parchment paper or kitchen towel on a baking sheet.
- Transfer the dough onto the parchment paper or kitchen towel, seam side down. Cover (I use the bowl I mixed the dough in), and let it rise another two hours.
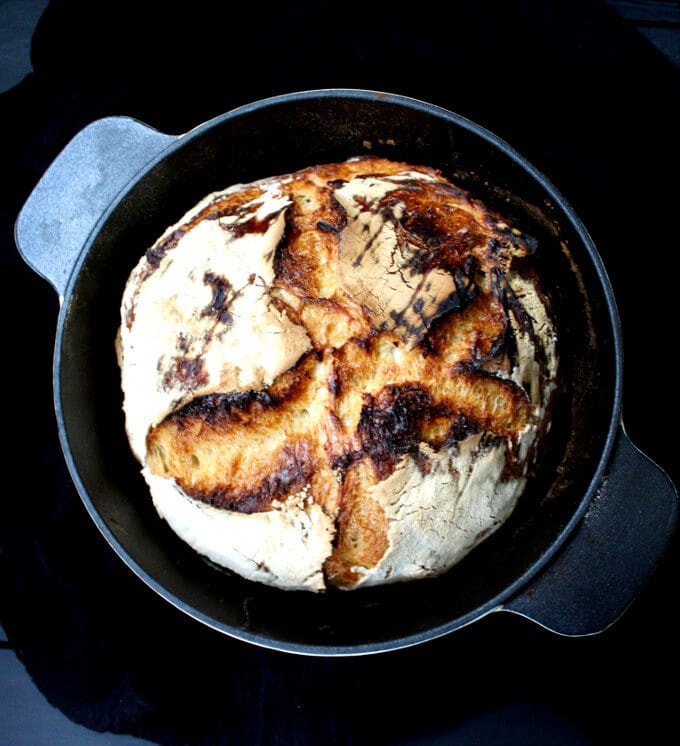
- About half an hour before your bread is done rising for the second time, preheat the oven to 500 degrees. Place a heavy cast-iron or other oven-safe pot in the oven with the lid on. (I use a 3.2 quart dutch oven that is not enameled on the inside. Enameled is even better.)
- Once the dough has risen, carefully remove your heated pot from the oven. Quickly, in a smooth motion, turn the dough into the pot so that the seam side now faces up. A parchment paper makes this much easier because the dough slides off more smoothly. Be very careful doing all this because the pot is very hot. If you find turning the bread into the dutch oven difficult to do without deflating it, you can just transfer the bread into the dutch oven with the parchment paper (don't do this if you used a kitchen towel).
- Put the lid back on the pot and bake for 30 minutes. Take off the lid and continue baking the bread for another 20 minutes. The bread will split at the top and char a little, which I love because the charring adds even more flavor.
- Once the loaf is baked, remove to a rack and let it cool about half an hour before carefully removing it from the pot. Let the loaf continue cooling on a rack. Slice and serve, or tear it apart with your bare hands (which you just might want to do because who has time for niceties when there's a delicious loaf of bread to be eaten 😉 ).
nancy pope
why can't you use active sourdough starter? What would happen if you do?
Vaishali
You can use active starter no problem
Kyerra
Hi! I'm starting my own sourdough for the first time and want to try out this lovely bread, however, I don't have a dutch oven (I'm a student with low budget:)). Could I use a regular cake pan instead? Do you have any tips for this? Thank you!
Vaishali
Yes, and tent with aluminum foil instead of lid. Give room for the bread to rise.
Sarah
Hello, when you say “unfed starter”, how long should it have been since the last feeding? A day? A week?
Vaishali
Up to a week!
Phoebe
I love this easy recipe which I first made today when the humidity was quite high. The dough was too moist to shape and had little rise. I did some research regarding moisture levels in dough on humid days and found the suggestion to reduce the water content by 10%. Will try this next bake. In spite of its low rise, the bread is beautiful and delicious! Thanks.
Robin
Should we add more water if we're using a cup of whole wheat flour? How much more? My dough is a lot drier with the whole wheat flour added.
Vaishali
If it's in dough form without any dry flour that can't incorporate just leave it as is.
Robin
If I have to leave the dough for longer than 10 hours overnight, say 16 hours or so, should I leave the dough in the fridge, or will it still be OK on the counter?
Vaishali
In the fridge.
Robin
Thank you. Baked yesterday with my new starter and it turned out amazing! So easy, I'll be making this recipe many many times I'm sure.
Davina
Is it possible to throw any ingredients / flavours in between the rises?
Vaishali
Yes! See this olive sage sourdough loaf for ideas. https://holycowvegan.net/sourdough-olive-sage-loaf/
Jessica
What would I substitute to make this bread gf ? Would all purpose flour or brown rice flour work?
Vaishali
Hi Jessica, I have a gf sourdough boule recipe here: https://holycowvegan.net/gluten-free-sourdough-boule/
Julie
Hello,
I just tried this recipe for the first time. When I tried to shape my dough and let it rise for another hour, it sort of "ran away" and was super sticky. Could you tell me how to get it so it stays in place better? Also, do you have any tricks to deal with the stickiness?
Thank you!
Vaishali
The dough will be sticky, but if it's very humid where you are, it could make the dough stickier. In that case let it rise slower, for a longer time, in the refrigerator or a cool basement. As for shaping, since you'll be baking in a dutch oven the dough will shape into a boule by itself, you don't really have to worry about that aspect.
Angie
I have made this recipe weekly for the past 3 months and love it! But I was wondering if you have any recommendations on how to adjust the recipe now that it’s becoming summer where I live, and we’ve had some very hot and humid days? I let the dough rise overnight for 10 hours, but this morning it was way too sticky to even work with and this hasn’t happened to me before- I assume it’s because of the increased humidity in the air. Perhaps I should let it rise in the fridge or in a cooler place, like our (finished) basement?
Vaishali
Your basement sounds perfect. Sourdough does get stickier because of the humdity!
Krithika
So I don't have a Dutch oven or any dish with a lid that could go in the oven. Has anyone tried this on a cookie sheet? I've read that adding another dish with water will help create steam and produce a nice crust. I will try this soon, but wanted to know if that would work here.
Vaishali
You can cover it with aluminum foil if you don't have a lid. Placing it on a baking tray would cause it to spread too much, making it wide and flat.
This bread is very crusty, so I'd recommend not adding steam to the oven to make it crustier unless you've tried it out once.
Jenn
I used a pyrex pie plate as my base and an upsidedown pyrex bowl as the "lid". It worked really well, but I had to be quite careful when removing the hot "lid" (bowl) after 30 minutes so as not to burn myself.
Patty
Hello! Your recipe says to use an unfed starter. How soon after you feed it can you use it?
Jai Knauff
This is a simple but perfect recipe. I went through many blogs to figure out how to bake my first sourdough boule. I think most sites just over complicate things. This is was easy to do and the bread came out just Amazing!
Estabanana
A-mazing!!!! First one I mad about 4 days into my starter and it was really runny, almost like slime and made an amazing loaf anyways.
Making one today on day 6 of the starter and the dough actually stayed in a ball and doubled in size on the counter and I can’t wait!
I do have a question: the first round stuck to the bottom of the enameled Dutch oven, is there a preferred way to keep it from burning/sticking? I’ve seen posts about using corn meal or oil but neither of those sound good!
Thank you for al the amazing advice and helping make this process easy and fun!!
Robin
I put mine in the Dutch oven on the sheet of baking paper. Stops it from sticking and makes for an easier clean up afterwards!
Louisa Balls
Hello, I love this recipe - thank you!
Question: can you use this recipe as a base and add flavourings to it? I’m keen to try a Savoury rosemary bread and also a honey/cinnamon/walnut loaf. I am unsure at which stage to add the flavourings?
Vaishali
Hi Louisa, happy you've enjoyed the bread. You can definitely add flavorings--best time to add is when you make the dough. If you add anything that may express a lot of liquid, you will need to adjust the amount of liquid in the recipe. You can use this recipe as a guide: https://holycowvegan.net/sourdough-olive-sage-loaf/
Robyn
Hi .
I made my first sour dough loaf from your blog and it was so tasty and crunchy.
I would like to make a gluten free loaf.
Is it just as simple as swapping the wheat flour to gluten free. Or are other ingredients needed.
Thankyou
Vaishali
Hi Robyn, you can try this recipe: https://holycowvegan.net/gluten-free-sourdough-boule/
Kunal
Firstly my sourdough starter took more than 12 days to happen (even though I'm sitting in hot and humid Mumbai). On the 11th day I decided to make the no knead bread. I mixed the ingredients and left it overnight, but since I had started in the afternoon, it was kept out for about 16 hours. In the night as well as the next morning the dough had risen and looked nice, but when I decided to turn it, it was very sticky on the inside. I somehow managed to put it in the oven to cook now, but what would have made it so sticky? Was it too much hydration and less flour.
Also would it be possible to use only whole wheat flour for making the no knead bread? I always prefer whole wheat.
Vaishali
Your sourdough starter may not have been strong enough, or your first rise may have been too long--don't let it go over eight hours, preferably. And although you are using an unfed starter, make sure it was fed no more than a week ago and was strong and bubbly at the time. The bread should rise the second time and should also get some oven spring in the oven--it's not normal for it to come out flat from the oven.
Vaishali
No, if you used my starter with the correct hydration for this recipe it should be sticky but you should be able to work with it. If you use another sourdough starter you'll have to adjust for the correct hydration.