Sourdough Starter Recipe
A sourdough starter is so simple and easy to make–all you need is water and flour and the wild yeast in the air around your kitchen and in the flour. It will reward you for years to come with tasty breads, waffles, pancakes and more, with no need for added yeast. Even better, the wild yeast in the sourdough is great for your gut health. Stir up a batch today--it's truly the gift that keeps on giving.
Servings: 1 starter (approx 1 ½ cups)
Calories: 408kcal
Equipment
- Large glass bowl (or ceramic bowl)
- Whisk
Ingredients
- 1 cup whole wheat flour
- ¾ cup bottled or non-chlorinated water
- 3 cups (approx) Unbleached all purpose flour (for feeding. Or bread flour or whole wheat flour)
Instructions
- Measure out the whole wheat flour into a large bowl or a crock. The container you use should be large enough to hold the sourdough starter as it rises and bubbles. Also make sure you use a glass or ceramic or sturdy, food-safe plastic container.
- Measure out the bottled or non-chlorinated, room-temperature water. Chlorine can inhibit the formation and growth of yeast, so it’s rather important that your water be as non-chlorinated as you can get it.
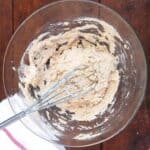
- Now add the water to the flour and whisk together to mix well. You should not have any traces of flour.
- Cover the sourdough starter loosely with a kitchen towel.
- If the weather where you live is cold, place it in a warm spot, like on top of a radiator or in an oven with the light on. It was rather warm here when I started George so I could leave him out on the kitchen table, but this time — with temperatures kissing the 40s — I have my new starter in the oven with the light on. Keep in mind that it may take longer for the yeast to develop in the starter in cooler weather.
- Leave your starter alone for 24 hours. When you look at it, you might see some bubbles, or there may be none, especially if you are in cooler temperatures. Either way, mix the starter well with a whisk or fork, measure out half a cup of the starter, and discard* it. (You can use the discard in flatbreads or unleavened breads, and from day 4 you can use it in sourdough waffles and pancakes)
- After discarding a portion of the starter, add half a cup of unbleached, all purpose flour and ⅜ of a cup of non-chlorinated water. Use warm water (not hot) if you are working in cool temperatures, as I am. Mix well and again, leave in a warm place. You will start noticing that your starter lightens in color with the addition of all purpose flour.
- By the third day you should see some activity in your starter and also a fruity aroma. Once again, discard half a cup of starter and add half a cup of all-purpose flour and 90 milliliters of water (⅜ of a cup).
- Continue the process for the next three days (try and do this at the same time of day– for instance, I began my starter Sunday morning, so I have to try and feed it around the same time every day, although an hour here or there won’t be amiss). Your starter should have started to thrive by now, rising after you feed it, and eventually settling down. King Arthur Flour, where I got my initial recipe, recommends discarding and feeding your starter twice after day 3, but I found that doing it just once was okay, especially since it was quite warm when I made my starter. This time, with cooler weather, I might feed the new starter twice depending on how it goes.
- By the seventh day, your starter, if it’s healthy and bubbling, should be ready to use. When I made George, I used the “discard” portion of the starter to make waffles, and they turned out great. If your sourdough starter is still slow in developing, increase feedings to twice a day and continue to keep it warm. It will eventually strengthen.
- Once your sourdough starter has matured, you will need to feed it once every week. I mix the starter well, take out the amount of sourdough starter I need to bake with, and replace it immediately in the proportion of 1 cup of flour to ¾ cup of water. For example, if I take out ½ cup of sourdough, I replace it with ½ a cup of flour and ⅜ths of a cup of water. After feeding the starter, I leave it on the counter for a day, and then refrigerate it.
Notes
- You will need whole wheat flour to begin your starter, but you can use all purpose flour or bread flour for subsequent feedings. If you can't use whole wheat flour for any reason, use all purpose flour, bread flour or rye flour.
If you want to make a starter without gluten, see my recipe for a gluten-free sourdough starter. - Always try and use filtered or distilled water for your sourdough as tap water can contain chemicals that affect the growth of the starter.
- If you add too much or too little water to the starter, don't panic--it won't hurt the starter or the bacteria. Just continue future feedings with the right proportions of water and flour and you'll be fine.
- To get a strong and healthy starter that'll give you the best results when you bake and for taste, you want to try and keep your sourdough starter in a room where the temperature is between 70 and 75 degrees Fahrenheit.
- You will know the starter is ready when it starts to rise within six to eight hours of feeding and gets really puffy. This will typically take seven days.
- Your sourdough starter, once it begins to bubble, will have a smell not unlike buttermilk. It should smell fresh and somewhat fruity, and not moldy or spoilt.
- For the first seven days, between feedings, leave your starter outside at a room temperature of no more than 75 degrees F. Once your starter is ready, you can store it in the refrigerator. Each time you feed it, leave it out at room temperature for a few hours or until it gets puffy and expands, then put it back in the fridge.
- Once your sourdough starter is ready, transfer it to a large glass or ceramic jar with a tight lid. A stainless steel containers is fine too. Make sure you choose a large container because as you feed the sourdough it will rise and expand.
- Check expert tips above for more detailed instructions/troubleshooting.
Nutrition
Calories: 408kcal | Carbohydrates: 86g | Protein: 16g | Fat: 3g | Saturated Fat: 1g | Sodium: 2mg | Potassium: 436mg | Fiber: 13g | Sugar: 1g | Calcium: 41mg | Iron: 4.3mg