

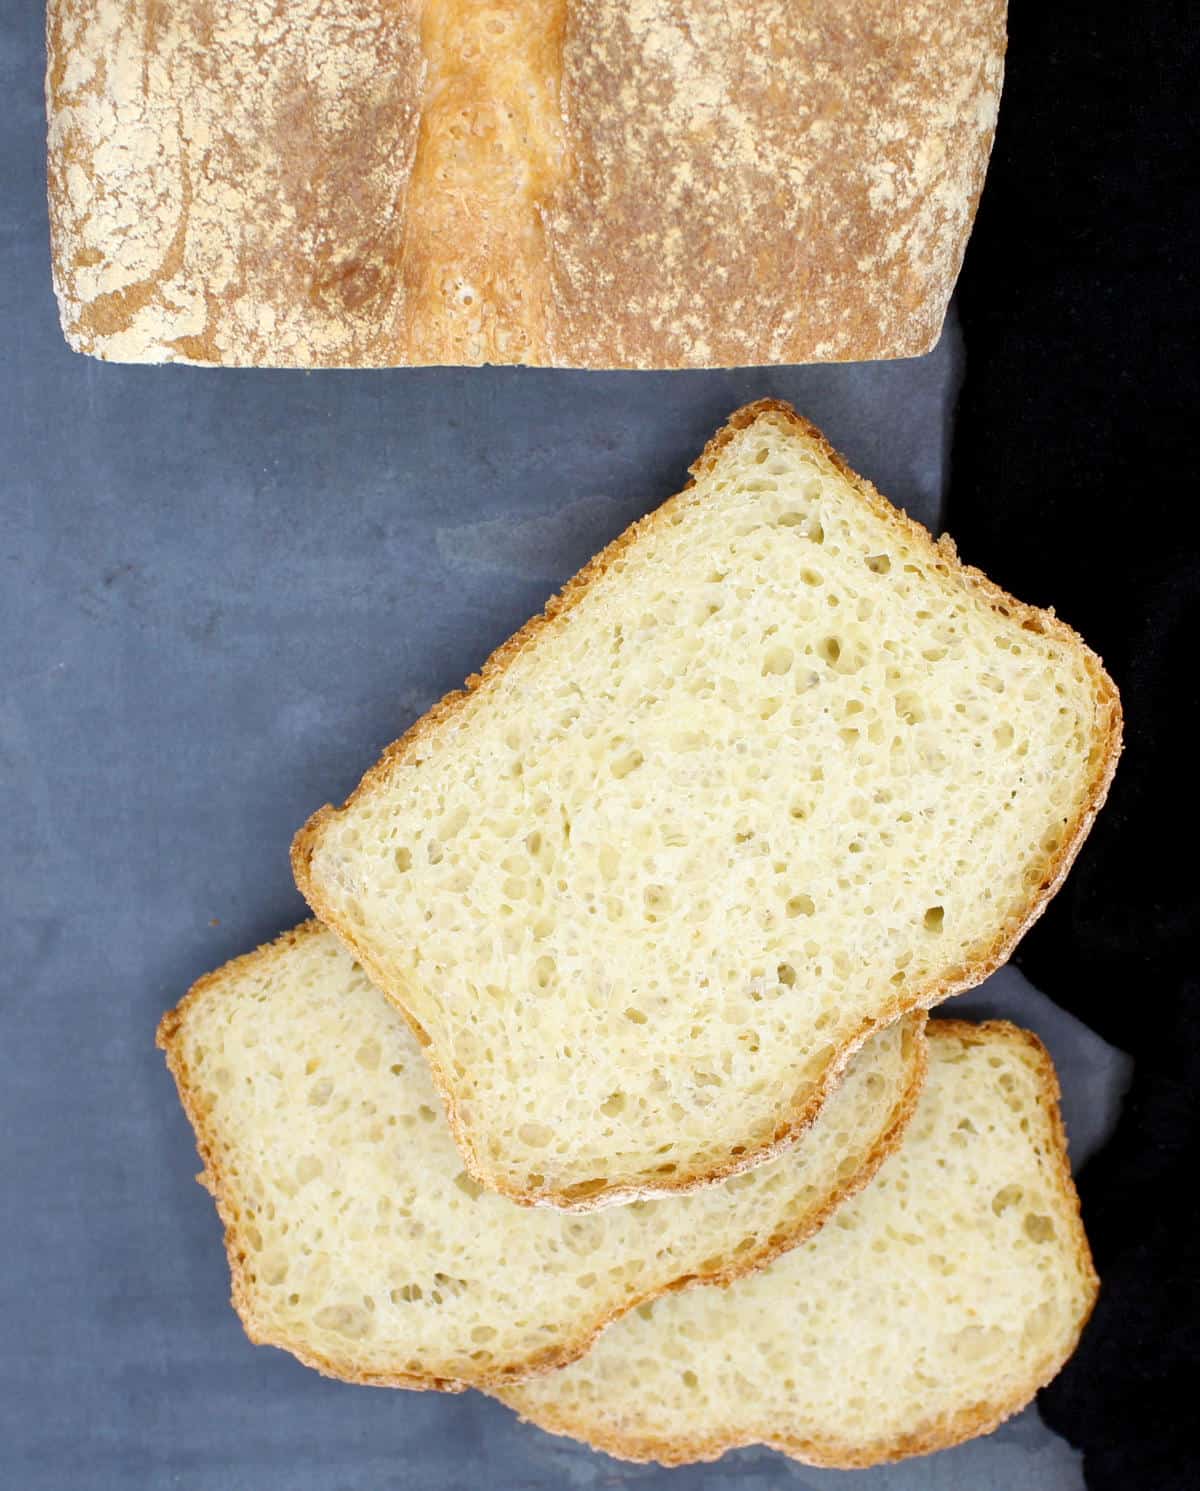
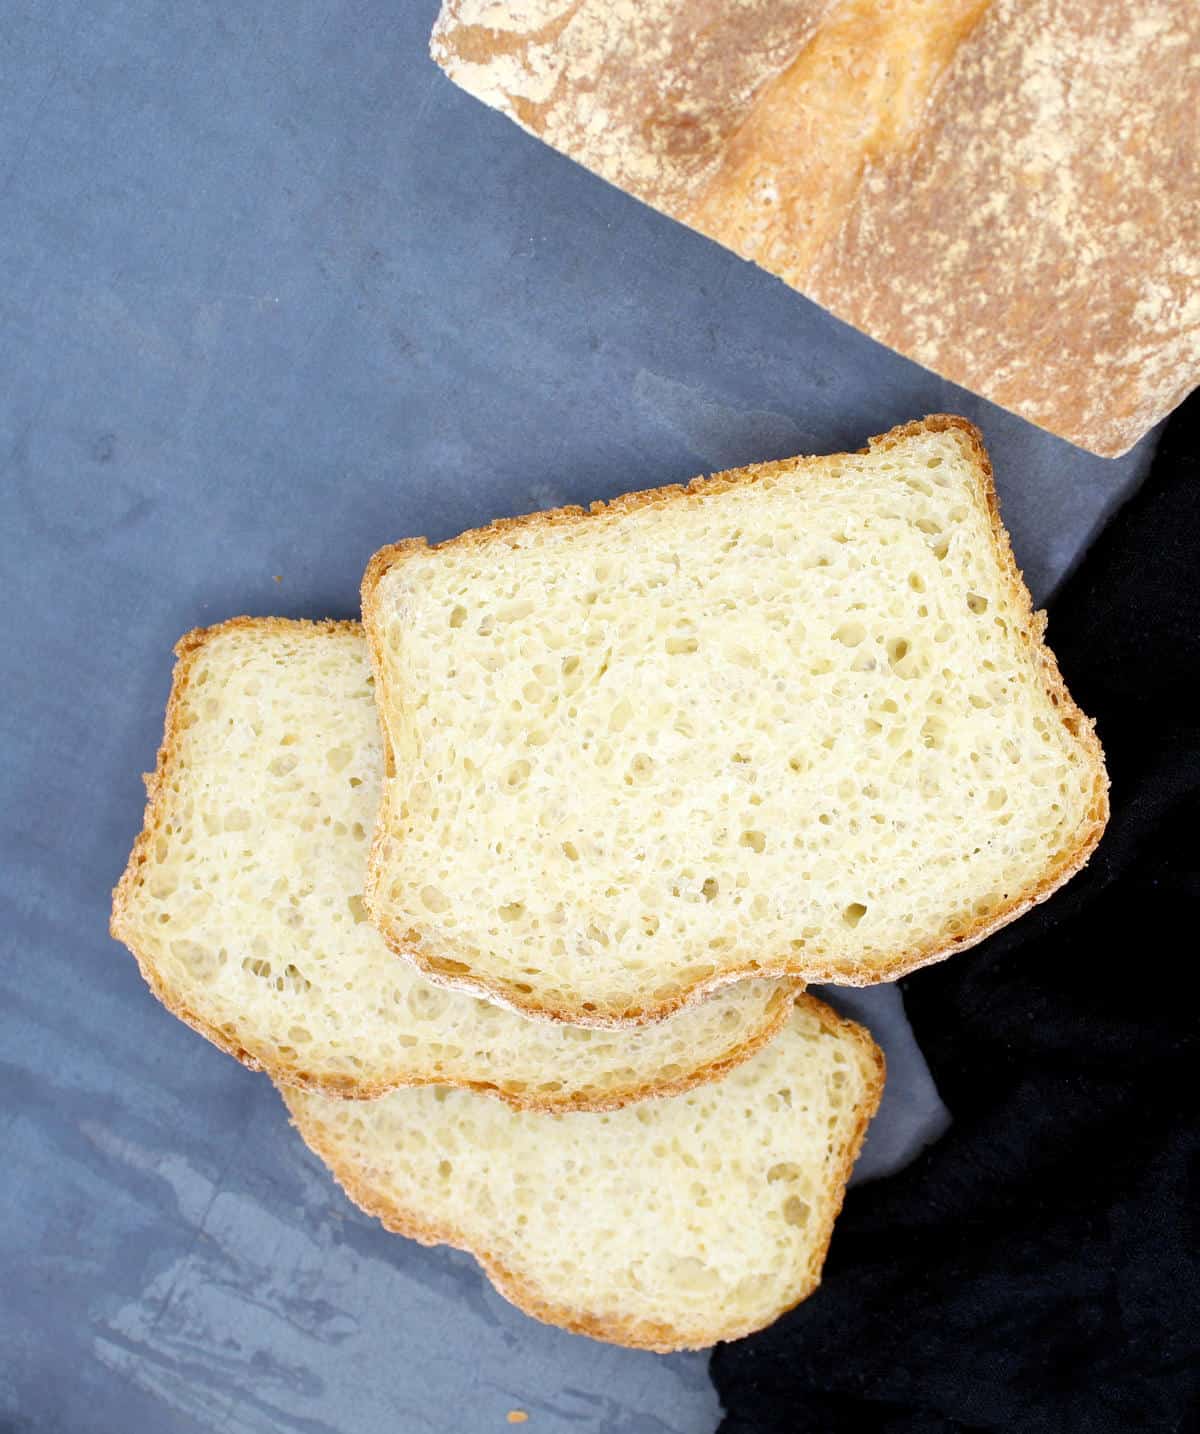
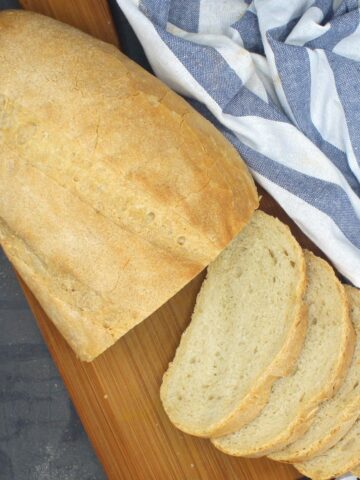
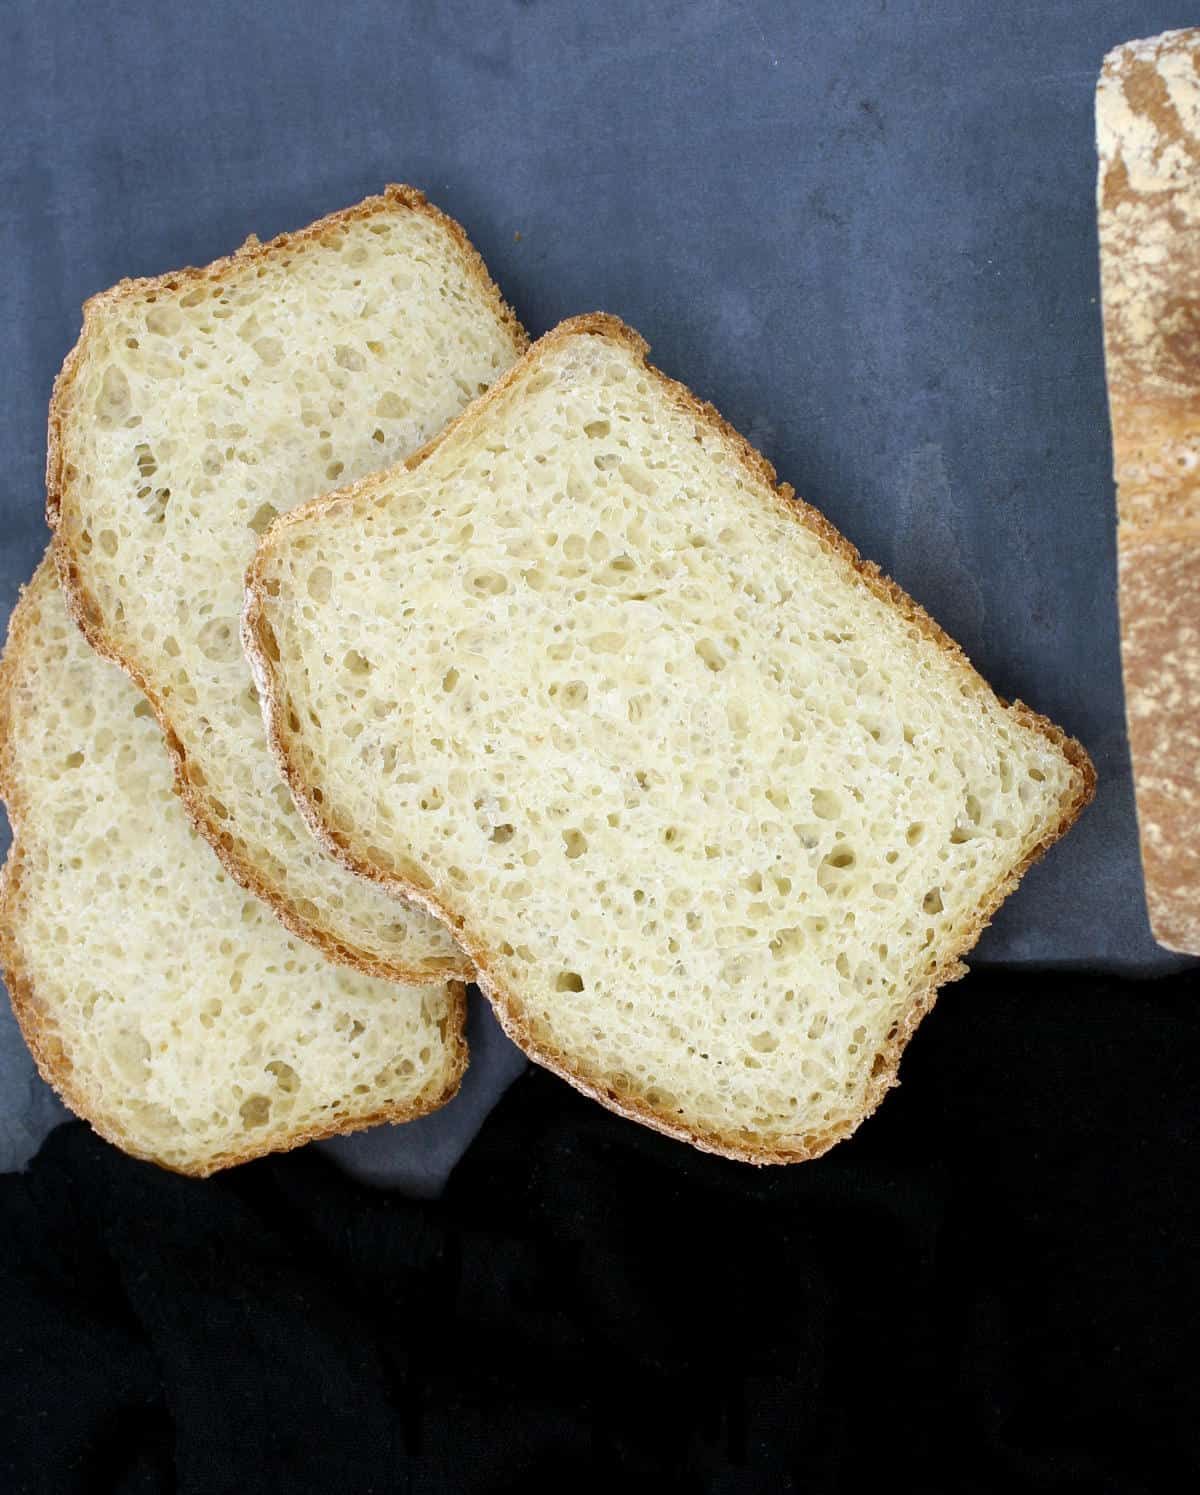
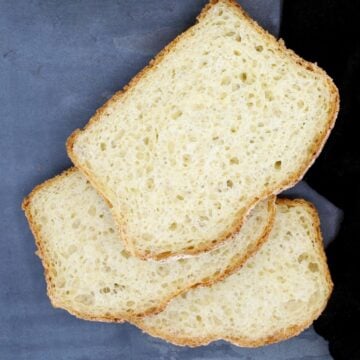
This delicious homemade crusty bread is no-knead. It has a slightly chewy, golden-brown crust and a soft, cloudy crumb with large, artisanal air pockets. A great recipe for both beginner and seasoned bakers, comes together rapidly, and needs just three ingredients--flour, salt and yeast.
If you love making bread, or want to take a dabble at it, here's the recipe to make next: it's the world's best -- and easiest -- crusty homemade bread, and I do not say that lightly.
Of the hundreds of breads I've baked over the years, including many, many sourdough breads, this is one of my top favorites to make. It is not a shortcut recipe and needs two rises, but the proofing time passes so swiftly and so effortlessly, you might feel like you cheated. 🙂
Both the crust and the crumb are divine: the crust has a slightly chewy texture and the crumb is soft and airy with large pockets, thanks to the high level of moisture in the bread.
Best of all, you don't need to spend more than a couple of minutes putting the dough together and there's no extensive kneading involved. Even so, this looks and tastes like an artisan bread: one you could've spent hours making.
Table of Contents
Why you will love this easy, crusty homemade bread
- It is super easy. This recipe is so straightforward and so simple that if you were to follow it accurately you will get good results. There is no kneading involved and a minimal amount of shaping. The bread releases easily from the pan and slices beautifully.
- It is delicious. This bread has a light, perfect flavor. It is seriously going to be one of the best breads you ever made, or ate.
- Everyone will love it. You can be assured that everyone you feed this bread to will ask for more. But you might not want to share. 😉
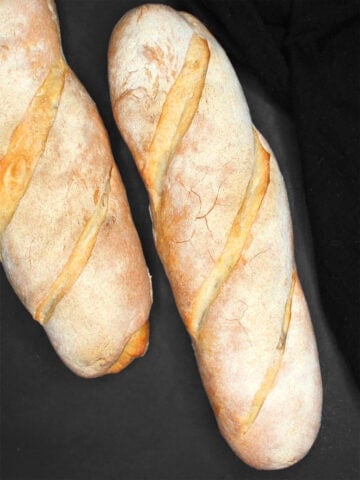
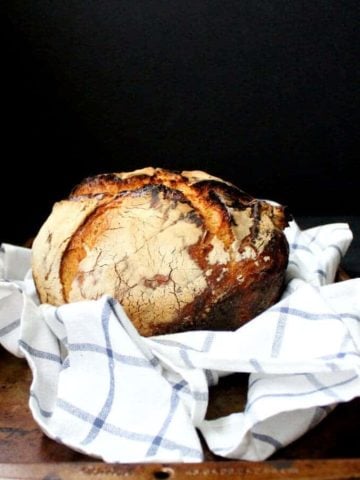
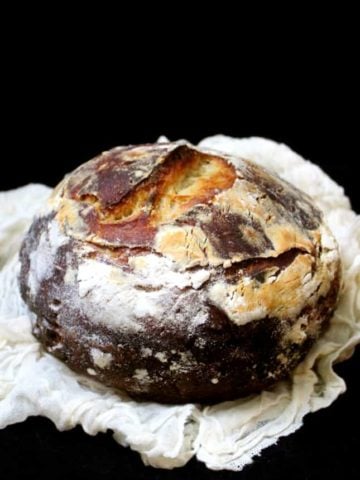
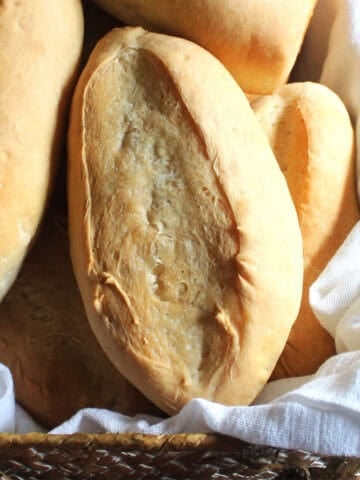
- You can bake it in a loaf pan, dutch oven or free form. I like baking this bread in a loaf pan because this is a loose dough and I like the bread to have a good height so I can use it for sandwiches. But feel free to shape it in a boule and bake on a baking sheet--the dough will spread out and flatten a bit. If you want a more rounded boule, bake the bread in a dutch oven (the crust will be chewier in a dutch oven).
Ingredients
- Unbleached all purpose flour. This is the best flour for this bread. You can use bread flour, however.
- Active dry yeast. For leavening. Make sure the yeast is still alive by blooming it first in warm water (or rather, lukewarm). If it froths and bubbles in a few minutes it is. Otherwise it's time to buy new yeast.
- Salt.
- Water. Try and use distilled or filtered water for breads, to ensure there are no chemicals interfering with the rise.
- A tiny bit of vegetable oil or cooking spray to coat the bowl and loaf pan.
How to make an artisanal, crusty bread
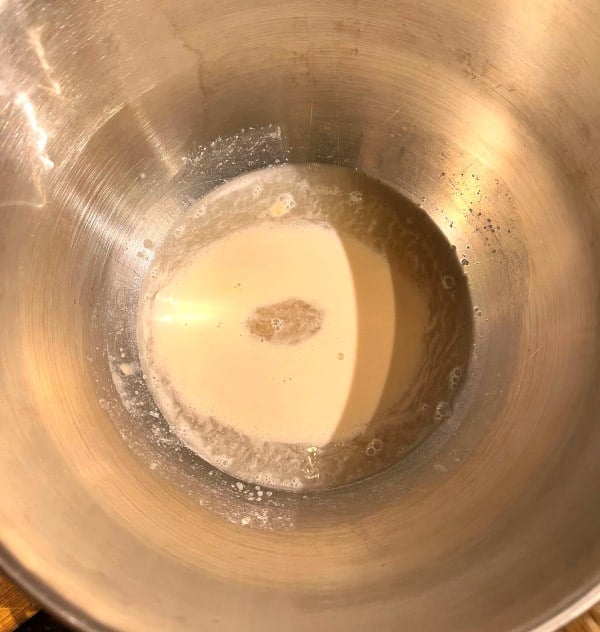
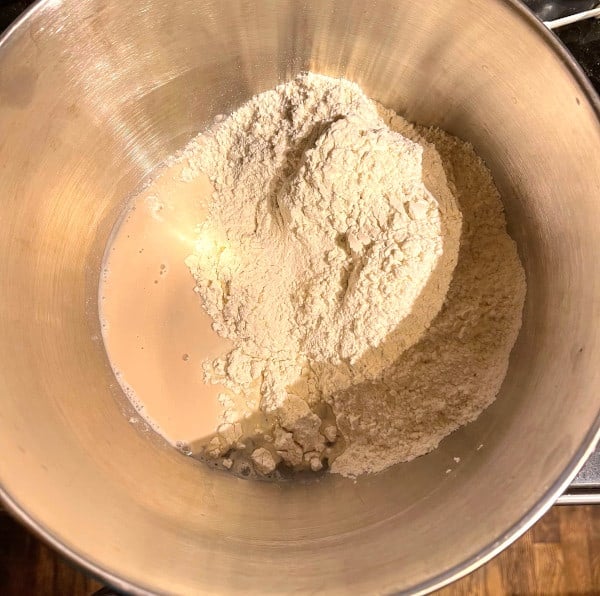
- Bloom 2 teaspoon active dry yeast by mixing it with 1 ½ cups lukewarm water. Add 3 ¼ cups all purpose flour and 1 teaspoon salt.
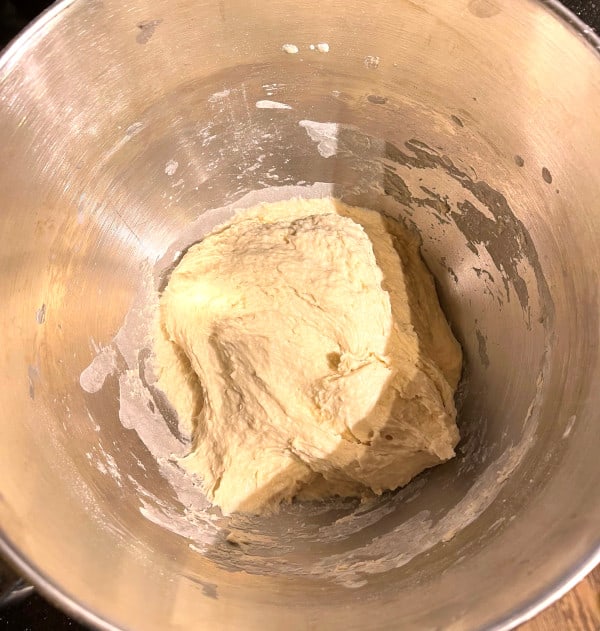
2. Mix until a loose dough forms. Carefully place in an oiled bowl and coat with a little more oil or cooking spray. It should more than double in an hour.

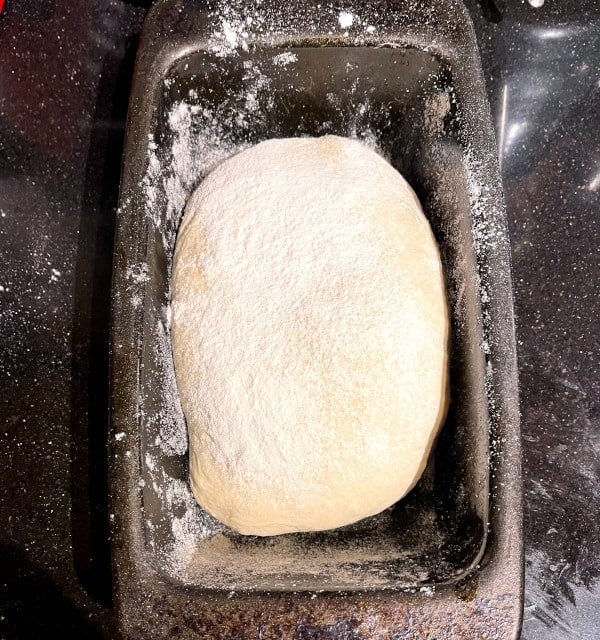
3. Shape the bread into an oval if baking in loaf pan or in a round if baking in dutch oven.
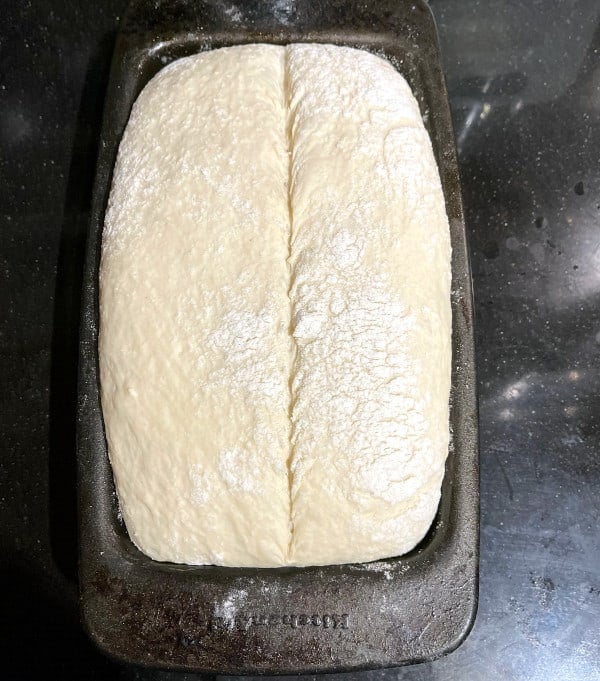
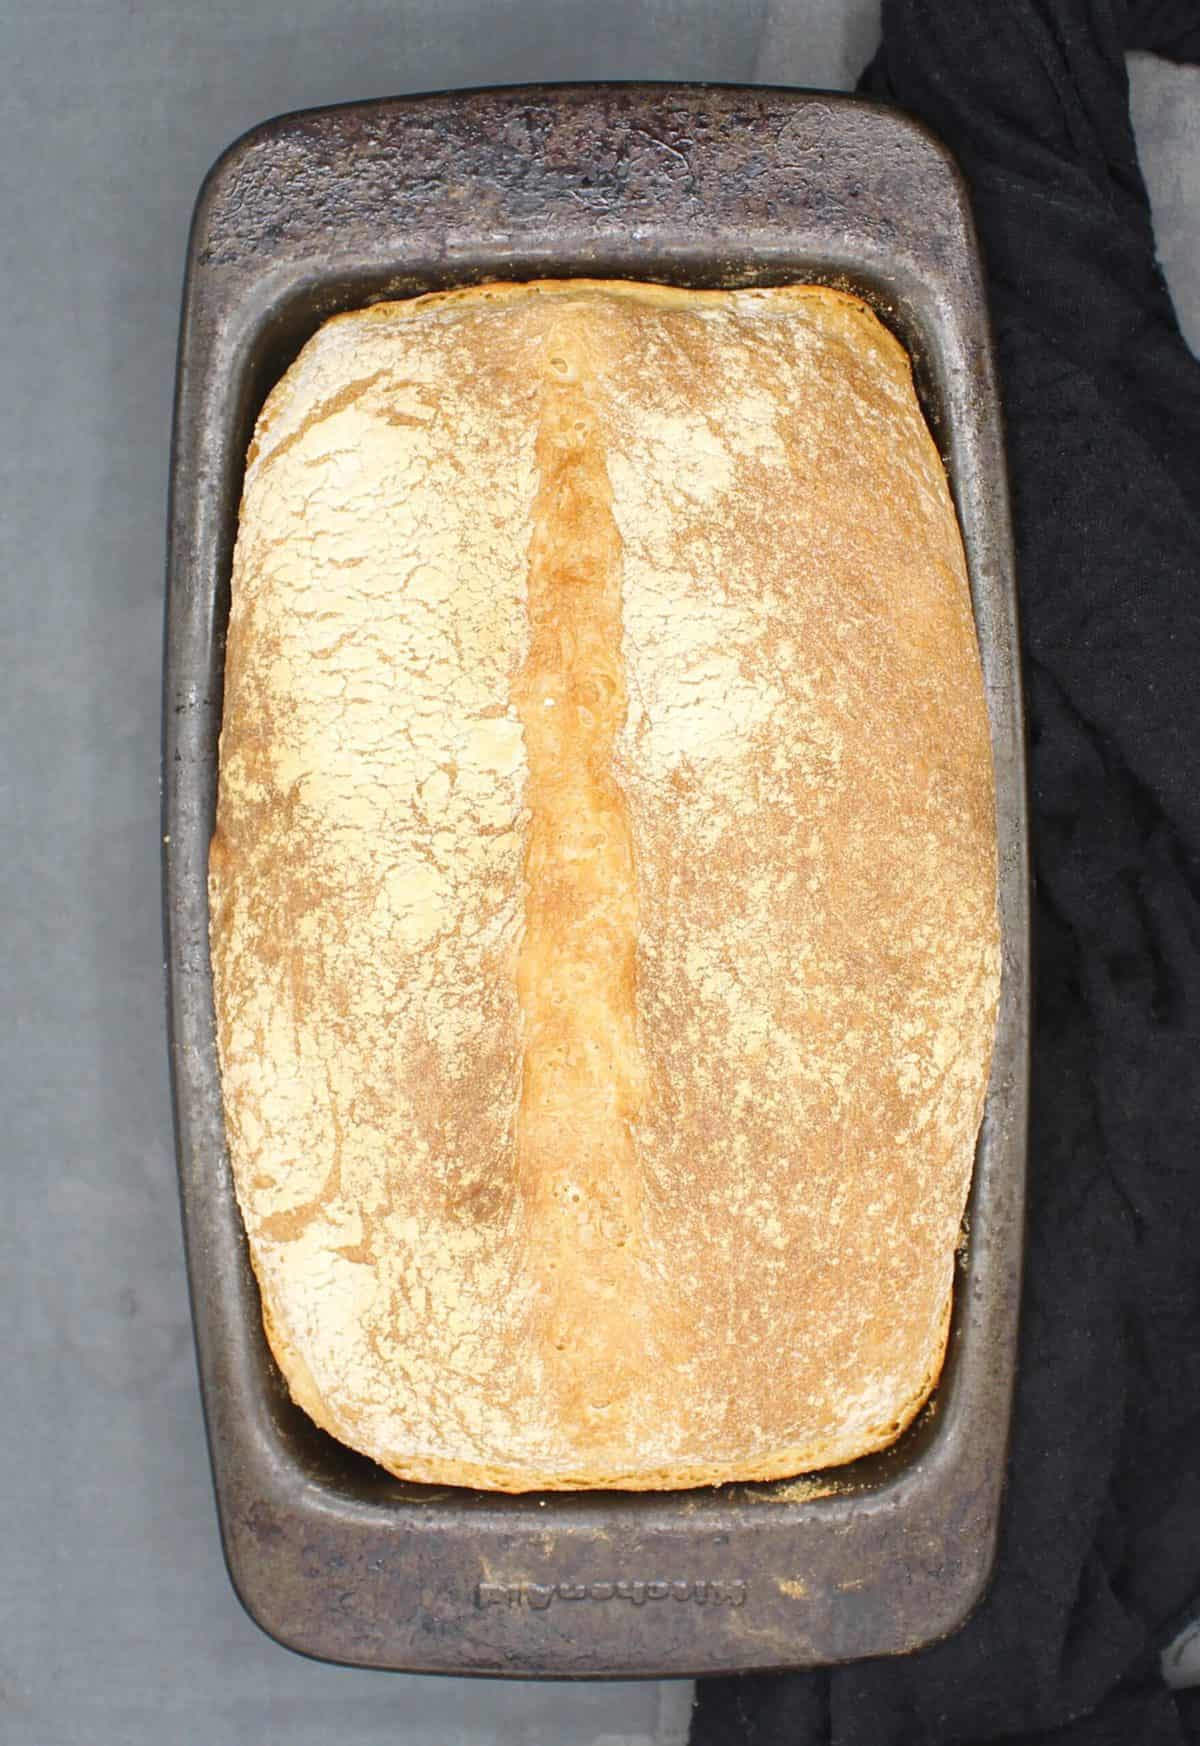
4. In about 45 minutes it should dome over the loaf pan (it might not dome if you are using a dutch oven with deep sides, but it will rise). About 15 minutes before you bake the bread preheat oven to 450 degrees. Score the bread with a sharp knife. Place a glass or metal oven-safe pan filled with hot water on lower rack. Bake bread on middle rack for 30 minutes. Cool thoroughly before eating.
Recipe FAQs
Yes. Use 1.5 teaspoon of instant yeast. You can skip the step for blooming the yeast and add it directly to the flour along with the water.
The loaf pan I used this time is one of the squatter ones I own--it's 10 inches by 5 inches. Had I used a more standard size bread pan --about 81/2 by 41/2 inches, I'd have gotten an even taller loaf.
Not at all. You can mix the dough in a stand mixer if you prefer to, using the dough hook, but it's not necessary. Just use a large bowl and a wooden spoon or your hands!
You don't need any special pans for this bread. I prefer a loaf pan because it gives a high loaf with perfectly shaped slices for sandwiches. But you can bake this bread freeform on a baking sheet. After the first rise shape the bread dough it into a boule or an oval loaf, place on the baking sheet and bake after it has risen. If you want a higher, more rounded boule use a dutch oven for the second rise and to bake the bread. You can even bake the bread in a small cast iron skillet.
No. Professionals and baking enthusiasts use a tool called a lame, a wand with a very sharp blade attached, to score the bread. You don't need it. A small, light, serrated knife, like a steak knife, does a fine job and that's what I use. Use a light, swift touch when scoring the loaf -- the dough should cut through quite easily. Don't use a heavy knife as the weight of the blade might cause the risen loaf to deflate. And don't use a blunt knife because any pressure you apply will also make your risen dough fall flat. Scoring the dough gives the gases formed as the oven heat hits the dough a vent to escape and gives your bread a lovely, artisanal look.
This is a white bread recipe, and you will get the best results with all purpose flour. But you can substitute a cup of the white flour with whole wheat flour. You will get a decent loaf although it will be a bit more dense than if you were to use APF alone.
Storage and freezing instructions
As there are no preservatives in this homemade crusty bread I recommend eating it within 3-4 days of baking. Keep it in the refrigerator during this time. For longer storage you can freeze the bread in a freezer safe bag, sliced or whole. Thaw before eating.
Pro tip!
Use a clean shower cap instead of a napkin to cover the loaf pan as the dough rises. This keeps the dough from drying while minimizing any chances of it getting stuck to the napkin.
More crusty bread recipes
Recipe card
Homemade Crusty Bread
Ingredients
- 2 teaspoons active dry yeast
- 1½ cups lukewarm water
- 3¼ cups unbleached all purpose flour
- 1 teaspoon salt (use less if that's your preference)
- Oil or cooking spray for coating bowl and loaf pan
- Cornmeal for dusting loaf pan
Instructions
- Prepare a loaf pan or a dutch oven by spraying some cooking spray or coating with oil. Dust with cornmeal for easy release.
- Mix the yeast and lukewarm water and set aside to activate the yeast, about five minutes. The yeast should start frothing and bubbling to indicate it's alive.
- Add the flour and salt and mix until a loose dough forms. You won't be able to shape it at this time.
- Oil a bowl or coat it with cooking spray and place the dough in it. Coat the top with a little more oil or cooking spray to keep the dough from drying.
- Set aside in a warm spot in your kitchen to rise for an hour. After an hour the dough should have more than doubled.
- Turn the dough out and using your hands shape it into a rectangle or oval loaf. If using a dutch oven you should shape it into a round.
- Gently place the loaf into the loaf pan or dutch oven. Dust some flour on top, cover with a clean shower cap or with a kitchen towel°, and return it to the warm spot. to let the dough rise Let it proof or rise for another 45 minutes. If you are using a loaf pan the dough should easily form a nice dome during this time.
- About 15 minutes before the dough has finished rising, preheat the oven to 450 degrees Fahrenheit.
- Just before you put the bread in the oven place a small glass or other oven-safe pan filled with hot water on a lower rack of the oven.
- Score the bread jbefore placing it on the middle rack in oven. I like to make a single score down the center, but you can also make three diagonal scores.
- Bake the bread for 30 minutes. Remove to a rack and cool for an hour, then remove from pan and continue cooling on rack.
- Slice and eat.
Nutrition Information
To print recipe card without images, uncheck "instruction images" after clicking the "print recipe" button.


patricia britt says
my daughter can eat bread and pasta in Europe ( Italy and France) but not in the US... so i tried making bread with italian flour and she is fine... Can i make this bread recipe with Italian flour - i use a 00 flour generally or something with over 10-grams of protein - like my boule in a dutch oven.. but she likes the loaf size as yours is shown...
Vaishali Honawar says
Hi Patricia, I haven't baked with 00 flour but I believe it is close to all purpose flour in protein content, albeit more finely milled. I think this recipe would work with 00 flour and would love to hear more about your experience if you do make it.
Partha Sarathy says
Hi Vaishali,
As a fellow desi, I have been making bread for over 20 years and have to agree, this is a no-nonsense recipe. I do make small mod though:
Instead of 100% AP flour, I a 50-50 ratio of fresh home milled wheat flour + bread flour, 1 TBSP of Wheat gluten with just a pinch of vitamin C crushed from a pill, to up the fiber, while still keeping a great texture.
Keep Baking,
Cheers!
Alexandria J says
Just made this recipe and it's fantastic! Nice and crusty on the outside soft and airy on the inside. My first ever loaf of bread! Thank you so much for this recipe!
Ann says
Thanks for sharing this recipe. I don't like bread that are so chewy, you're fighting to bite if off, or the texture is heavy, dense, and rubbery. I read your description, but can you tell me about the texture?
Margo Abadjian says
Hi Vaishali, this bread looks amazing! It even looks like it wouldn’t be too hard to try and make for someone like me who has never been brave enough to make homemade bread.
Vaishali says
Hi Margo! It really is super easy. Hope you try it. ❤️
Patience says
Thr bread looks yummy
😋 I will try baking it today
Marianne Surges says
I try to avoid white flour. Have you tried this with whole wheat flour? If not, can you make a recommendation for a balance of the two flours?
Thank you!
Vaishali says
Hi Marianne, you can sub 1 cup of the APF for whole wheat (also in FAQs above). If you want an all whole wheat loaf, I'd recommend adding a couple of tablespoons of vital wheat gluten, which would give a nice rise and make the bread airier.
Clifford says
Thanks for this. In these times we all need an easy recipe for bread. I got a similar recipe online last year but it calls for maple syrup. My wife is anti-sugar so we prefer your recipe. We are still arguing about how to say Tu"r"meric, that's all your fault. Love your site.
Vaishali says
Hi Clifford, 😀 😀 Just listen to your wife! And thanks for the kind words. If you make the recipe I'd love to hear.