

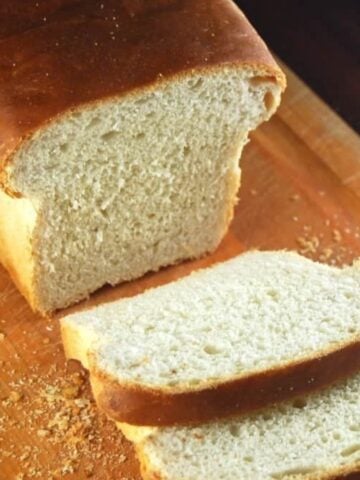
An artisanal loaf of No Knead Sourdough Bread that takes almost no skill and minimal amount of hands-on time. If you love making sourdough breads, this is one you absolutely want to try! All you need for this recipe is two ingredients -- a quality sourdough starter and flour. The bread is crusty with a tender, airy crumb and a delicious flavor.
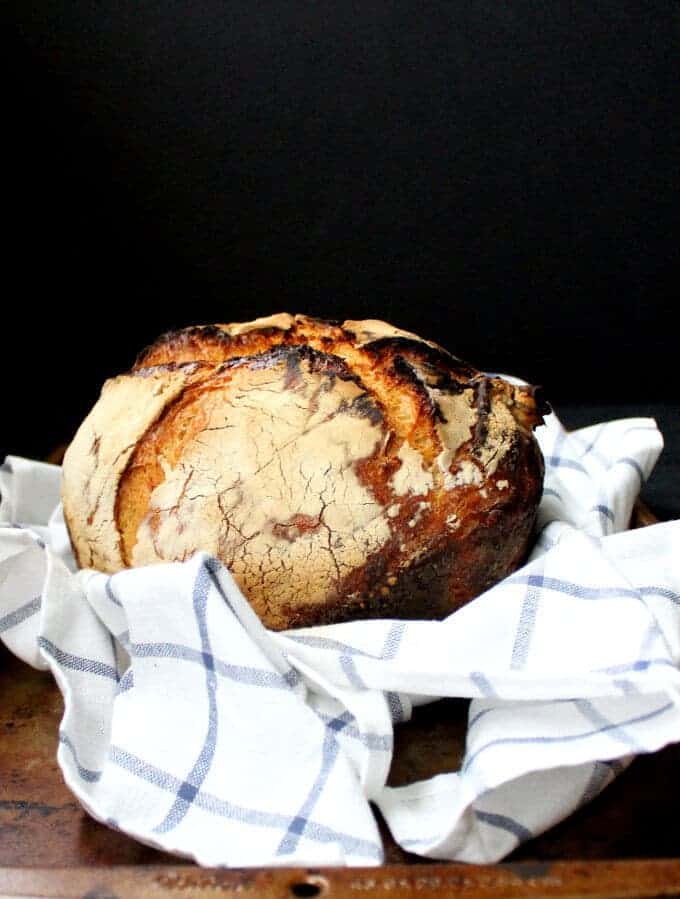
Table of Contents
No-knead sourdough bread
If making bread seems like a lot of work, I have for you the perfect solution: my no knead sourdough bread recipe.
This is really one of my favorite bread recipes, and one everyone in my home loves. It was my son Jay's favorite bread. He loved eating it fresh and once it was a day old, I'd toast it up for him and he loved it even more. With a dab of vegan butter, this bread is heaven itself.
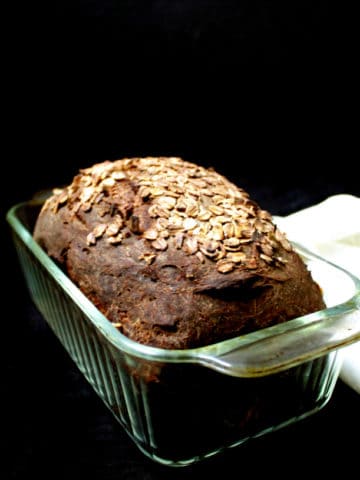
I started out with a recipe from Sam Sifton, but over the weeks I've tried different versions of it, including a part whole-wheat one that is ridiculously good, although not as airy as the version made entirely with white bread flour. It does pack in a ton of flavor, though. But you can rest easy even with this recipe, which uses white bread flour, because the probiotic microflora in the sourdough slow down the rate at which glucose is released into the blood-stream, making sourdough bread -- yeah even white sourdough bread -- rank lower on the glycemic index.
The best part about making this bread is, I don't even need to refer back to the recipe. The ingredients couldn't be simpler or more basic and therefore easy to remember. The only real work is mixing up the ingredients, but you can do it all in one bowl and set it aside to rise. You do need some time for the sourdough to do its magic, but it's all hands-off time and some things are worth waiting for, aren't they?
The dough needs two rises. One is a longer, overnight rise, and the second is a shorter, two-hour rise. You will need a dutch oven or a heavy, oven-safe pot with a lid to bake the bread. My dutch oven is not enameled on the inside, but it works just great. You will also need some parchment paper or a kitchen towel for the second rise, with parchment a much better option.
I hope you will try this loaf and if you do, I know you'll love it. Just be sure to follow instructions (I am usually not a stickler for following recipe instructions, and I don't usually ask that you do that with my recipes -- except when you're baking breads and desserts). That way you can rest assured you get perfect, foolproof results.
Now for the no knead sourdough bread recipe. Happy baking!
OMG, my first loaf and so easy! It worked! The crust is like a bakery bread. I'll make it again. Thanks. - Janice.
Recipe card
No Knead Sourdough Bread
Ingredients
- ¾ cup sourdough starter (unfed is fine, but it should have been fed at least within a week of baking the bread)
- 1 ¼ cups water (use distilled or non-chlorinated water for bread, especially sourdough breads)
- 3 ½ cups bread flour (can replace 1 cup of the bread flour with whole wheat flour. The bread will be less airy but still delicious)
- 1 teaspoon salt
Instructions
- In a large bowl, mix the sourdough starter with the water, then add the flour and salt and mix until a consistent but sticky dough forms. You can do this by hand or in your stand mixer.
- Cover the bowl with cling wrap and let the dough rise overnight or 8-10 hours.
- Turn the risen dough onto the kitchen counter and form it into a ball as best as you can. If the dough is hard to handle, flour your hands but resist the temptation to add more flour. You want a dough with higher hydration or water content for a light, airy loaf. Adding too much flour will make your bread dense. Even if your dough doesn't form into a perfect loaf, it will shape up nicely during baking in the dutch oven.
- Prepare a sheet of parchment paper by sprinkling liberally with flour. If you don't have parchment, you can use a kitchen towel sprinkled with flour, but keep in mind that there is a much higher chance of your dough deflating when it rises on a kitchen towel because it will more likely stick to the towel. Place the parchment paper or kitchen towel on a baking sheet.
- Transfer the dough onto the parchment paper or kitchen towel, seam side down. Cover (I use the bowl I mixed the dough in), and let it rise another two hours.
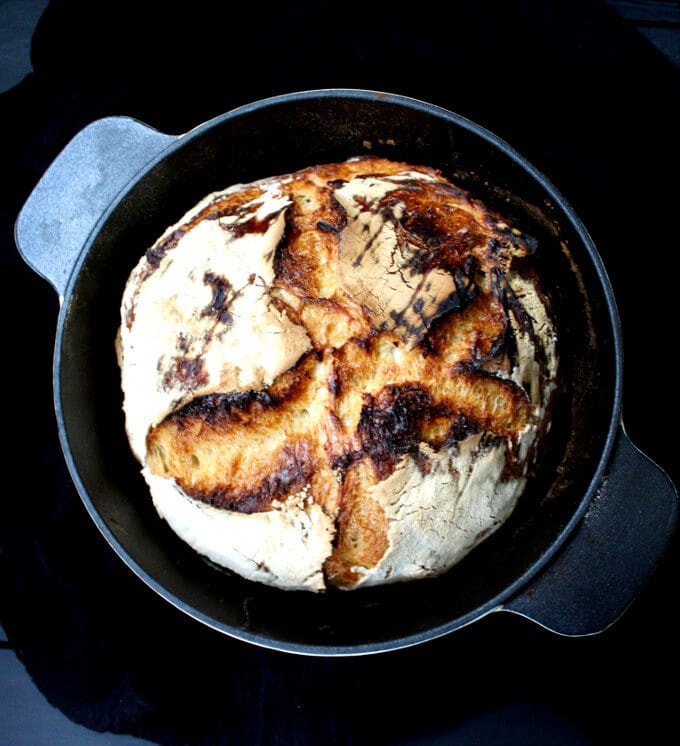
- About half an hour before your bread is done rising for the second time, preheat the oven to 500 degrees. Place a heavy cast-iron or other oven-safe pot in the oven with the lid on. (I use a 3.2 quart dutch oven that is not enameled on the inside. Enameled is even better.)
- Once the dough has risen, carefully remove your heated pot from the oven. Quickly, in a smooth motion, turn the dough into the pot so that the seam side now faces up. A parchment paper makes this much easier because the dough slides off more smoothly. Be very careful doing all this because the pot is very hot. If you find turning the bread into the dutch oven difficult to do without deflating it, you can just transfer the bread into the dutch oven with the parchment paper (don't do this if you used a kitchen towel).
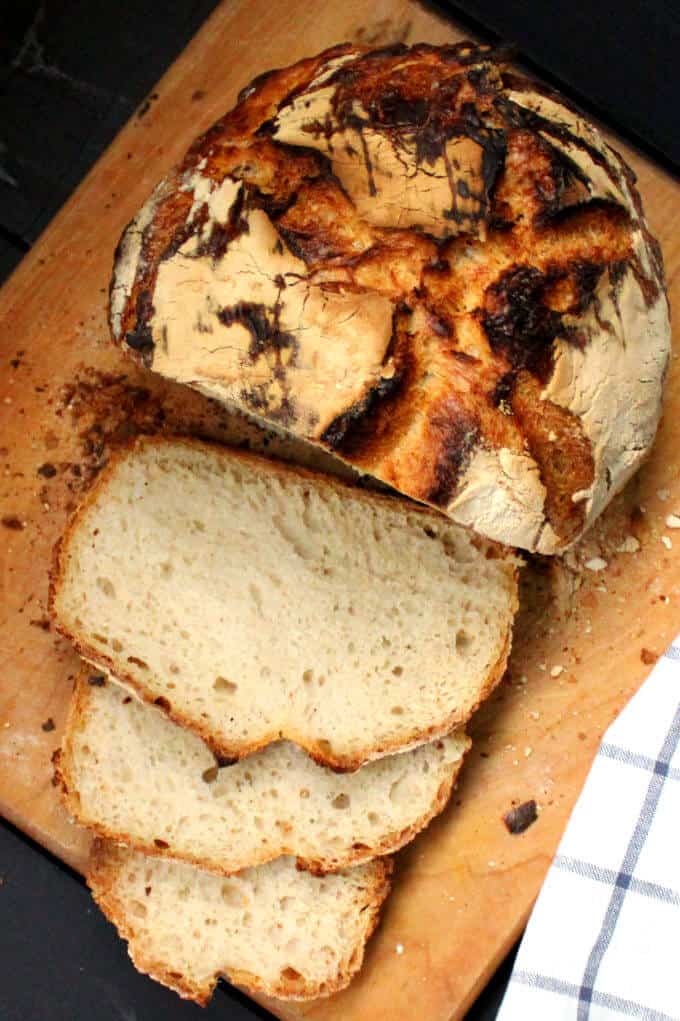
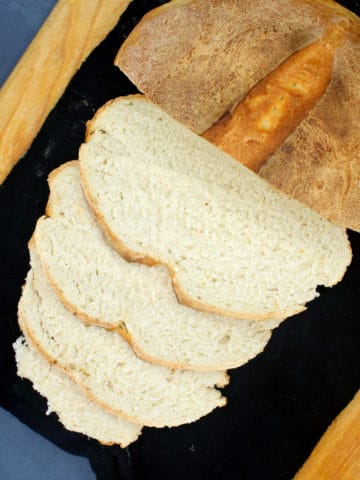
- Put the lid back on the pot and bake for 30 minutes. Take off the lid and continue baking the bread for another 20 minutes. The bread will split at the top and char a little, which I love because the charring adds even more flavor.
- Once the loaf is baked, remove to a rack and let it cool about half an hour before carefully removing it from the pot. Let the loaf continue cooling on a rack. Slice and serve, or tear it apart with your bare hands (which you just might want to do because who has time for niceties when there's a delicious loaf of bread to be eaten 😉 ).
Notes
Nutrition Information
To print recipe card without images, uncheck "instruction images" after clicking the "print recipe" button.
Recipe FAQs
There can be a number of causes why the bread dough did not rise. These are the most common:
-You used a weak or inactive starter. Make sure that the starter is active - it bubbles and rises within hours of feeding. And if you used sourdough discard, it should have been fed no more than a week back, and should have bubbled and doubled after being fed.
-The dough was not proofed in a warm spot. Sourdough bread dough needs to be at a temperature between 75 and 82 degrees Fahrenheit in order to rise.
-You used a starter with a very high hydration so the dough was too wet, which would cause the gluten to collapse.
-You deflated the bread dough when you turned it into the heated Dutch oven. You can avoid doing this by placing the loaf, including the parchment paper, in the Dutch oven.
You can, but bread flour has more gluten and will give you a higher bread.
The cast iron heats the bread dough evenly and it also traps steam, yielding that wonderful, crusty crumb.
Yes, you can use a cast iron skillet, a glass or metal baking pan, or even a baking sheet dusted with corn meal. Because the dough is loose it may spread more in a baking pan or on a baking sheet, giving you a flatter bread, but it should still have the great crumb. To make the bread crustier, place a small baking pan filled with water on the bottom rack of the oven when you begin to preheat it.
Absolutely. Wrap it in freezer-safe wrap or freeze in a freezer-safe container for up to four months. Thaw completely and warm in oven before slicing and serving.


Pat Rutan says
Hi Vaishali! I am thrilled to have found your website. It was like finding a gold mine. I love, love, love Indian food and live hours away from an Indian restaurant. Also, my husband and I are eating mostly vegan. (We are in our 70s and in excellent health and we want to stay that way!)
I have many of the Indian spices you list in bulk, but will buy some that I don't have from you. I will also replenish my supply from your Amazon account as I run out of things.
Much love and many blessings to you for your generous and ingenious offering of healthy culinary riches!
Vaishali says
Hi Pat! So happy you found me. I hope you enjoy every recipe you try from the blog, and remain in excellent health for a long, long time to come. ❤️
Deborah Corrigan says
Hi
I love your recipes and would like to know if olive oil and rosemary could be added to this bread? If so, at what stage?
Warm regards
Debbi
Lisa says
Hi Vaishali,
Thank you for sharing your recipe. This was my first to at making sourdough starter and then the bread. Excellent recipe for both! Thank you.
Vaishali Honawar says
Awesome!! So happy to hear.
tracey etwell says
hi there,
When i make this recipe, i get rising in the first half, and then it is sooo sticky! i can't make a ball and its running all over the place. I end up with a flat pancake kind of bread. Maybe its too wet, should I reduce the water?
Vaishali says
It's possible your starter has more hydration or you are working in very humid weather. Use less water next time- you want a slightly wet dough but it shouldn't be so runny that you can't form it.
Rosemary Moreland says
500 degrees? Is that Fahrenheit. Is seems a very high temperature
Vaishali says
You need a high temperature for the oven spring.
Janice says
OMG, my first loaf and so easy! It worked! The crust is like a bakery bread. I'll make it again. Thanks
Vaishali says
Awesome! It’s my favorite bread to make and eat!
Greg says
If you eat sourdough regularly your taste buds get used to the tangy flavour. Just an idea.
Cierra says
Hi! I was wondering if I could leave the dough to rise longer than 10 hours for the first round?
Natalie says
I left mine for almost 12 hours and it was fine.
Joan Thompson says
Hi, the starter is 3/4 cup and that’s how much needed to make the bread. So I’m guessing I feed the starter and then take out the 3/4 cup?
Vaishali says
Hi, exactly. Feed the starter to increase the quantity, then take out the amount required to bake bread.
Gunilla says
Do I have to use bread flour. Can I use all purpose?
Vaishali Honawar says
You can, but the bread won't rise as high.
Bonny Lynn Glavin says
I read your recipe all the way through and the starter recipe. It sure will be my only sourdough bread.
Your instructions for the starter was made to be easy with accompany photos helps. Other recipes are too difficult to understand. Thank you
Vaishali Honawar says
I am so happy to hear that, Bonny!
Stephanie says
Hi! I have been making this bread for over a year now and started with the sourdough starter (instructions were excellent thank you). I do have a question- my bread doesn’t taste sour anymore? I make sure to use hungry starter, stir the hooch in and my starter has been established for a year. Any idea why?