

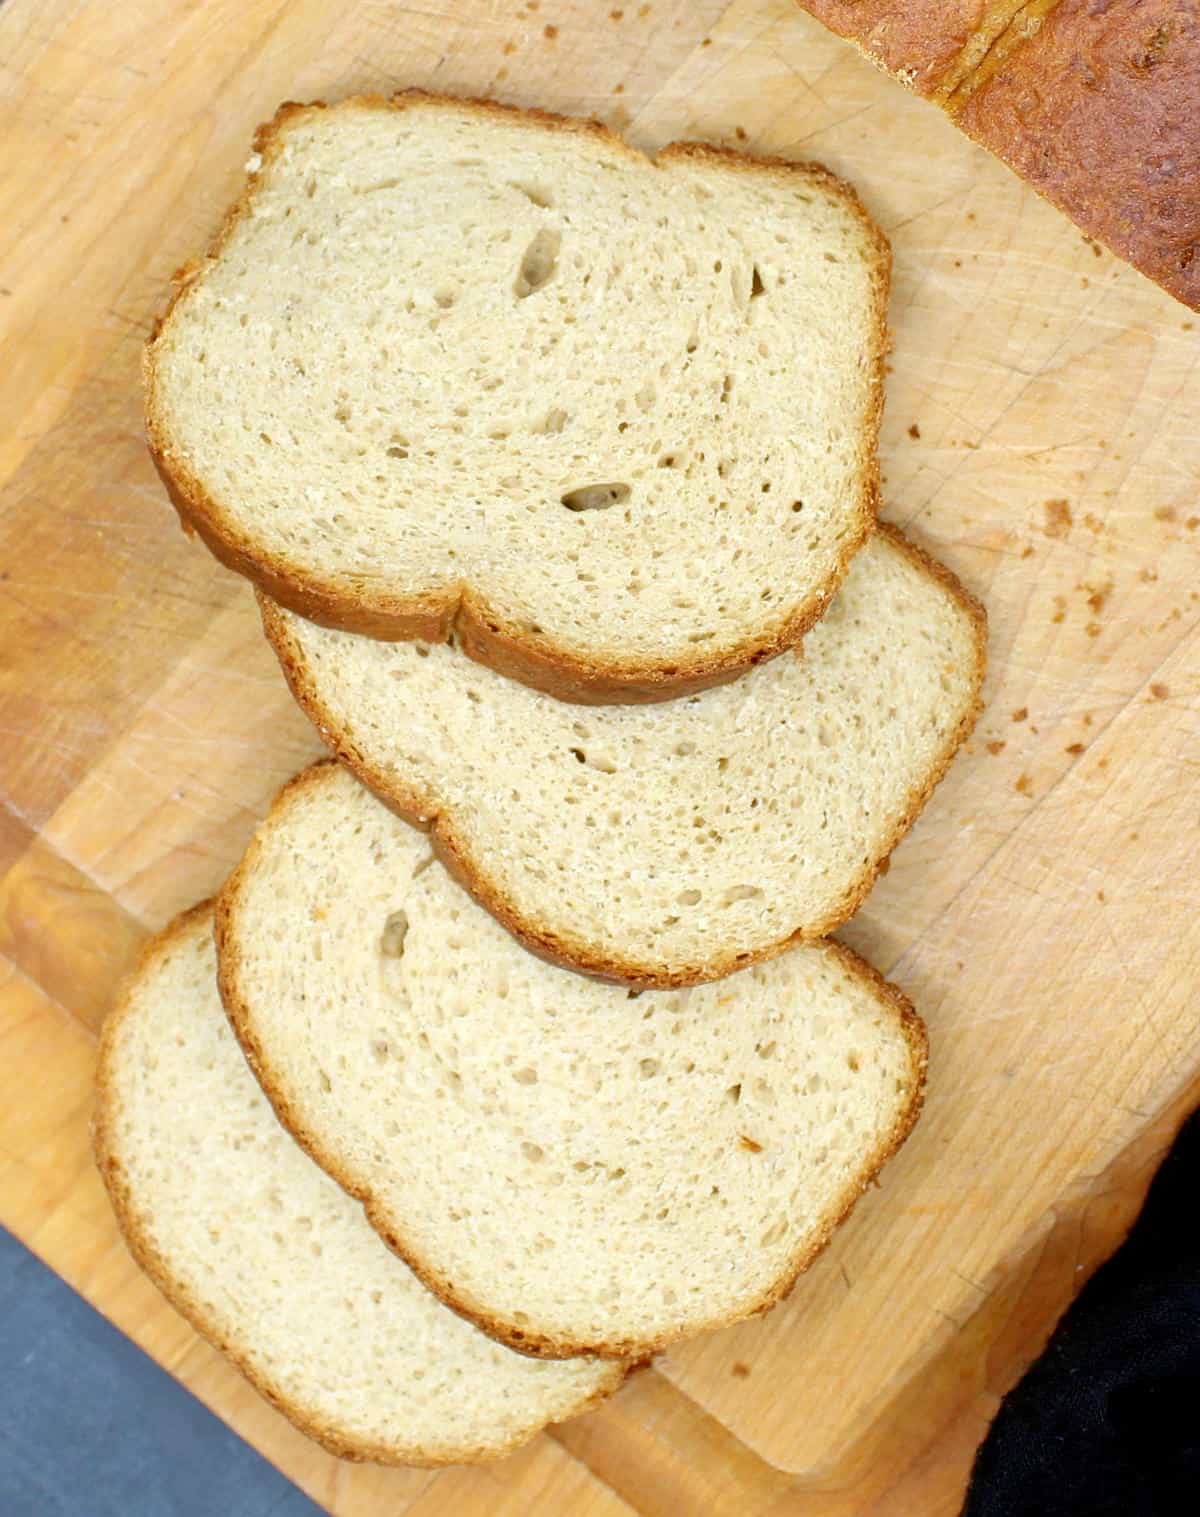
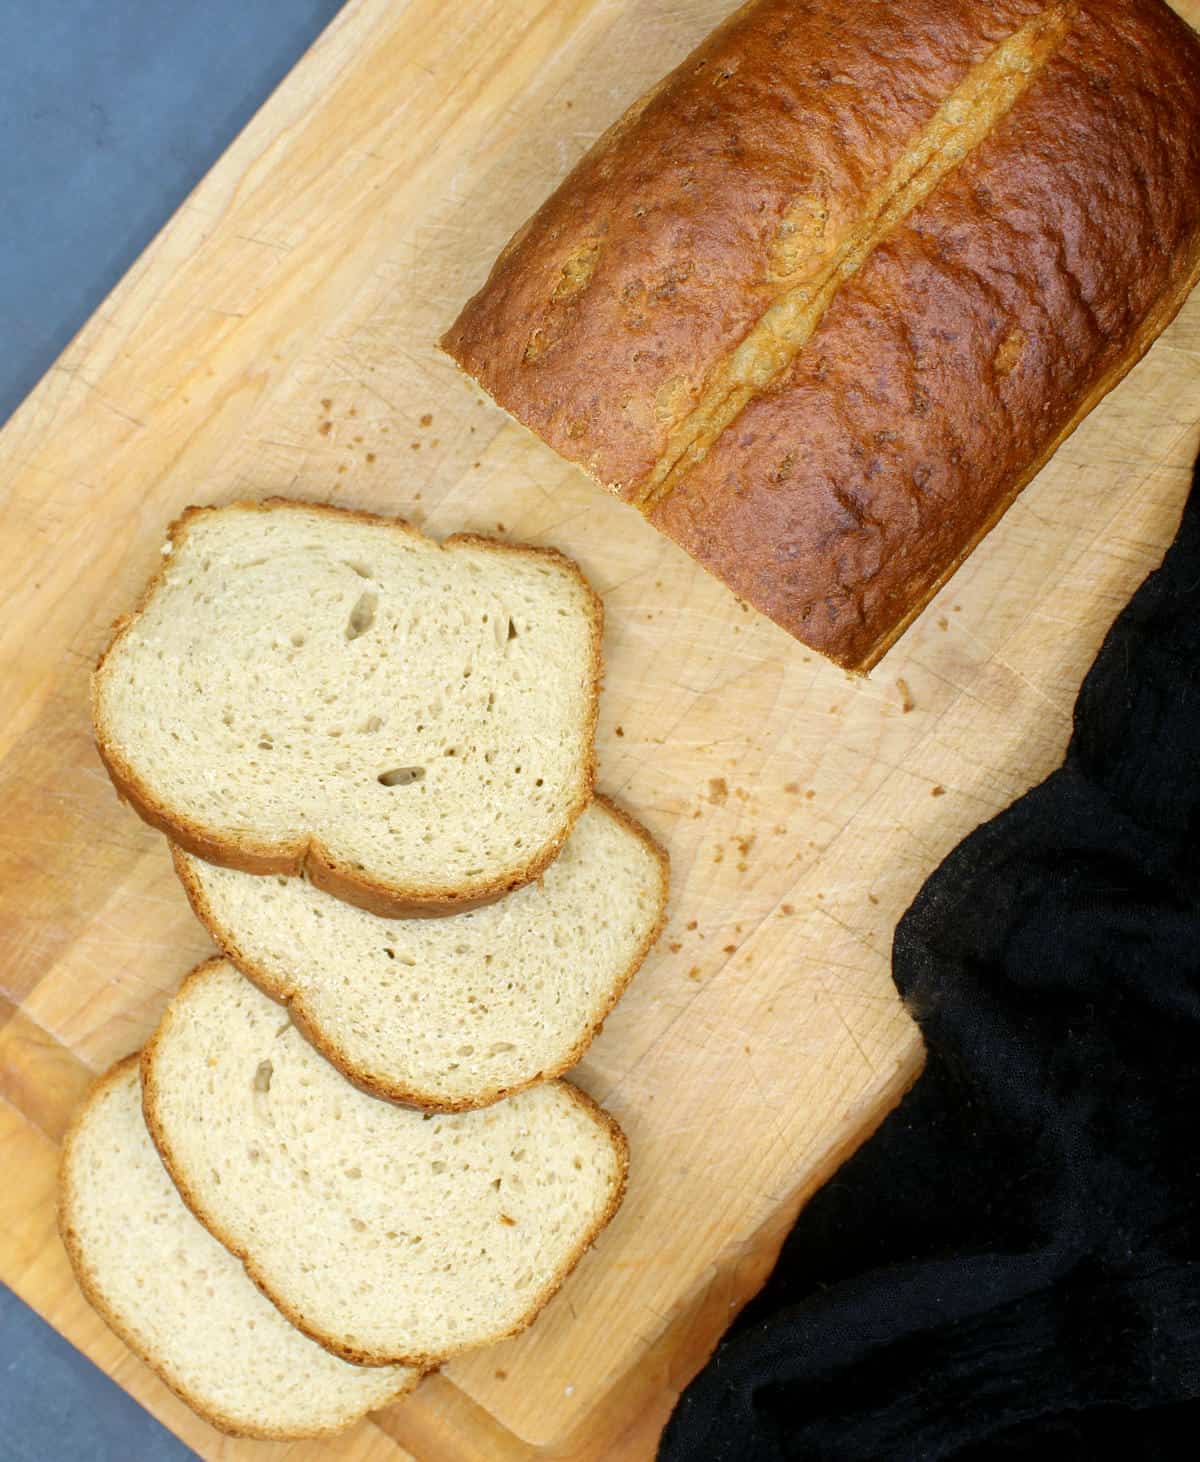
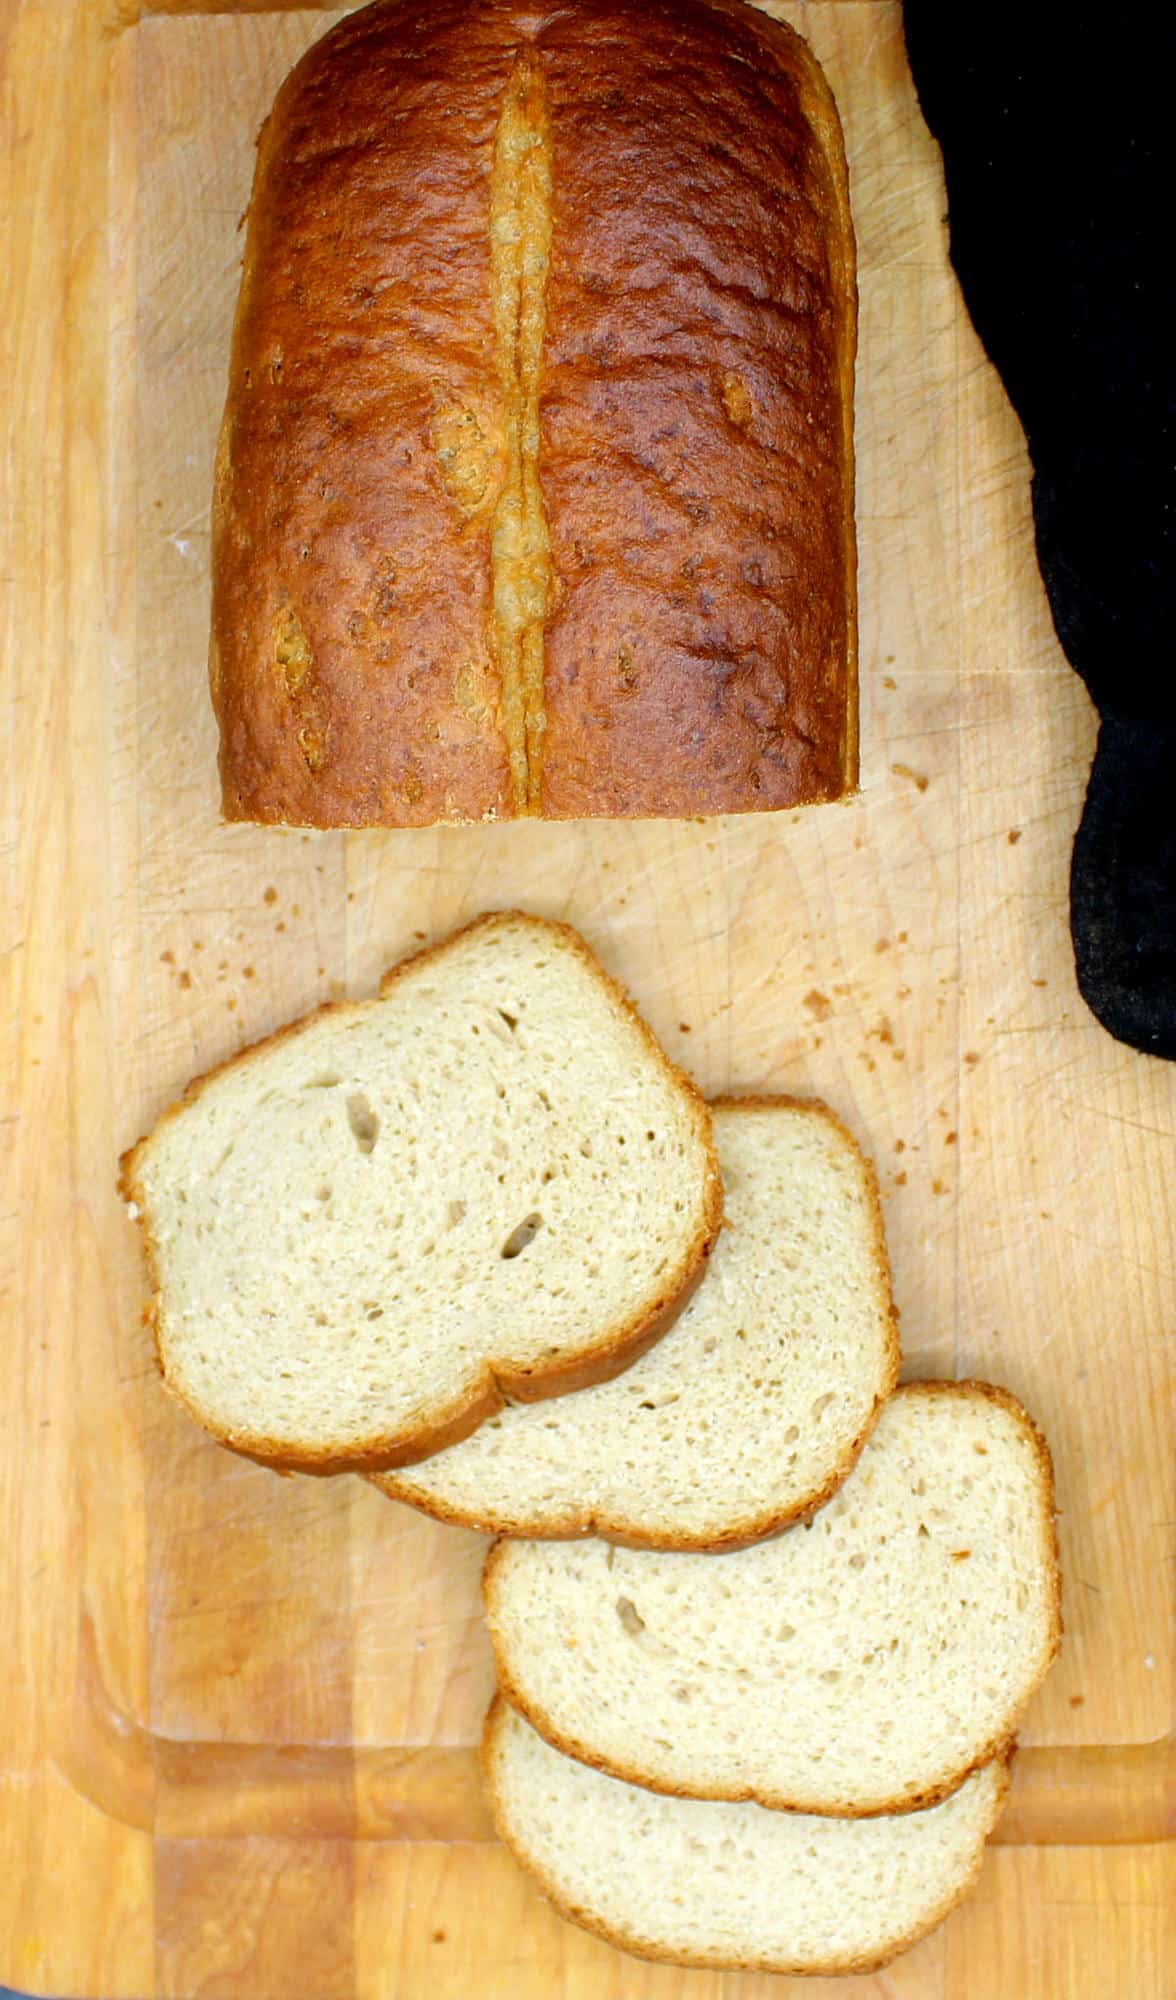
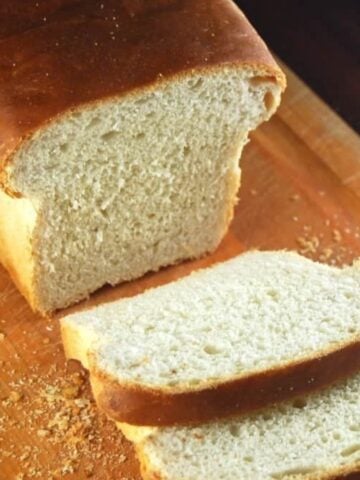
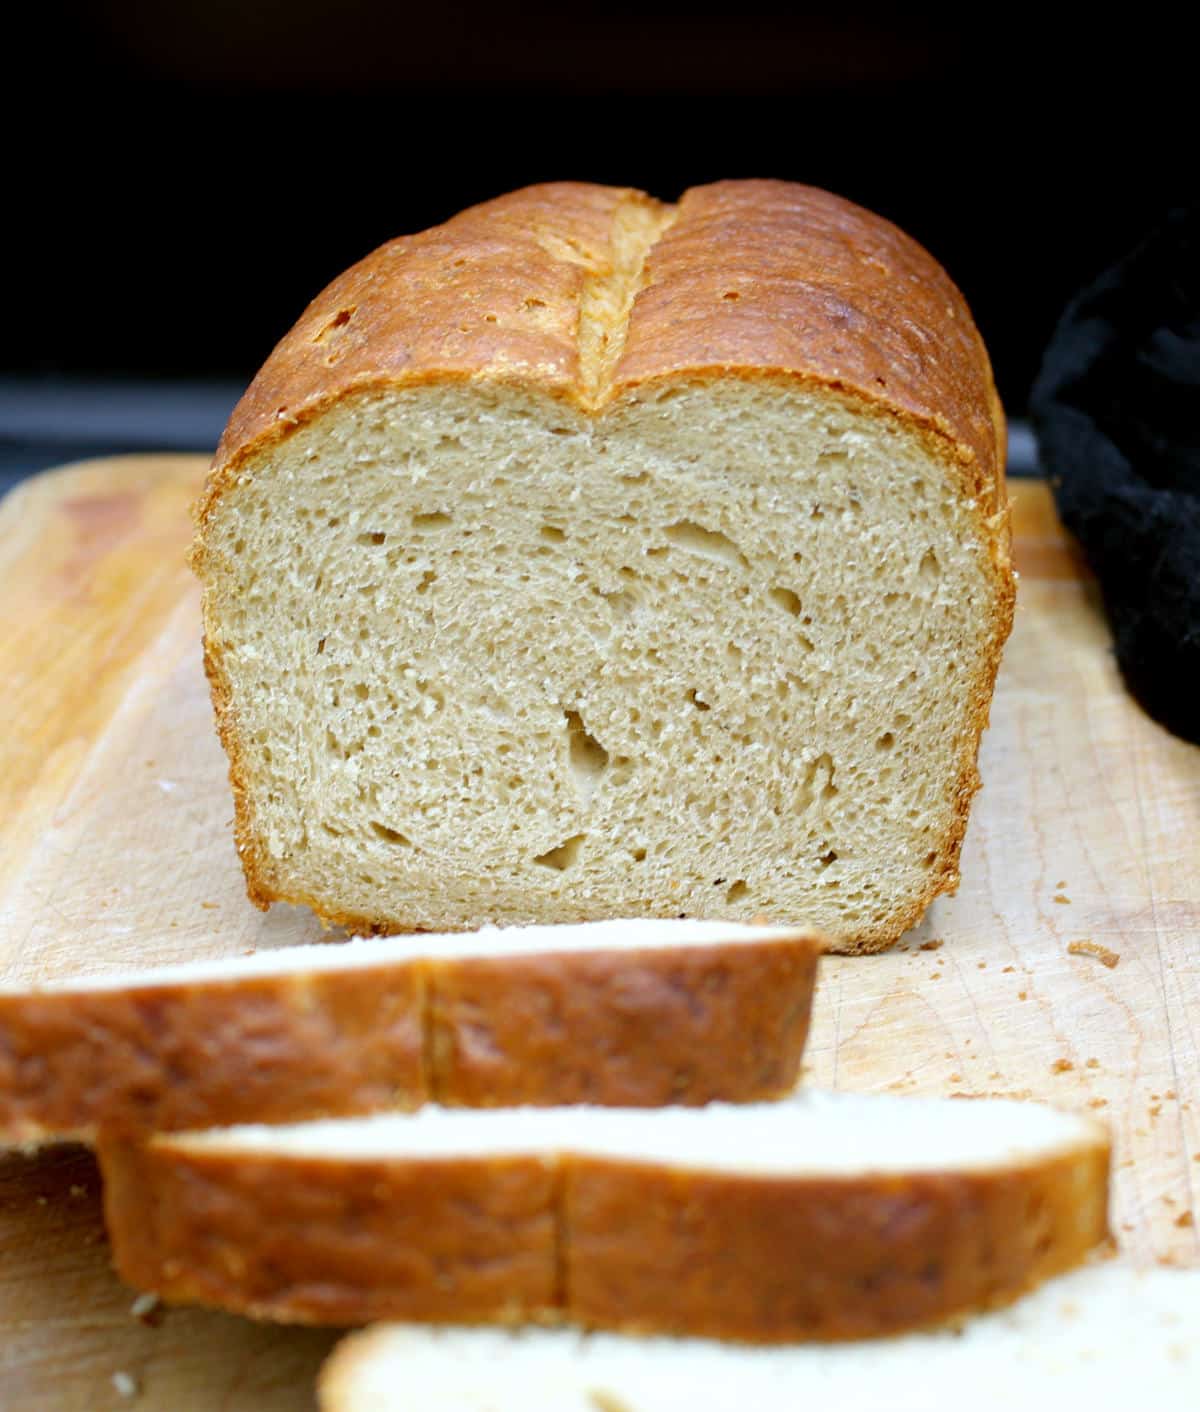
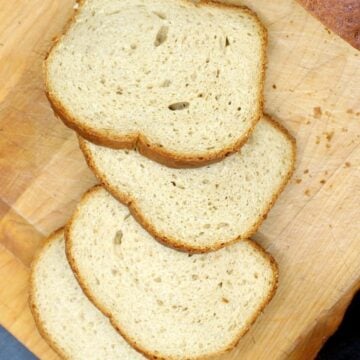
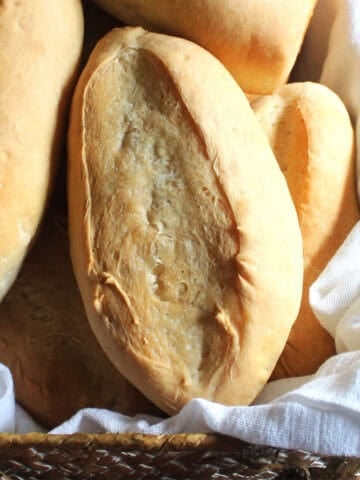
This high protein whole wheat sandwich bread has the softest crumb and a slightly chewy crust. It is light and fluffy, not dense and heavy as all-whole-wheat breads can often be. Each slice has 105 calories and 6 grams of protein. The recipe makes two loaves of bread and freezes nicely.
This is my go-to high protein whole wheat sandwich bread, a recipe I've been making for years now, and it's lived on this blog for a decade. I have recently made some tweaks to it, including reducing the proofing intervals from three to two and reducing the amount of vital wheat gluten it uses, which would sometimes result in a chewy crust. For that reason I wanted to reshare it with those of you who believe unreservedly in the joy that an act as simple as baking bread can bring.
Homemade breads are usually far better tasting than anything you can buy, and this one is all that and so much more. It's very light and low-calorie, and you get two loaves for around -- or less than -- the amount of flour you'd typically use for a single loaf. That's because the vital wheat gluten helps the dough rise really high and gives the bread a very fluffy, light texture when baked. It's not just the perfect whole wheat bread, but it's the perfect bread if you are watching what you eat.
The first time I made this high protein whole wheat sandwich bread I used a cup of vital wheat gluten in it, and while the crumb was divine, it sometimes caused the crust to get very chewy. This time I've cut down the wheat gluten in half. I tried going lower but wasn't very happy with the rise and texture of the bread, so I really recommend keeping it to at least half a cup for the best results. This way you get the best of both: a soft crumb and a crust with the slightest bit of chewiness.
Table of Contents
Why you will love this whole wheat sandwich bread
- It's fluffy and soft, the perfect high protein whole wheat sandwich bread. Most whole wheat bread recipes, no matter how light they promise to be, turn out too dense for my liking and harden up within a day or two. This bread will keep nicely in the refrigerator after the first day for about a week, and you can freeze it too. Slice it, warm it, and it tastes as fresh as when you first made it.
- It's easy to make. You will need to knead this dough to develop the gluten, but you will also get spectacular results for that work.
- It's light. You get two loaves for just over three cups of flour, and each slice has more protein. So if you're watching what you eat this is the perfect bread for you because you'll be getting more for fewer calories.
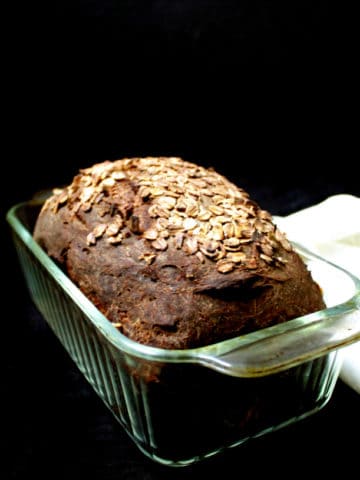
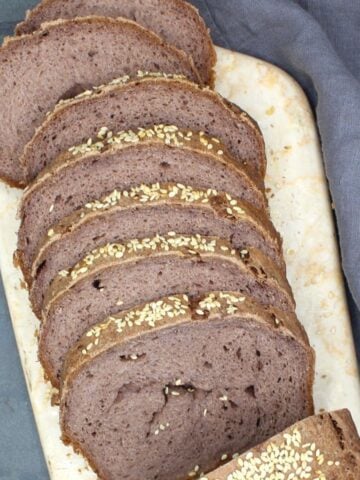
- It's all whole wheat. Which makes it really good for you. And if you like seeded breads, you can add seeds to it to make it even healthier, higher in protein, and delicious.
Why vital wheat gluten?
For those unfamiliar with vital wheat gluten, this is a natural protein found in wheat and it is especially valuable in baking wholegrain breads because it helps them build structure-- in simpler words, it helps them rise. I've explained the role of gluten in bread-baking and the gluten content of various kinds of flours in this old post on my Whole-wheat French Bread.
But to do a quick recap, here's the reason whole wheat bread doesn't rise as well as a bread made with all-purpose flour or bread flour: gluten occurs in the grain's endosperm and all-purpose and bread flours are made by milling the endosperm which automatically gives them a high gluten content. Bread flour, especially, has a very high gluten content, making it ideal for breads (but not cakes).
Whole-wheat flour contains not just the endosperm but also the wheat germ and bran which are the outer coatings of the wheat kernel and are devoid of gluten. Since ounce for ounce whole-wheat flour has less milled endosperm in it than more refined flours do, it has a lower gluten content. Adding a bit of vital wheat gluten into the mix helps the bread rise higher and also improves the texture of the whole wheat bread, keeping it from becoming too dense.
While it is entirely possible to make an all whole wheat flour bread without the vital wheat gluten, and I'll share that recipe with you as well in the near future, this bread is way lighter and softer than any whole wheat bread recipe I've ever tried, and it remains my favorite.
Ingredients for high protein whole wheat sandwich bread
- 4 teaspoons active dry yeast.
- 2 tablespoons maple syrup (use sugar or agave nectar as substitutes)
- ¾ cup warm water
- 2 tablespoons vegetable oil (I used olive oil)
- 1 ½ cups nondairy milk (I used oat milk)
- 1 teaspoon salt
- ½ cup vital wheat gluten flour
- 3-4 cups whole wheat flour
How to make high protein whole wheat sandwich bread
- Add yeast and maple syrup to a large bowl or the bowl of a stand mixer. Pour in the lukewarm water and mix well. Set aside for five minutes until the yeast froths to indicate it's alive. Add the vegetable oil and milk to the yeast, then dump in the vital wheat gluten flour and two cups of whole wheat flour.
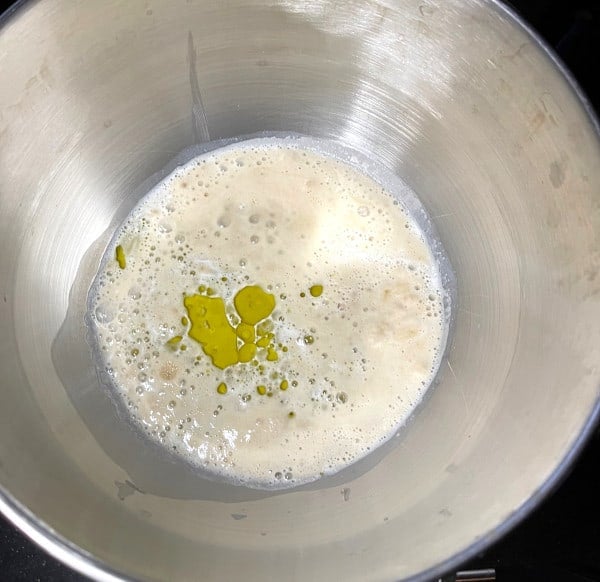
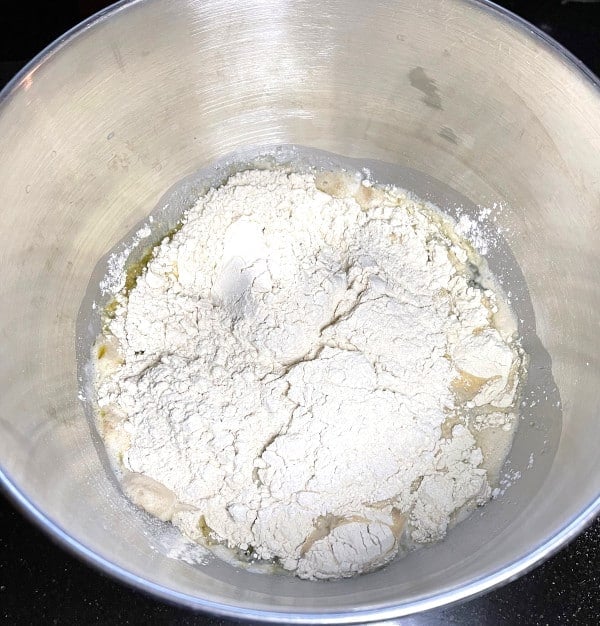
- Mix until all ingredients come together, then add the salt. Continue kneading the dough, adding half a cup at a time and then, as the dough gets dryer, just a tablespoon at a time. On a low humidity day here in the DC area I needed about 3 ¼ cups. You might need more flour depending on where you are and the weather around you.
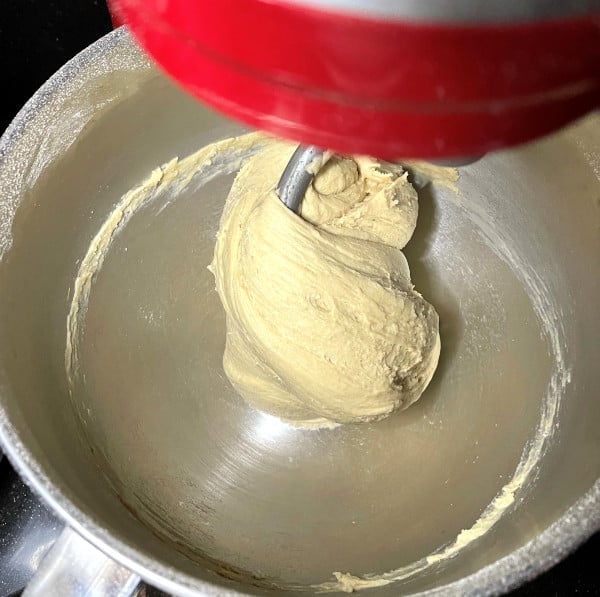
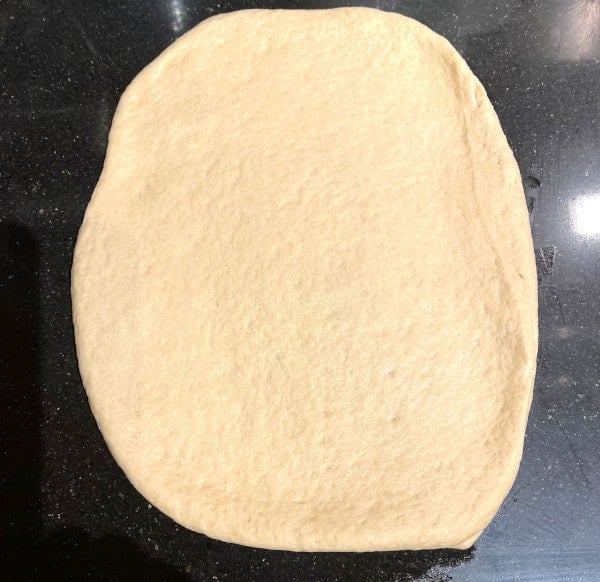
- Once you have a pliable, smooth but not sticky dough, continue to knead it further for 8-10 minutes. The kneading will help the bread rise really well, so don't take any shortcuts. If doing this in a stand mixer, which makes this way easier, knead at medium-low speed, around 4 in a KitchenAid.
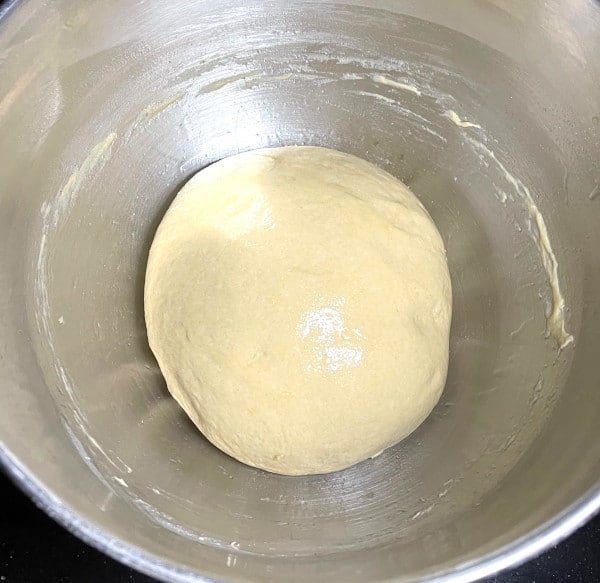
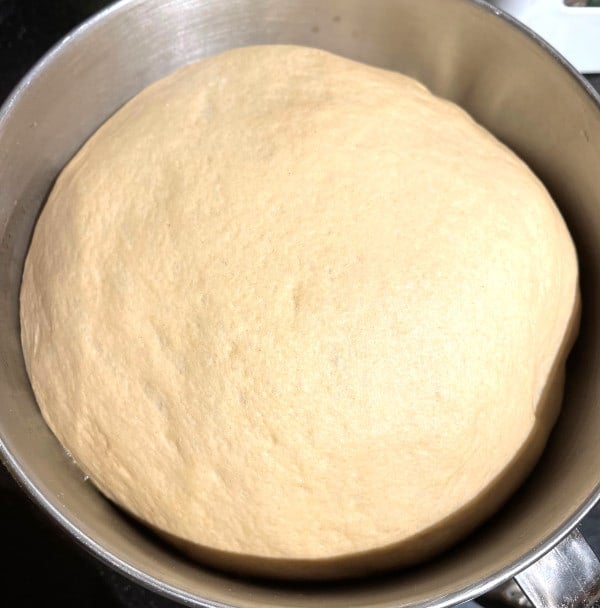
- Once the dough looks like it does in the picture above, remove it to a clean, unfloured surface and knead briefly by hand before shaping into a smooth ball. Oil the bowl and place the dough back in it, coating the top with some oil or cooking spray to make sure it doesn't dry out. Cover tightly and set aside for 45 minutes to an hour during which time it should rise quite a bit, more than double.
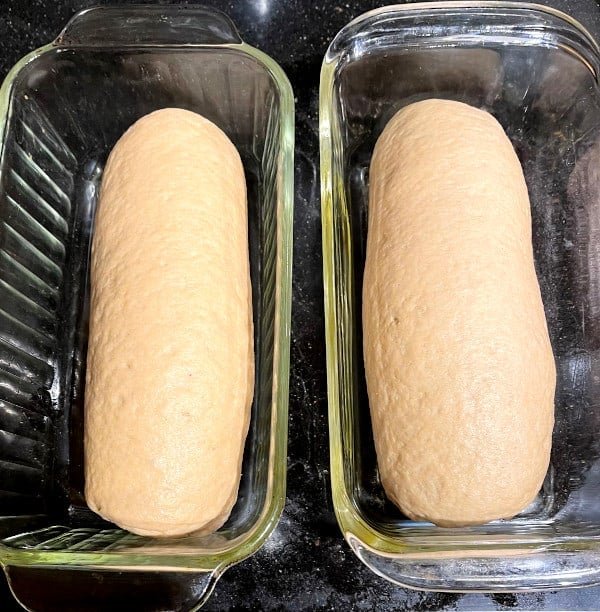
- Remove the dough from the bowl, punch it down and knead it briefly again. The dough should be smooth. Divide the dough ball into two pieces and roll each into a rectangle with a rolling pin, keeping the breadth slightly smaller than your loaf pan.
- Roll up each rectangle of dough into a cylinder and tuck in the ends. Place the loaves, seam side down, in oiled loaf pans. Cover loosely (I use clean plastic shower caps) and set aside in a warm place for about an hour for the dough to rise.

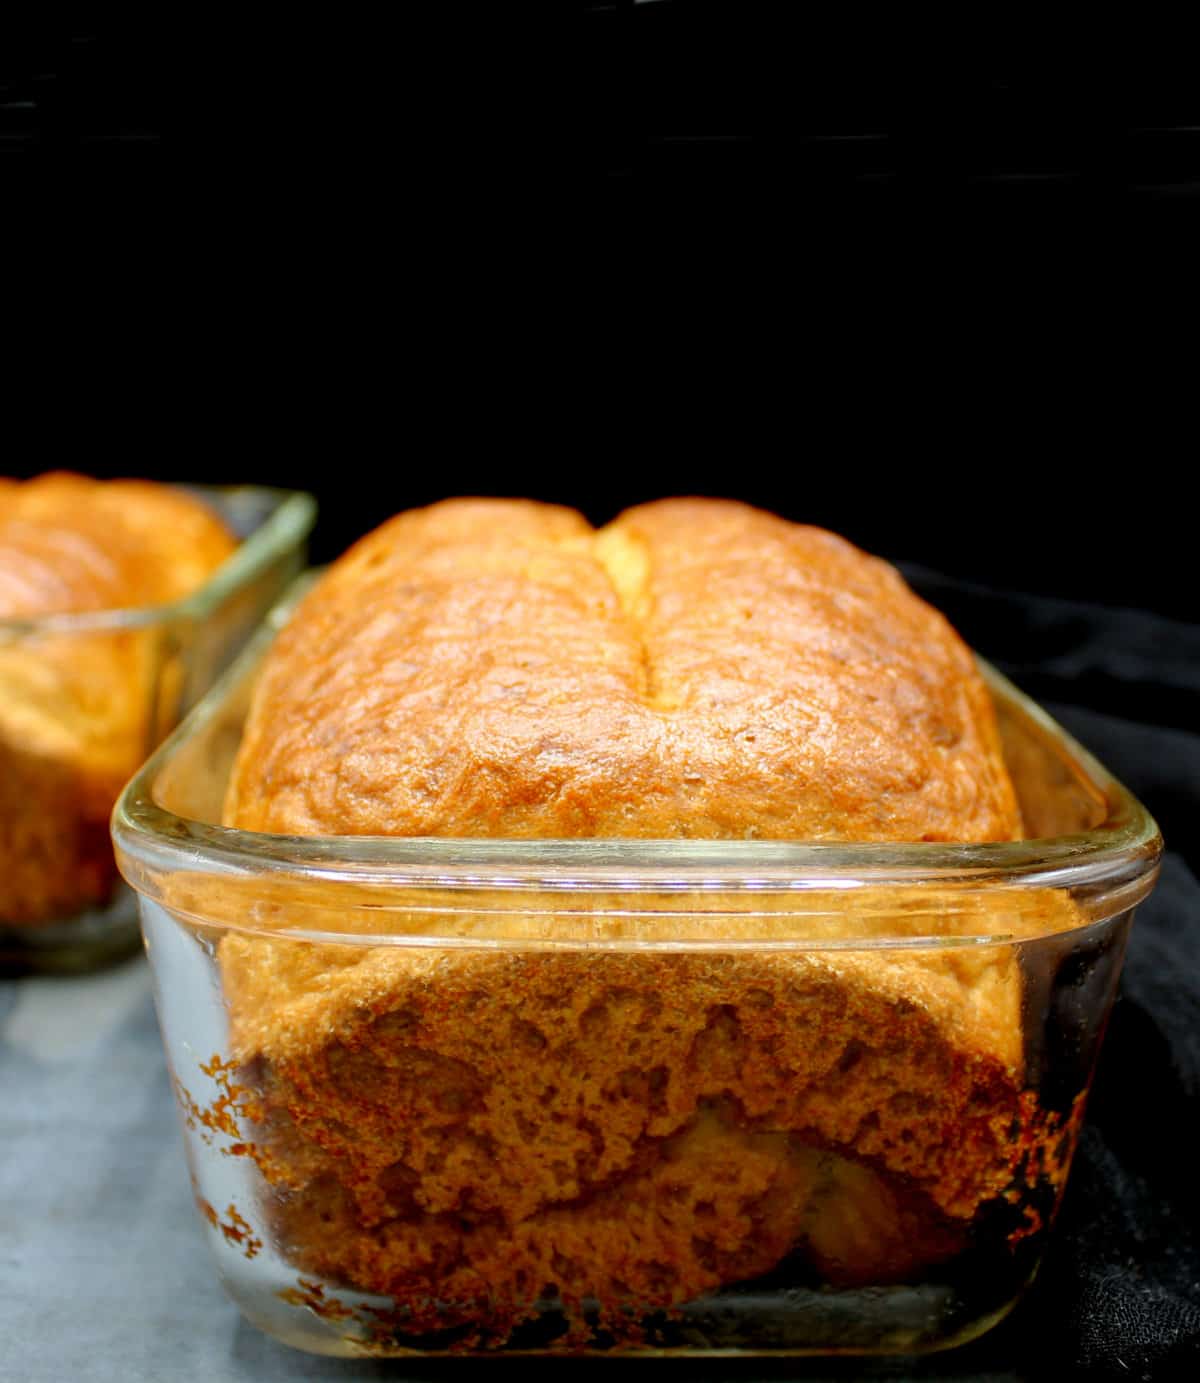
- Bake in a preheated 450 degree oven for 10 minutes, then reduce heat to 350 degrees and continue baking another 30 minutes.
- Let the loaves cool on a baking rack for about an hour before you unmold them. Continue cooling on the rack before slicing.
Recipe FAQs and troubleshooting
Any whole wheat flour is fine, but I would recommend using either a white whole wheat flour or durum whole wheat flour, both of which give a lighter, softer crumb.
Yeast are single-celled fungi and are living organisms. Kept around too long, or in unsuitable conditions, yeast can die and if that happens your yeast will not bloom or bubble when you add it to lukewarm water. Packages of yeast usually have a use by date, so be sure to check that before you use it.
Another reason the yeast might not bloom is if you used water that was too hot. The water you add to yeast should be warm but comfortable to the touch--between 100 and 110 degrees on a thermometer. Water that's too hot will kill the yeast, rendering it useless for the bread.
A whole wheat dough needs to be kneaded really well for a great texture and flavor as well as for the rise. If you don't knead the dough long enough, you might not get as good a rise.
Also, don't overproof the bread dough--that could cause your loaves to fall flat in the oven. Stick to the recommended times, going only slightly longer if necessary.
I wouldn't usually score a sandwich bread, but I did in this case because in the past, especially when I was using a whole cup of vital wheat gluten, the bread would sometimes form a skin on top when baking with a large air bubble underneath. Having baked with the smaller quantity of vital wheat gluten for a while I feel comfortable saying that you don't have to score the bread if you don't want to.
The bread will keep wonderfully at room temperature for a day or so, after which you should place it in a plastic bag and refrigerate it for 3-4 days. Warm before eating. For longer term storage place in a freezer safe bag and freeze. You can also slice the bread before freezing.
That really is a great recipe, and if you still want to follow it, you will need to make just need a few tweaks: if you add a cup of VWG you will need less flour--around 2 to 2 ½ cups. The rest of the process is the same but the bread made with more VWG will rise much higher and you'll also have more protein per slice. I do recommend scoring the bread if you use more vital wheat gluten.
More delicious sandwich bread recipes

Recipe card
High-Protein Whole-Wheat Sandwich Bread
Ingredients
- 4 teaspoons active dry yeast
- 2 tablespoons maple syrup (or sugar)
- ¾ cups water (warm)
- 2 tablespoons avocado oil or any neutral oil (I used olive. Avocado or any vegetable oil is fine)
- 1½ cup nondairy milk (warm)
- ½ cup vital wheat gluten flour
- 4 cups whole wheat flour (you might not need all 4 cups)
- 1 teaspoon salt
Instructions
- Mix the yeast, maple syrup and warm water in a large bowl or in the bowl of a stand mixer. Set aside for the yeast to bloom, about five minutes.
- Add the milk, oil, vital wheat gluten and 2 cups of whole wheat flour to the bowl. Mix thoroughly, then mix in the salt.
- Continue to mix in the flour, a quarter cup at a time and then, as the dough gets dryer, a tablespoon at a time, until the dough is no longer sticky. I needed about 3 ¼ cups this time, but on more humid days I've needed as much as 4 cups.
- Continue kneading the dough for another 10 minutes. You should have a really smooth, supple dough. Form the dough into a ball. Oil the bowl and place the ball of dough in it, coating the top with some oil or cooking spray so it doesn't dry out.
- Cover the bowl and set it aside in a warm spot. After 45 minutes it should have more than doubled.
- Remove the dough and punch it down, then form into a smooth ball. Divide into two pieces. Roll out each into an approximate rectangle, then roll each rectangle into a cylinder. Tuck the ends into the bottom and place the loaves in two oiled standard (6 cup) loaf pans, seam side down.
- Cover loosely (I use clean shower caps) and set aside in a warm spot for another hour or until they dome over the loaf pans. About 15 minutes before the bread has finished proofing, preheat the oven to 450 degrees.
- Place the loaves into the oven and bake 10 minutes. Turn down heat to 350 degrees and contine baking another 30 minutes.
- Cool on a rack for about about an hour, then remove the loaves from the pan and continue cooling on the rack.
Nutrition Information
To print recipe card without images, uncheck "instruction images" after clicking the "print recipe" button.


Pat McAllister says
I just got back to baking fresh milled whole wheat bread, but now I don't use eggs. I've tried 3 or more recipes and each on was not great. Last week I threw out the loaf as it was under cooked. I tried your recipe today and we are so thankful for the results. This will be my foolproof recipe from now on. Thank you!!!! Bless you!!!!
Angela says
Could this be adapted so it could be baked in a bread machine?
Vaishali Honawar says
Hi Angela, I've not tried this recipe in the bread machine so can't say for sure. If you try I'd love to hear.
Angela says
I’ve made this recipe is my zojirushi bread machine and it turned out great
Kaitlyn says
What size loaf pans are you using?
Vaishali Honawar says
I used 8 by 4 inch pans for this bread.
Jill says
Great recipe, it turns out great each time and it's really easy to make. I'd like to try folding in seeds or making a cinnamon raisin swirl version next time!
Brandy Stamper says
I love this recipe. Is there a way I can use this recipe with a sourdough starter instead? If so, what would be the new measurements for everything? I am not much of a baker, so measurements for non-baking dummies is appreciated!
Kate says
I tried this recipe with hesitation because I was surprised at the amount of yeast. 48 grams seems a lot. The bread worked but I think I might try 14-16 grams next time. Could this have been a typo? If so, how much yeast is recommended?
Vaishali says
It was a typo - it's 4 tsp and each is 3 grams, so 12 grams of yeast. My apologies and it's been corrected.
Kathryn Duncan says
I’d like to try making your recipe, as I’m trying to add more protein to my diet.
The total ratio of liquid to dry ingredients seems way too high. I’m seeing 2&1/4c liquid to 4&1/2c flour/VWG. Is that correct? Please advise. Thank you very much.
Vaishali says
Hi Kathryn, the vital wheat gluten does absorb a lot of liquid, so you need that much.
JJ says
I am so glad to finally find a high protein bread recipe that doesn’t call for artificial ingredients such as protein powder. Very eager to make this bread soon! Thank you for sharing this recipe!
Angela says
I make this in my 2lb bread machine on the dough setting. Then separate into two loaves and bake in the oven. I use all 4 cups of flour. Great recipe
Vaishali says
Awesome! So great to know the recipe works in the bread machine.
Krista Iannuzzi says
Could I do this in a bread machine? I’m looking for an easy way to add more protein into my family’s diet and I make lots of bread in the bread machine for my kids.
Vaishali says
I haven't made this in the bread machine but would think it will work quite well.