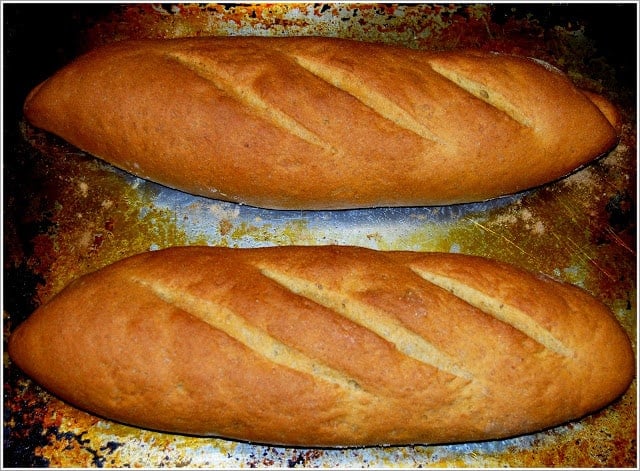
So maybe French women don't get fat, but I am not French and I do. Unless I watch what I eat.
Still, I do get the urge to eat some lusciously soft, heartily crusty French bread ever so often. And when I was struck by the recurring urge to bake a French bread this weekend, I decided, for a change, to make it healthy by incorporating as much whole wheat into the recipe as I possibly could.
I had already posted an Easy French Bread on this blog, and this is a healthier, whole wheat version of that recipe. It turned out amazing, although I won't take all the credit for it-- French bread is one of the easiest breads to bake, and almost anyone can make a pretty good loaf with just a little practice.
Despite its healthy nature, this bread is also rather traditional because it uses just flour, water and salt, as classic French bread does. I did add some vital wheat gluten because I wanted the bread to be airy and light, as good French bread should be.
To understand the role and importance of vital wheat gluten in wholegrain bread-making, it might help to know the difference between whole-wheat flour, which you might have often heard described as being low in gluten, and refined flours like all-purpose flour and bread flour, which have a high gluten content.
Refined flours are made by milling the endosperm of the wheat kernel which is a coating around the embryo of the grain and which contains a protein that, when kneaded, develops into gluten, giving bread its chewiness and structure and helping it to rise.
Whole-wheat flour, on the other hand, is made by milling the entire wheat kernel which includes the endosperm, the outer coating called the bran, and the embryo or the germ. Therefore, measure-for-measure, whole-wheat flour contains less endosperm than all-purpose or bread flour and therefore less of the protein that causes gluten to develop. Get it?
At the other end of the scale you have cake flour which is refined further by stripping from it not just the bran and germ but also a good deal of the gluten-creating protein, yielding a high-starch flour that contains very little gluten. This makes it perfect for crumbly, tender cakes.
A quick piece of information for home cooks who tend to substitute maida, a super-refined flour that is widely used in India to make sweets and some breads, with all-purpose flour. Maida is actually much closer to cake flour than it is to all-purpose flour because of its very high starch content.
Coming to the point of this post, when you make a bread with only or mostly whole-wheat flour or other wholegrain flours like rye, you need to give the dough a protein boost so it will yield a well-risen, well-structured loaf of bread instead of a heavy, dense loaf that you could kill someone with (hopefully not by feeding it to them 🙂 ). That protein boost is given by adding vital wheat gluten to the recipe. If you can't find vital wheat gluten, which is sold in grocery stores like Whole Foods in powder form, I'd suggest flip-flopping the ratio of whole-wheat to all-purpose flour in the recipe and leaving out the added gluten.
I used durum whole-wheat flour, the same flour I use to make chapatis and puris, for this bread. You can buy durum whole wheat flour in five-, 10- or 20-pound bags at Indian grocery stores and even at natural food stores like Whole Foods.
Since I've often enough stressed in the past that bread-making is equal parts science and art, I thought it might help for you to see pictures of most of the major steps, so I've included them here. As always, feel free to ask if you have any questions.
Step-by-step Whole Wheat French bread recipe.
Mix the yeast, 1 cup of all-purpose flour and 1 cup of water in a large bowl. Let stand for a few minutes until the mixture becomes quite bubbly, about 10-15 minutes.
Now add the vital wheat gluten, remaining flour, salt and remaining water. Mix to combine and then knead by hand about 10 minutes or in a stand mixer, on medium speed, about six minutes, until you have a very smooth, elastic and resilient dough.
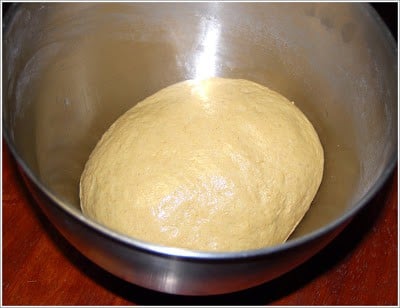
Form the dough into a ball and place in an oiled bowl, turning over once to coat the top with oil. Cover loosely with a kitchen towel and set aside to rise at room temperature. (In winter, I'd leave it in a cold oven with the light on).
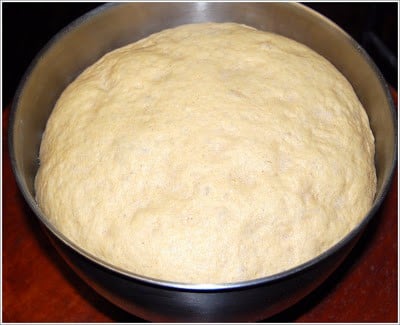
After two hours, the dough would have more than doubled. Punch it down to remove all the gases in it, then divide it into two. Let the dough stand, covered with a kitchen towel, around 10 minutes before shaping.
Take one ball of dough and punch it down with your fist to release all the gases and air. You will have a six-inch round when you're done.
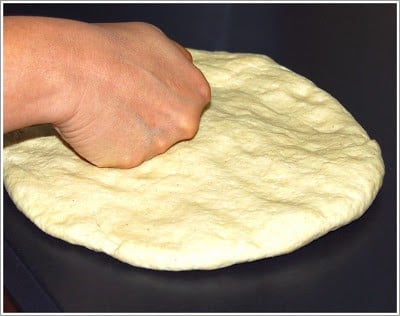
Now, roll over more than half of the dough and, using your knuckles or the heel of your hand, press it down into the bottom.
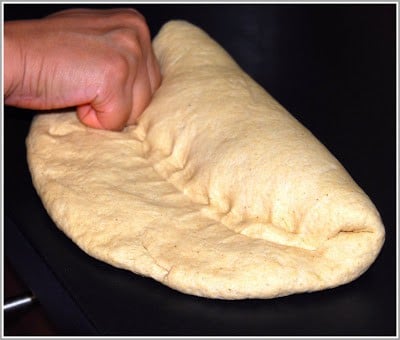
Repeat two more times, rolling the dough over each time, until you have a cylinder. Each time, press in the seams with your knuckles or the heel of your hand. If needed, at the end, pinch in the seam with your fingers to seal it. You will now have a cylinder with tapering ends, about six inches in length.
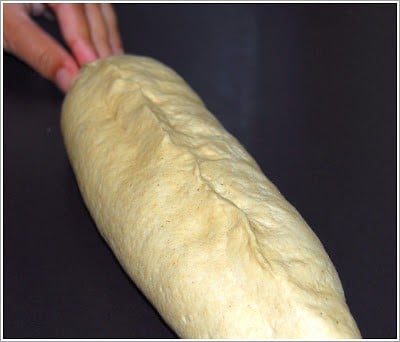
Now using the palms of your hands and fingers and without applying any pressure, roll the dough until you have a roll about 12 inches in length. The roll should be even all over and taper off at the ends-- apply a little pressure when you reach the ends to create the tapering shape.
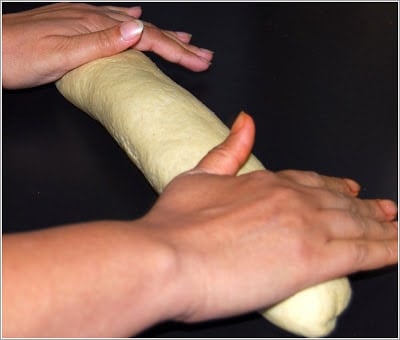
Repeat this with the other ball of dough.
Place the two loaves on a baking sheet lightly greased with oil and sprinkled with cornmeal, at least four inches apart because they will expand and rise.
Cover with a floured kitchen towel and set aside for an hour.
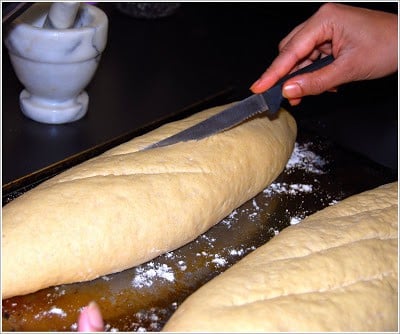
With a very sharp knife or razor, and very quickly, make three long, diagonal cuts in the top of the bread. (I used a serrated steak knife as you can see in the picture, but if you're not practiced at this, use a very sharp, thin razor blade because you don't want to deflate the dough)
Preheat the oven to 425 degrees. Five minutes before baking, spray about ½ cup water into the oven to create a steamy environment. (The water helps create a crusty loaf and also it creates a moist environment where the bread bakes slowly, creating more flavor).
Place the bread in the oven and close the door. Five minutes later, spray more water into the oven.
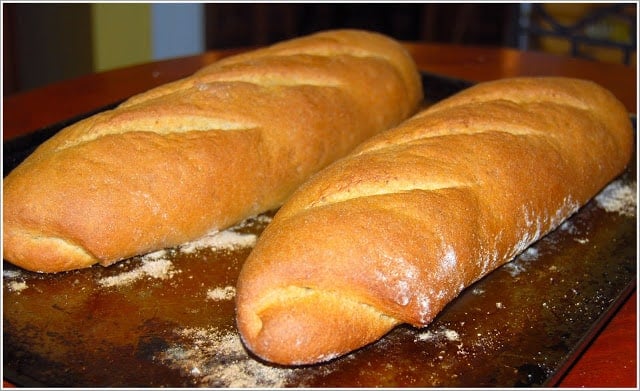
Bake about 30 minutes until the loaves are golden-brown. Lift up the loaf to check that it separates easily from the baking sheet.
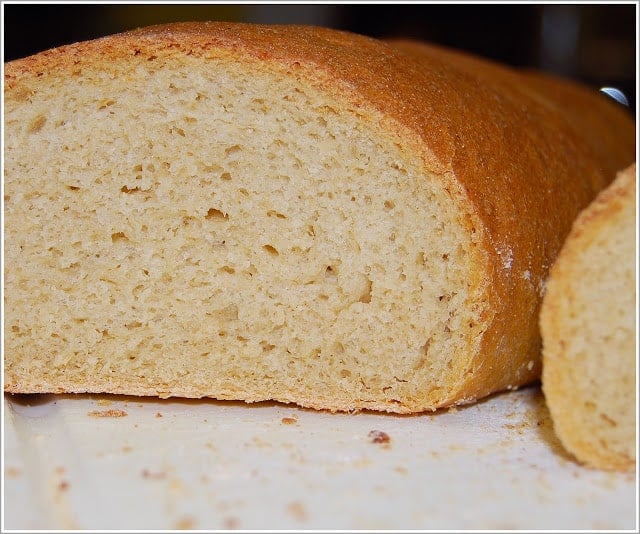
Let stand at least 15 minutes on a rack before cutting.
More vegan bread recipes
- Low Carb Whole Wheat Sandwich Bread
- Vegan French Bread, easy recipe
- Vegan Olive Oil Brioche
- High Protein Sandwich Bread
- Vegan Cornbread
Whole-Wheat French Bread: A Step-By-Step Guide
Ingredients
- 3 cups whole-wheat flour
- 2 cups unbleached all-purpose flour
- 1 tablespoon vital wheat gluten
- 1 ½ teaspoon salt
- 2 cups of mildly warm water
- 2 ½ teaspoon yeast
Instructions
- Mix the yeast, 1 cup of all-purpose flour and 1 cup of water in a large bowl. Let stand for a few minutes until the mixture becomes quite bubbly, about 10-15 minutes.
- Now add the vital wheat gluten, remaining flour, salt and remaining water. Mix to combine and then knead by hand about 10 minutes or in a stand mixer, on medium speed, about six minutes, until you have a very smooth, elastic and resilient dough.
- Form the dough into a ball and place in an oiled bowl, turning over once to coat the top with oil. Cover loosely with a kitchen towel and set aside to rise at room temperature. (In winter, I'd leave it in a cold oven with the light on).
- After two hours, the dough would have more than doubled. Punch it down to remove all the gases in it, then divide it into two. Let the dough stand, covered with a kitchen towel, around 10 minutes before shaping.
- Take one ball of dough and punch it down with your fist to release all the gases and air. You will have a six-inch round when you're done.
- Now, roll over more than half of the dough and, using your knuckles or the heel of your hand, press it down into the bottom.
- Repeat two more times, rolling the dough over each time, until you have a cylinder. Each time, press in the seams with your knuckles or the heel of your hand. If needed, at the end, pinch in the seam with your fingers to seal it. You will now have a cylinder with tapering ends, about six inches in length.
- Now using the palms of your hands and fingers and without applying any pressure, roll the dough until you have a roll about 12 inches in length. The roll should be even all over and taper off at the ends-- apply a little pressure when you reach the ends to create the tapering shape.
- Repeat this with the other ball of dough.
- Place the two loaves on a baking sheet lightly greased with oil and sprinkled with cornmeal, at least four inches apart because they will expand and rise.
- Cover with a floured kitchen towel and set aside for an hour.
- With a very sharp knife or razor, and very quickly, make three long, diagonal cuts in the top of the bread. (I used a serrated steak knife as you can see in the picture, but if you're not practiced at this, use a very sharp, thin razor blade because you don't want to deflate the dough)
- Preheat the oven to 425 degrees. Five minutes before baking, spray about ½ cup water into the oven to create a steamy environment. (The water helps create a crusty loaf and also it creates a moist environment where the bread bakes slowly, creating more flavor).
- Place the bread in the oven and close the door. Five minutes later, spray more water into the oven.
- Bake about 30 minutes until the loaves are golden-brown. Lift up the loaf to check that it separates easily from the baking sheet.
- Let stand at least 15 minutes on a rack before cutting.
Love this vegan French bread? Check out more this collection of all the bread recipes you'll ever need on Holy Cow Vegan!

SugarLoaf
Texture perfect, but taste was a bit too salty.
Vaishali
You can use as much or as little salt as you like.
Monica
The top recipe shows 1.5 tbsp of salt. I thought it was a lot. But still followed. Should have read the comments first.
Vaishali
You can change the salt per your requirements and taste!