

A sourdough starter is so easy to make-all you need is water and flour and a week for them to work together and create a thriving colony of healthy, probiotic wild yeast. The starter will reward you for years to come with tasty sourdough breads, waffles, pancakes and more, with no need for added yeast. Stir up a batch today--it's truly the gift that keeps on giving.
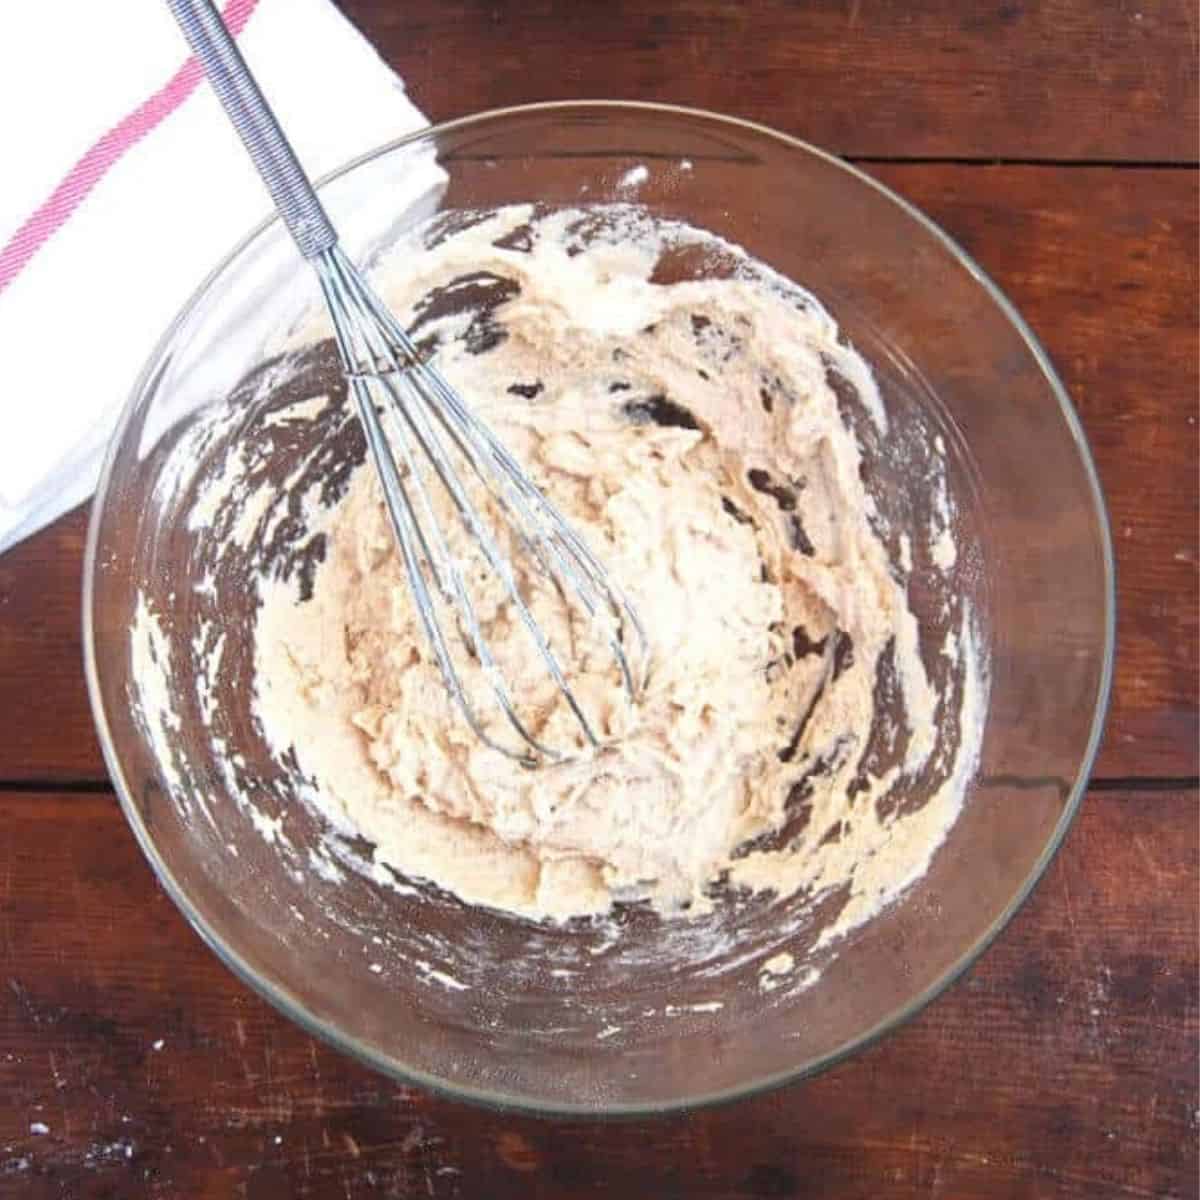
Table of Contents
What is a sourdough starter?
A sourdough starter is a natural culture made with flour or water that can be used to leaven baked goods like breads instead of commercial yeast. To make a sourdough starter you mix the water and flour and let stand for a week, feeding it a little more flour and water every day. The flour already contains good bacteria and over time, as the starter ferments, it also captures wild yeast bacteria from the environment, creating a lively colony of beneficial microorganisms.
When you add sourdough starter to baked goods instead of bread, you don't just get a natural leavening agent; you also get its powerful health benefits. There are billions of yeast bacteria in a sourdough starter and they are great for your gut. When a sourdough starter is added to a batter or dough, these bacteria break down the starches in the flour, making the baked good easier to digest and also giving it a distinctive, delicious tang. Some studies show that sourdough can be eaten by people with celiac disease who cannot normally tolerate gluten while others show that breads made with sourdough are better for diabetics because they don't cause blood sugar to rise as high as regular bread would. (If you do have these health problems, though, check with a doctor before making changes to your diet.)
I've been nurturing a sourdough starter for almost a decade now. After I first made it, my jar of commercial yeast sat in the freezer while I experimented with not just breads but sourdough pancakes, sourdough waffles, pretzels, English muffins, sourdough biscuits, sticky buns and so much more. The sourdough made eating these treats not just more fun and delicious, but also more guilt-free.
In this post I'm sharing my best tips - learned over years of experience - on how to make and maintain a foolproof sourdough starter. This is an extraordinarily easy recipe that anyone can make. But it is not a process that can be rushed. When you start a sourdough starter from scratch, you will need seven days before you can use it.
Be sure to name your starter. 🙂 Mine was named George by a reader, and over the years I've smiled many times as you've come back to tell me the names you've given your starters: Georgina, Crunchy, the Hulk and Tina (after quaranTine :)) among others.
Recipe card
Sourdough Starter Recipe
Ingredients
- 1 cup whole wheat flour
- ¾ cup bottled or non-chlorinated water
- 3 cups (approx) Unbleached all purpose flour (for feeding. Or bread flour or whole wheat flour)
Instructions
- Measure out the whole wheat flour into a large bowl or a crock. The container you use should be large enough to hold the sourdough starter as it rises and bubbles. Also make sure you use a glass or ceramic or sturdy, food-safe plastic container.
- Measure out the bottled or non-chlorinated, room-temperature water. Chlorine can inhibit the formation and growth of yeast, so it's rather important that your water be as non-chlorinated as you can get it.
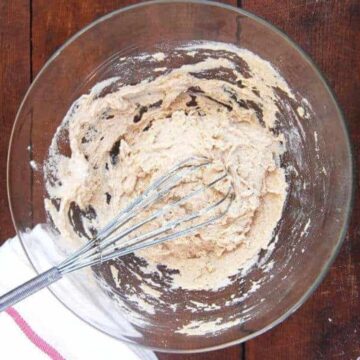
- Now add the water to the flour and whisk together to mix well. You should not have any traces of flour.
- Cover the sourdough starter loosely with a kitchen towel.
- If the weather where you live is cold, place it in a warm spot, like on top of a radiator or in an oven with the light on. It was rather warm here when I started George so I could leave him out on the kitchen table, but this time - with temperatures kissing the 40s - I have my new starter in the oven with the light on. Keep in mind that it may take longer for the yeast to develop in the starter in cooler weather.
- Leave your starter alone for 24 hours. When you look at it, you might see some bubbles, or there may be none, especially if you are in cooler temperatures. Either way, mix the starter well with a whisk or fork, measure out half a cup of the starter, and discard* it. (You can use the discard in flatbreads or unleavened breads, and from day 4 you can use it in sourdough waffles and pancakes)
- After discarding a portion of the starter, add half a cup of unbleached, all purpose flour and ⅜ of a cup of non-chlorinated water. Use warm water (not hot) if you are working in cool temperatures, as I am. Mix well and again, leave in a warm place. You will start noticing that your starter lightens in color with the addition of all purpose flour.
- By the third day you should see some activity in your starter and also a fruity aroma. Once again, discard half a cup of starter and add half a cup of all-purpose flour and 90 milliliters of water (⅜ of a cup).
- Continue the process for the next three days (try and do this at the same time of day- for instance, I began my starter Sunday morning, so I have to try and feed it around the same time every day, although an hour here or there won't be amiss). Your starter should have started to thrive by now, rising after you feed it, and eventually settling down. King Arthur Flour, where I got my initial recipe, recommends discarding and feeding your starter twice after day 3, but I found that doing it just once was okay, especially since it was quite warm when I made my starter. This time, with cooler weather, I might feed the new starter twice depending on how it goes.
- By the seventh day, your starter, if it's healthy and bubbling, should be ready to use. When I made George, I used the "discard" portion of the starter to make waffles, and they turned out great. If your sourdough starter is still slow in developing, increase feedings to twice a day and continue to keep it warm. It will eventually strengthen.
- Once your sourdough starter has matured, you will need to feed it once every week. I mix the starter well, take out the amount of sourdough starter I need to bake with, and replace it immediately in the proportion of 1 cup of flour to ¾ cup of water. For example, if I take out ½ cup of sourdough, I replace it with ½ a cup of flour and ⅜ths of a cup of water. After feeding the starter, I leave it on the counter for a day, and then refrigerate it.
Nutrition Information
To print recipe card without images, uncheck "instruction images" after clicking the "print recipe" button.
Ingredients
- Flour. Use whole wheat flour to begin the starter. Whole wheat flour gives your sourdough starter a stronger start because it's full of micronutrients and friendly bacteria. You can also use all purpose flour, bread flour or rye flour. (If you want to make a starter without gluten, see my recipe for a gluten-free sourdough starter).
- Water. Use distilled or filtered water to both make and maintain the starter. Tap water usually has chlorine in it, and chlorine can kill the wild yeast.
How to make sourdough starter (day by day, with pictures)
Day 1
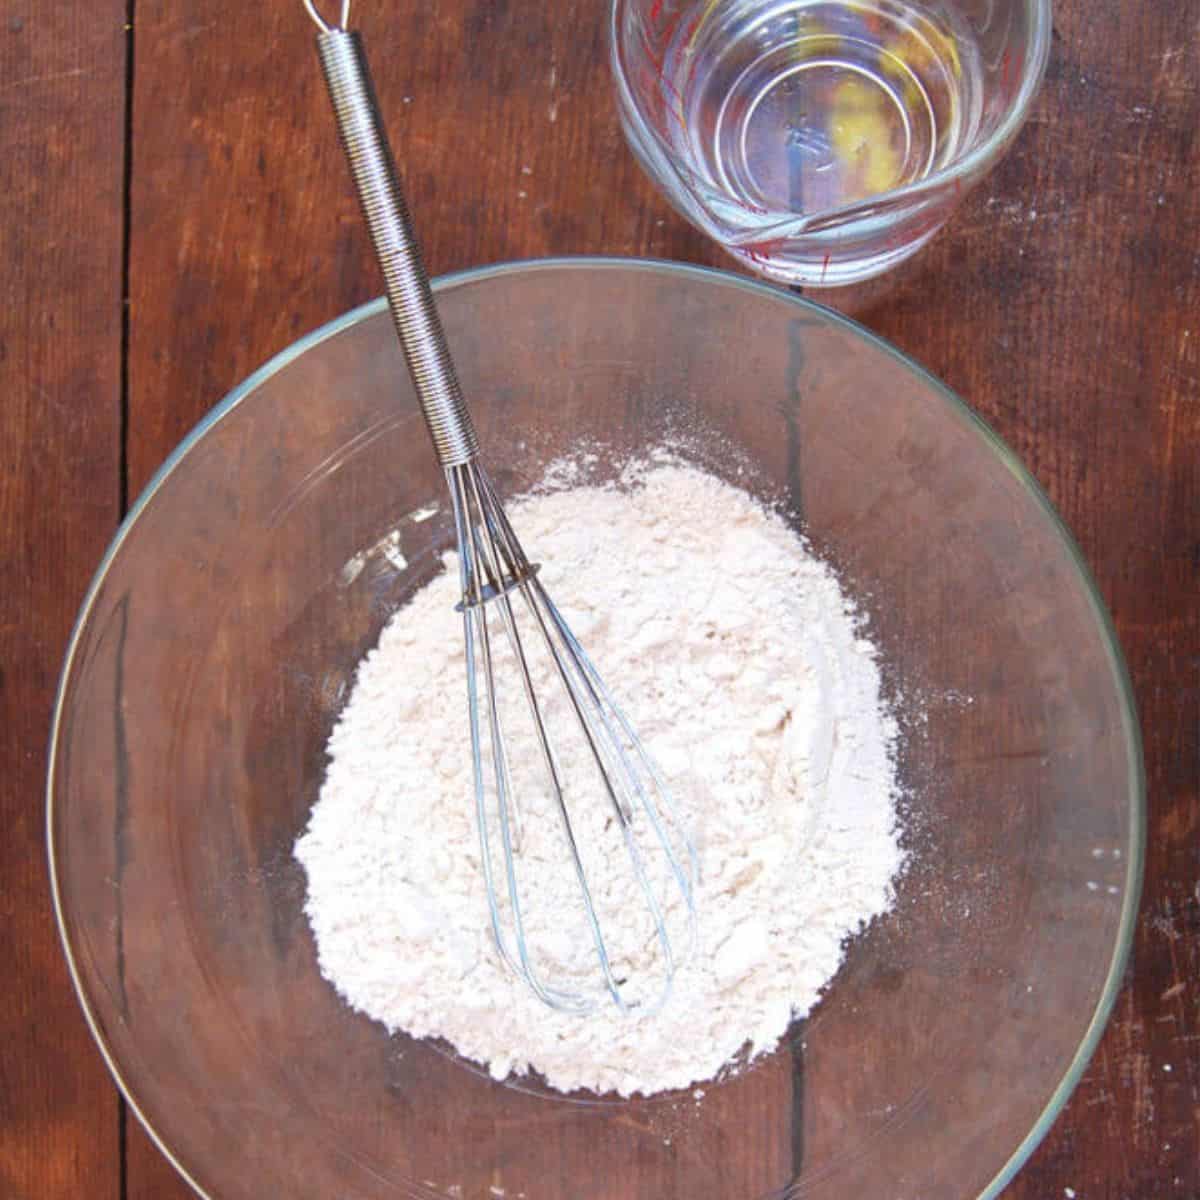
Measure out 1 cup of whole wheat flour into a large bowl or a crock. The container you use should be large enough to hold the sourdough starter as it rises and bubbles. Measure out ¾ cup of bottled or non-chlorinated, room-temperature water. Chlorine can inhibit the formation and growth of yeast.
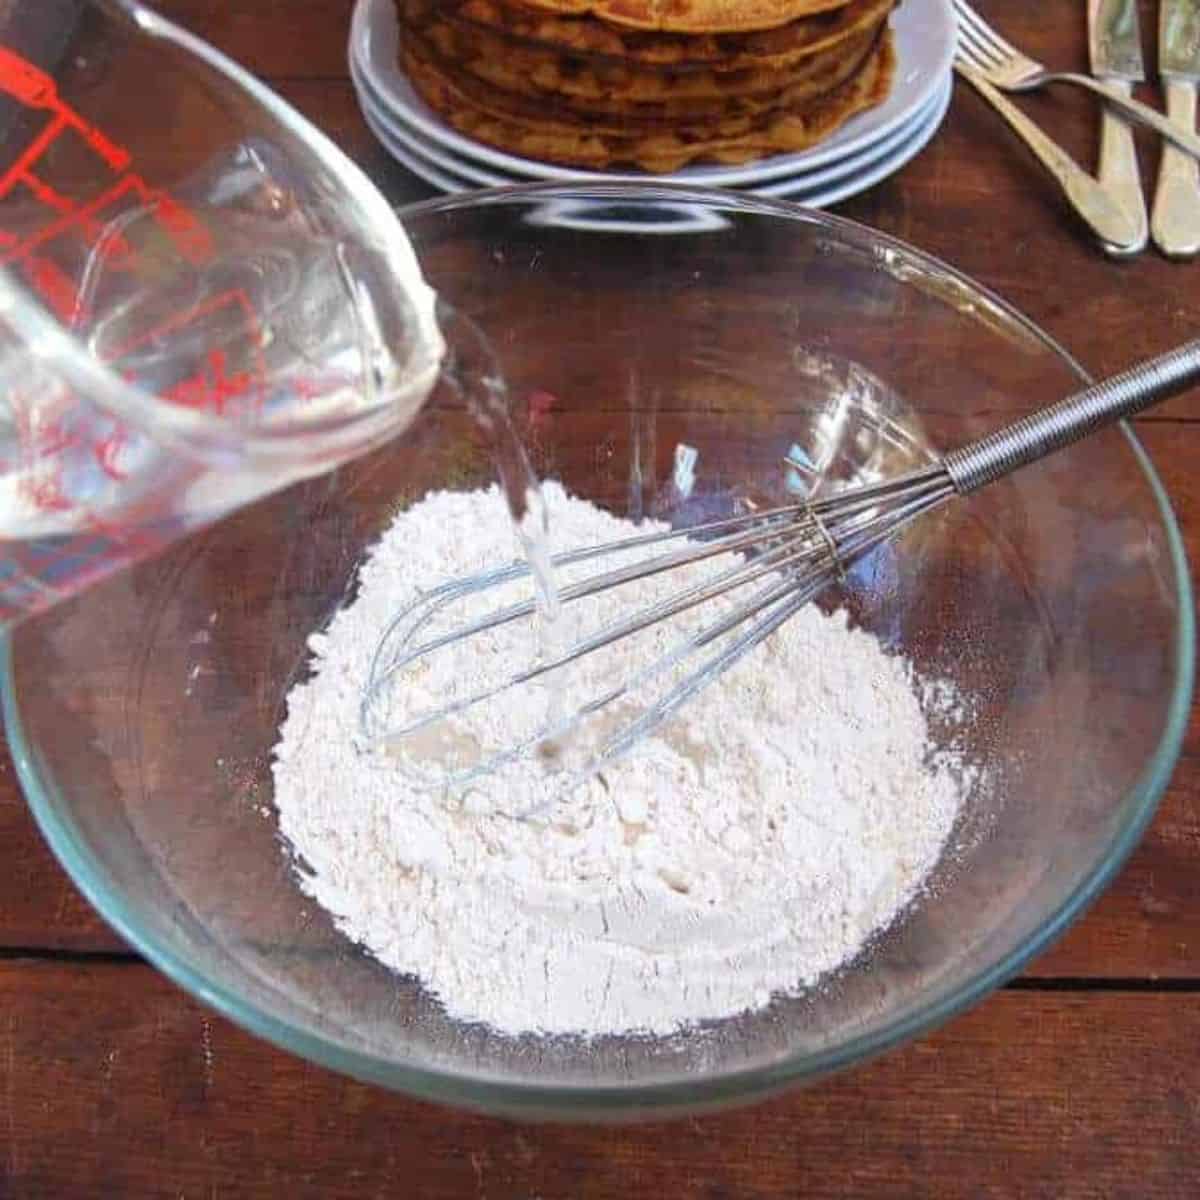
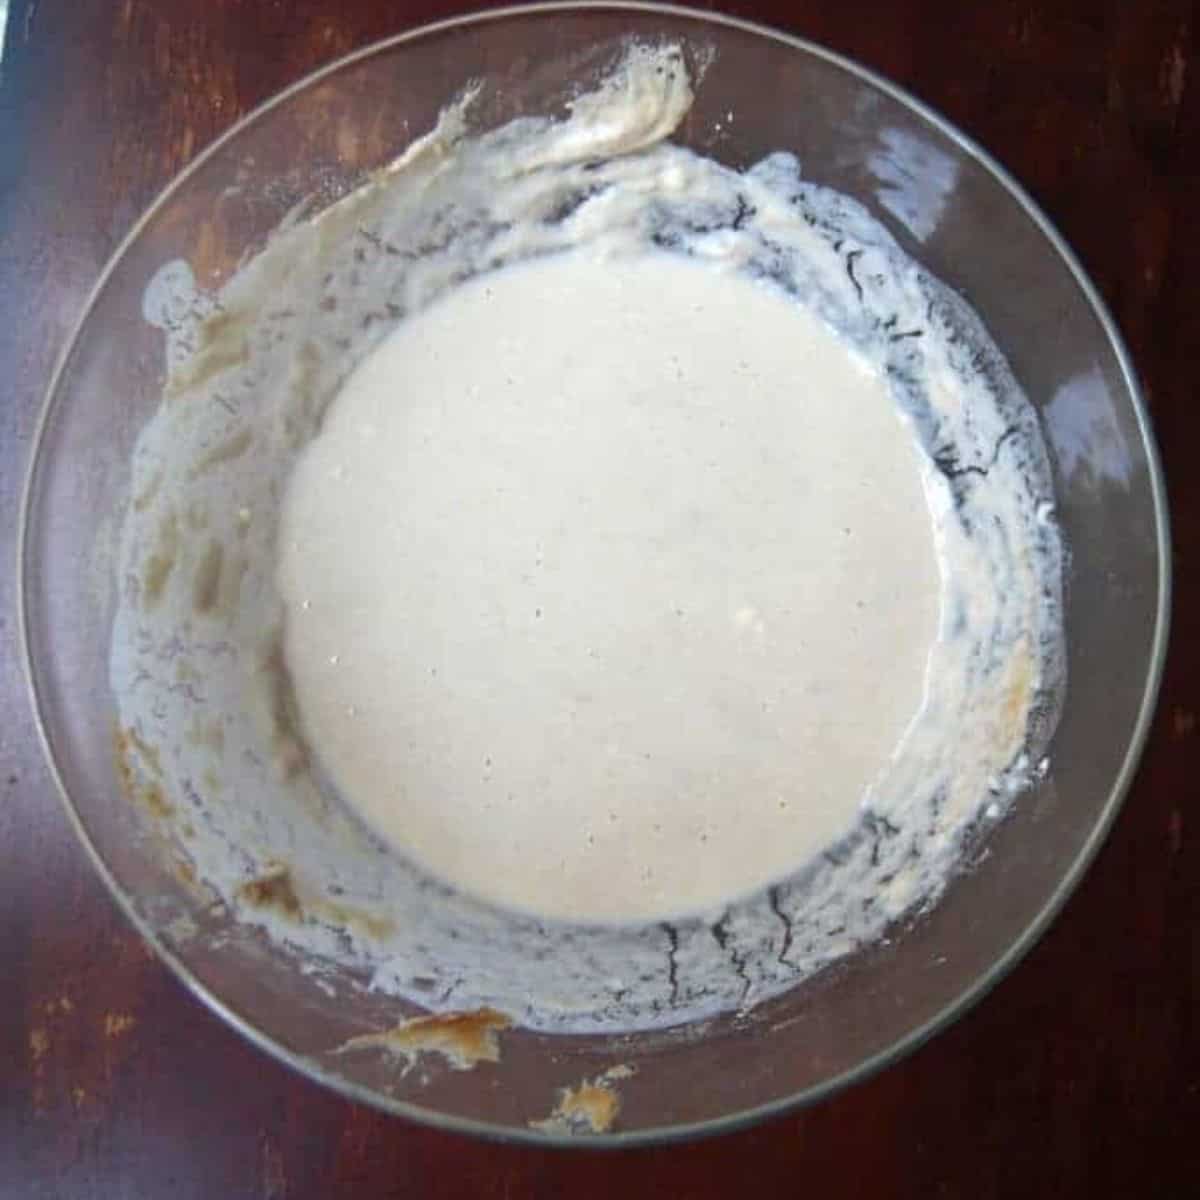
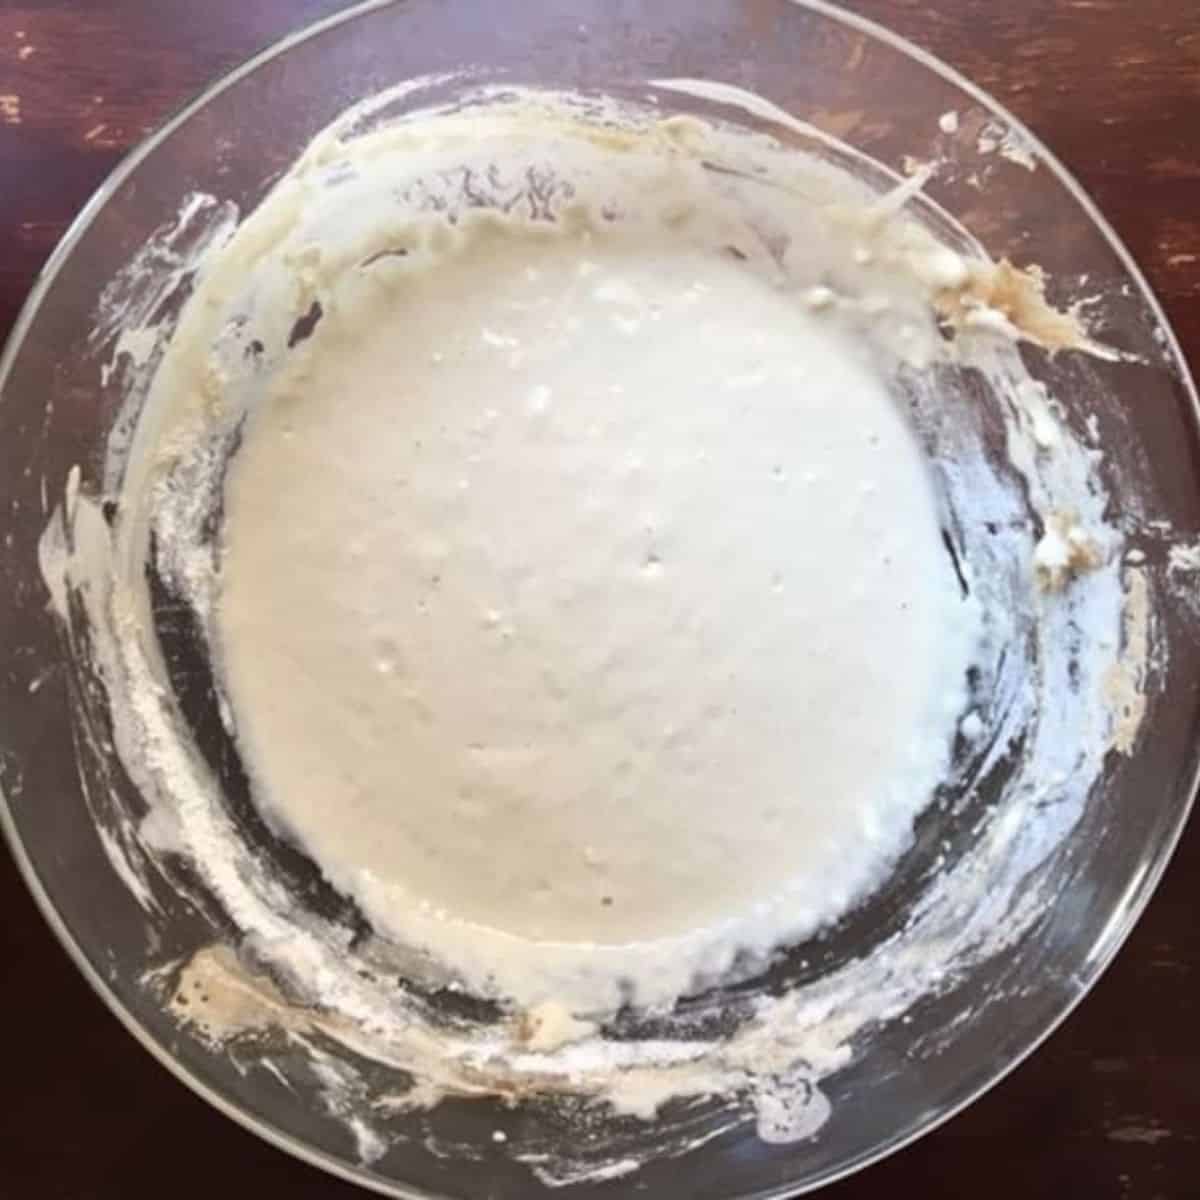
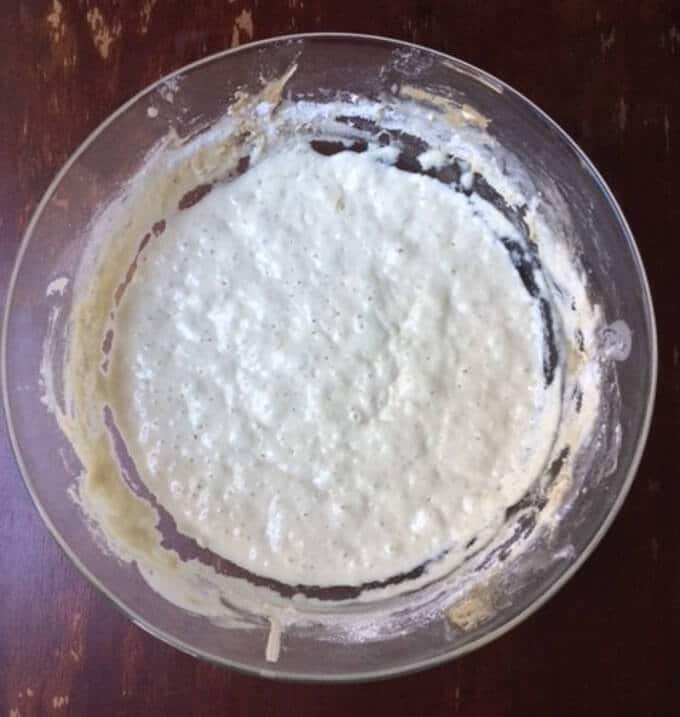
Add the water to the flour and whisk together to mix well. You should not have any traces of flour.
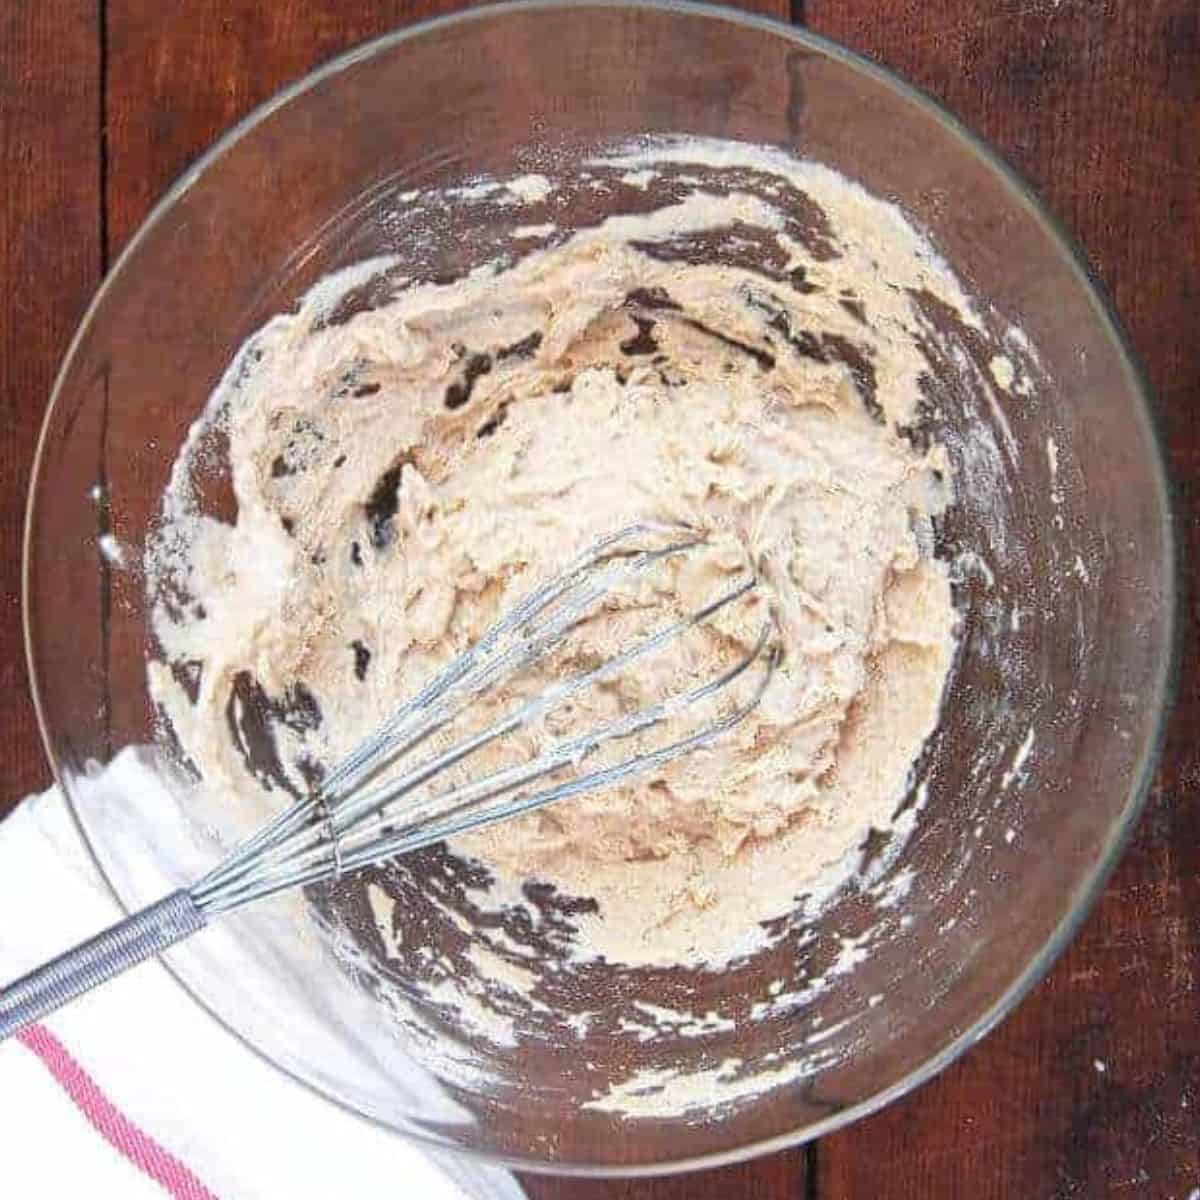
The sourdough starter should look like this after mixing.
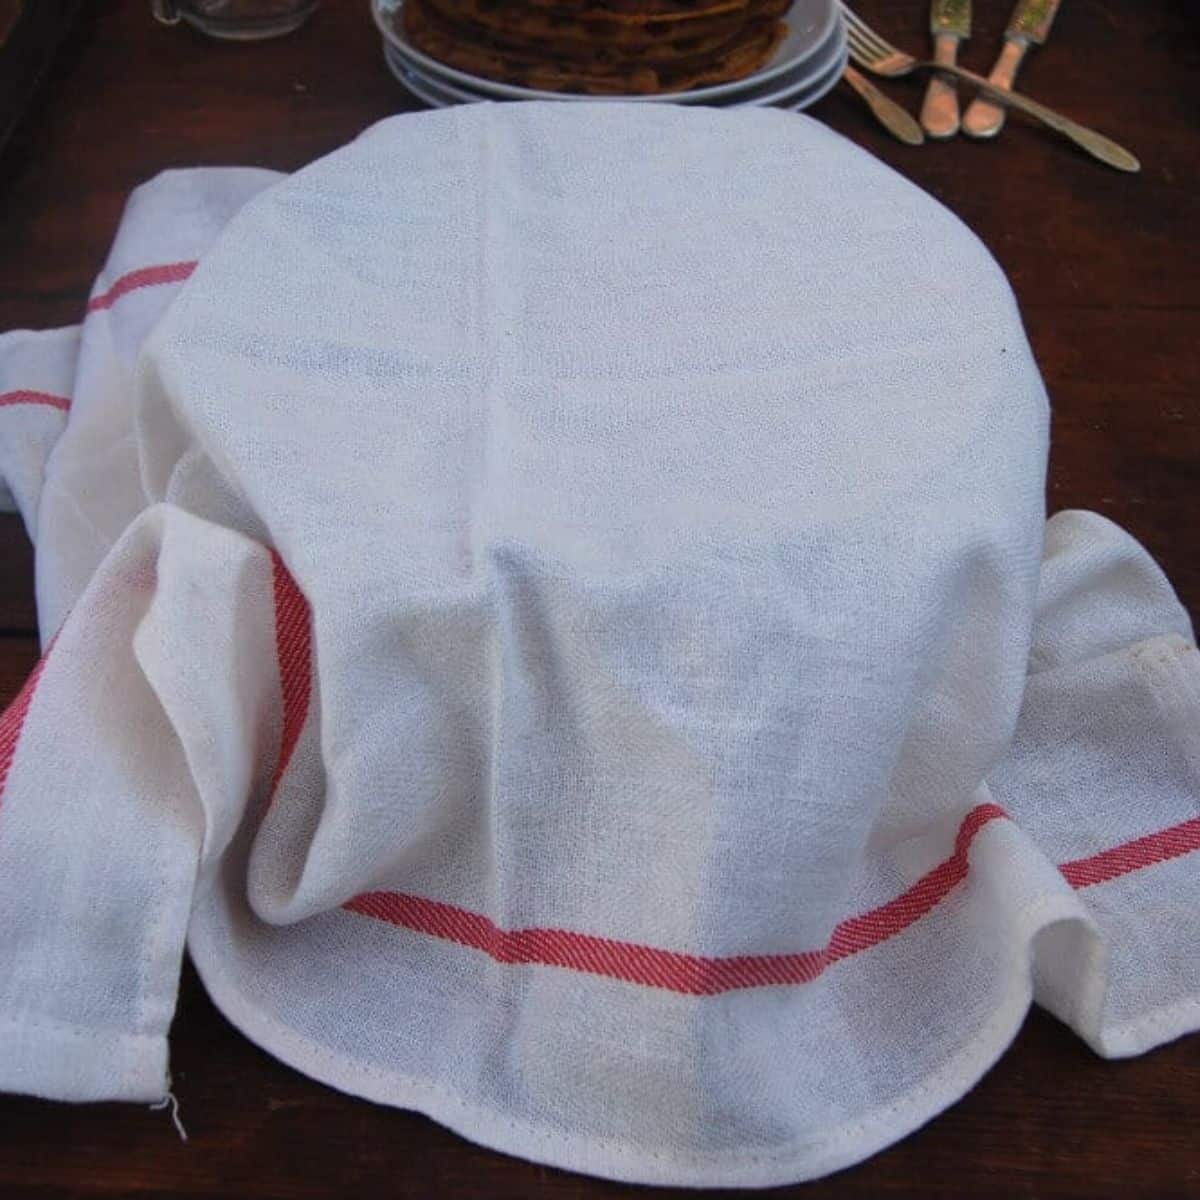
Cover the starter loosely with a kitchen towel. Set aside in a warm spot. A temperature of 75 to 80 degrees Fahrenheit (24 to 27 degrees Celsius) is optimal.
Day 2
On the second day, you might see some bubbles in the sourdough starter, or there may be none, especially if you are in cooler temperatures.
Either way, mix the starter well with a whisk or fork, measure out half a cup of the starter, and "discard" it. Add ½ cup unbleached, all purpose flour and ⅜ cup or 6 tablespoon or 90 mils of warm, non-chlorinated water. Mix well and again, leave in a warm place. You will start noticing that your starter lightens in color with the addition of all purpose flour.
Day 3
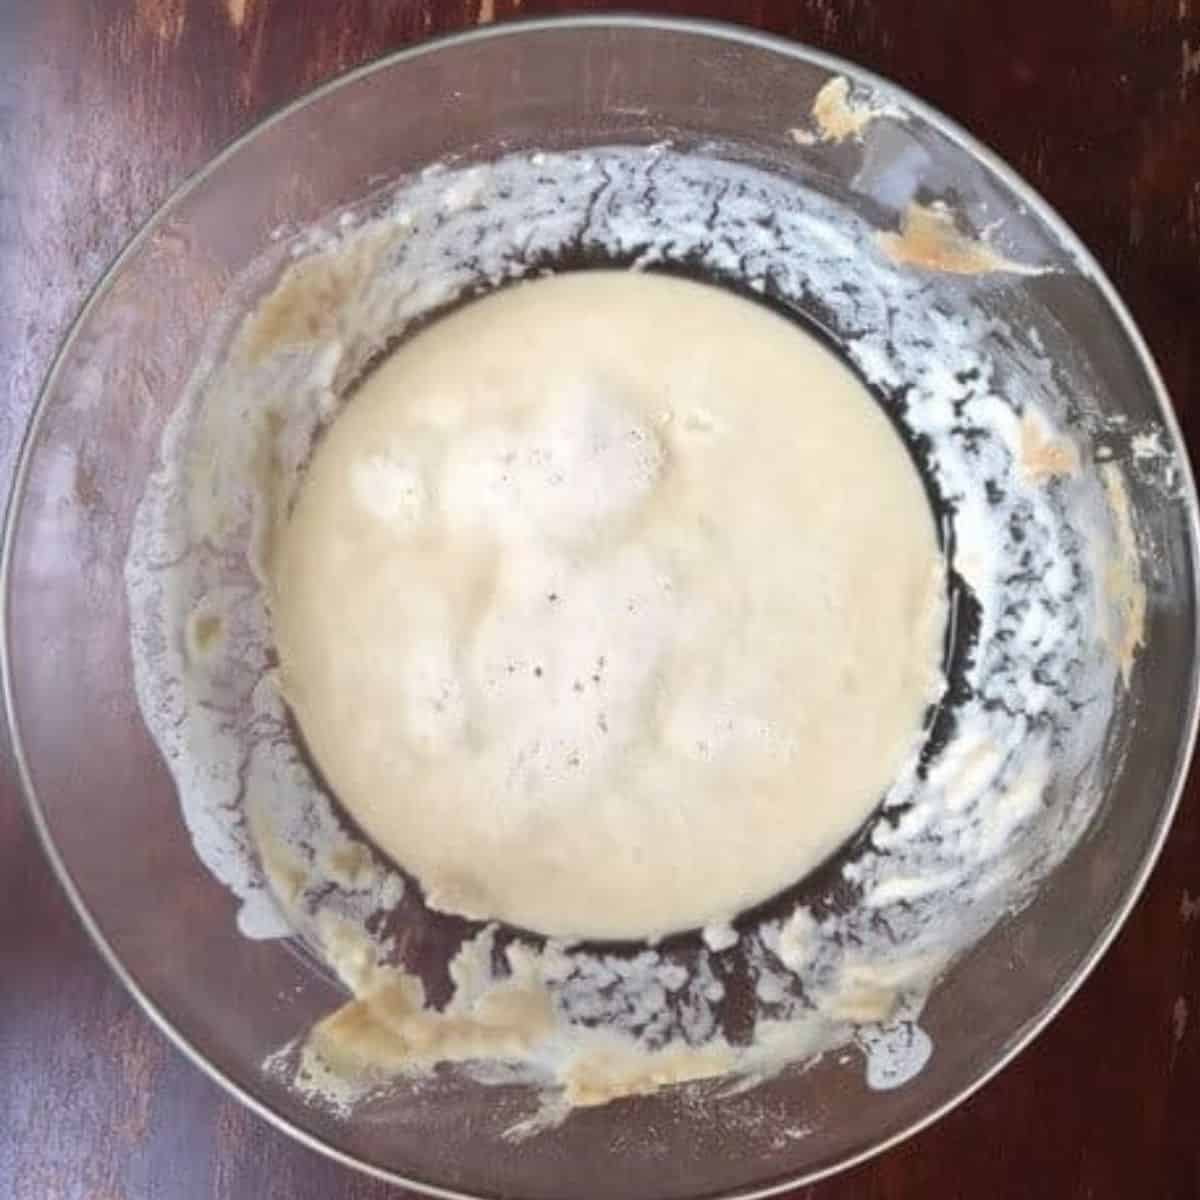
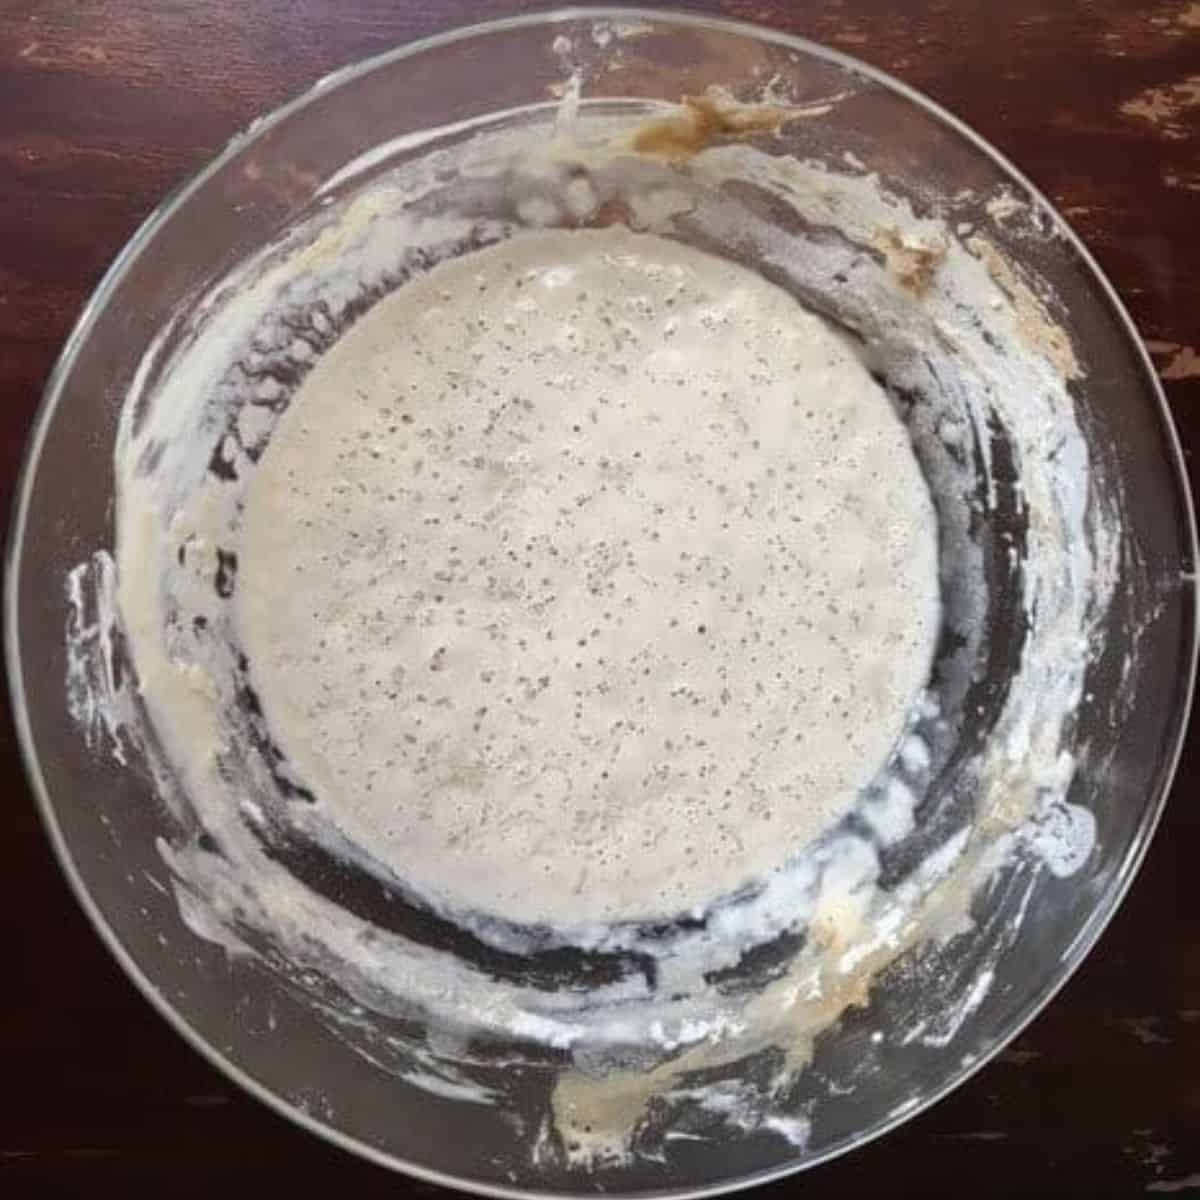
By the third day you should see some bubbling activity in your starter and also a fruity aroma. There may also be some darker liquid on top.
Mix the starter, discard half a cup and feed by adding half a cup of all-purpose flour and ⅜ of a cup of water (90 mils or 6 tbsp).
Day 4
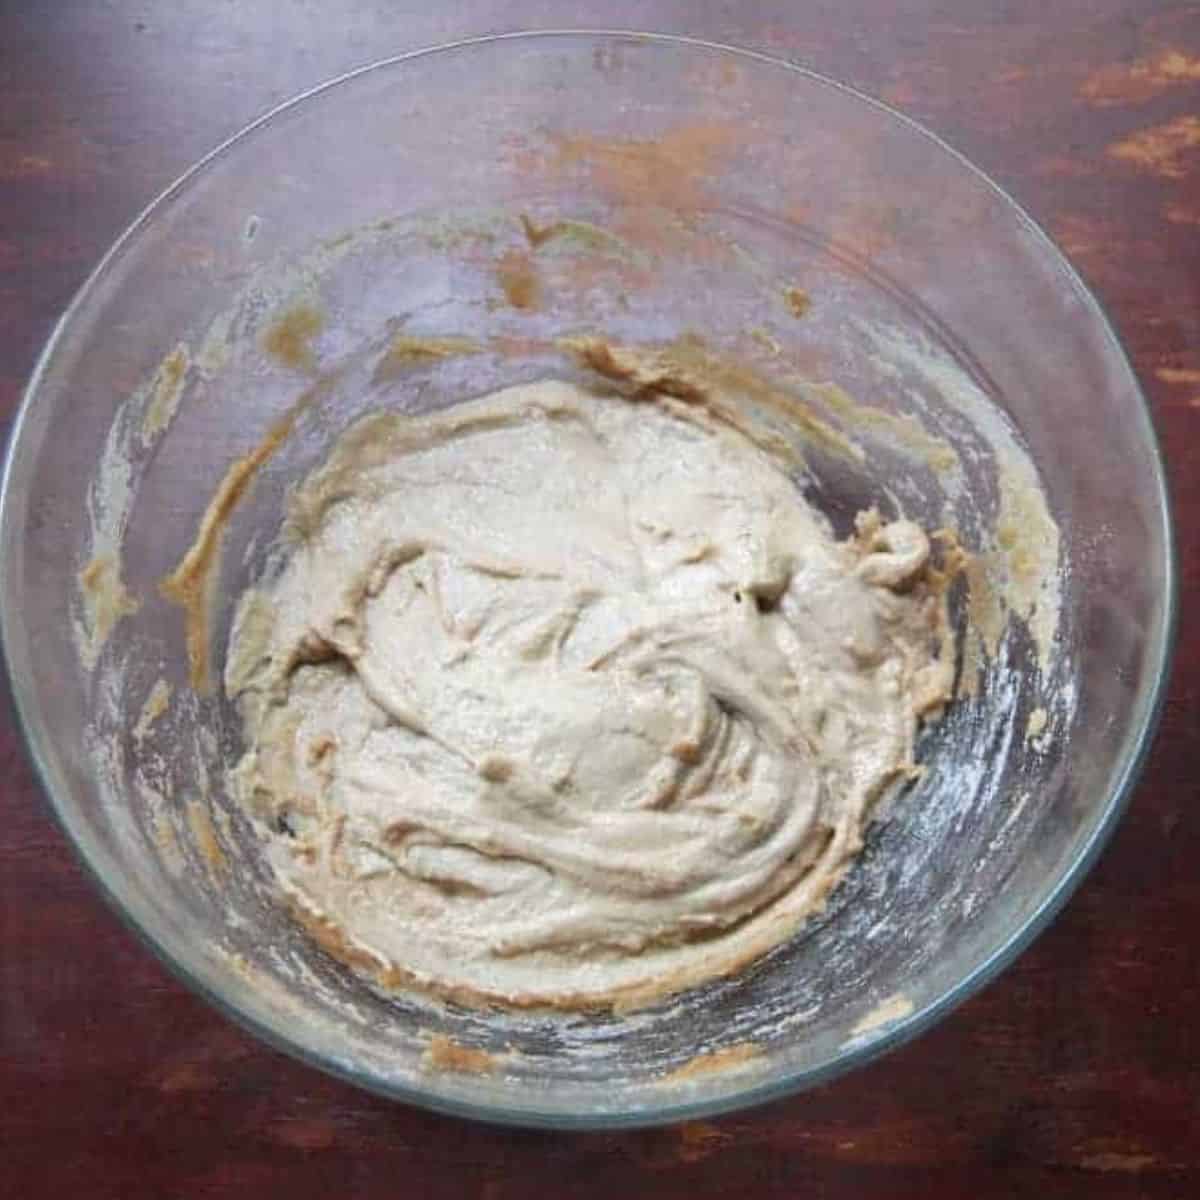
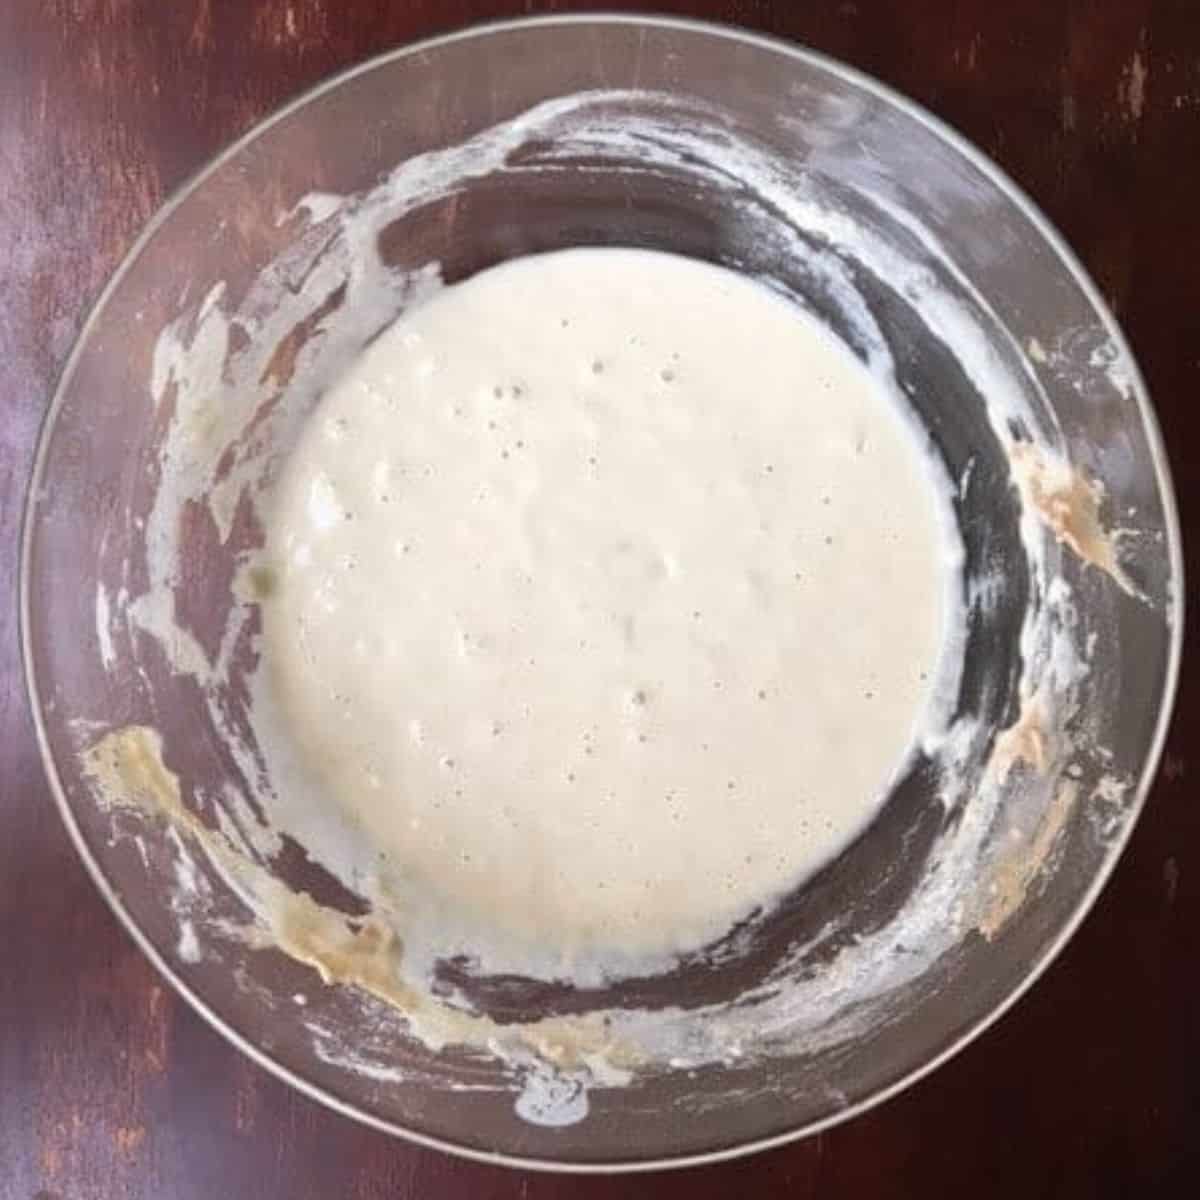
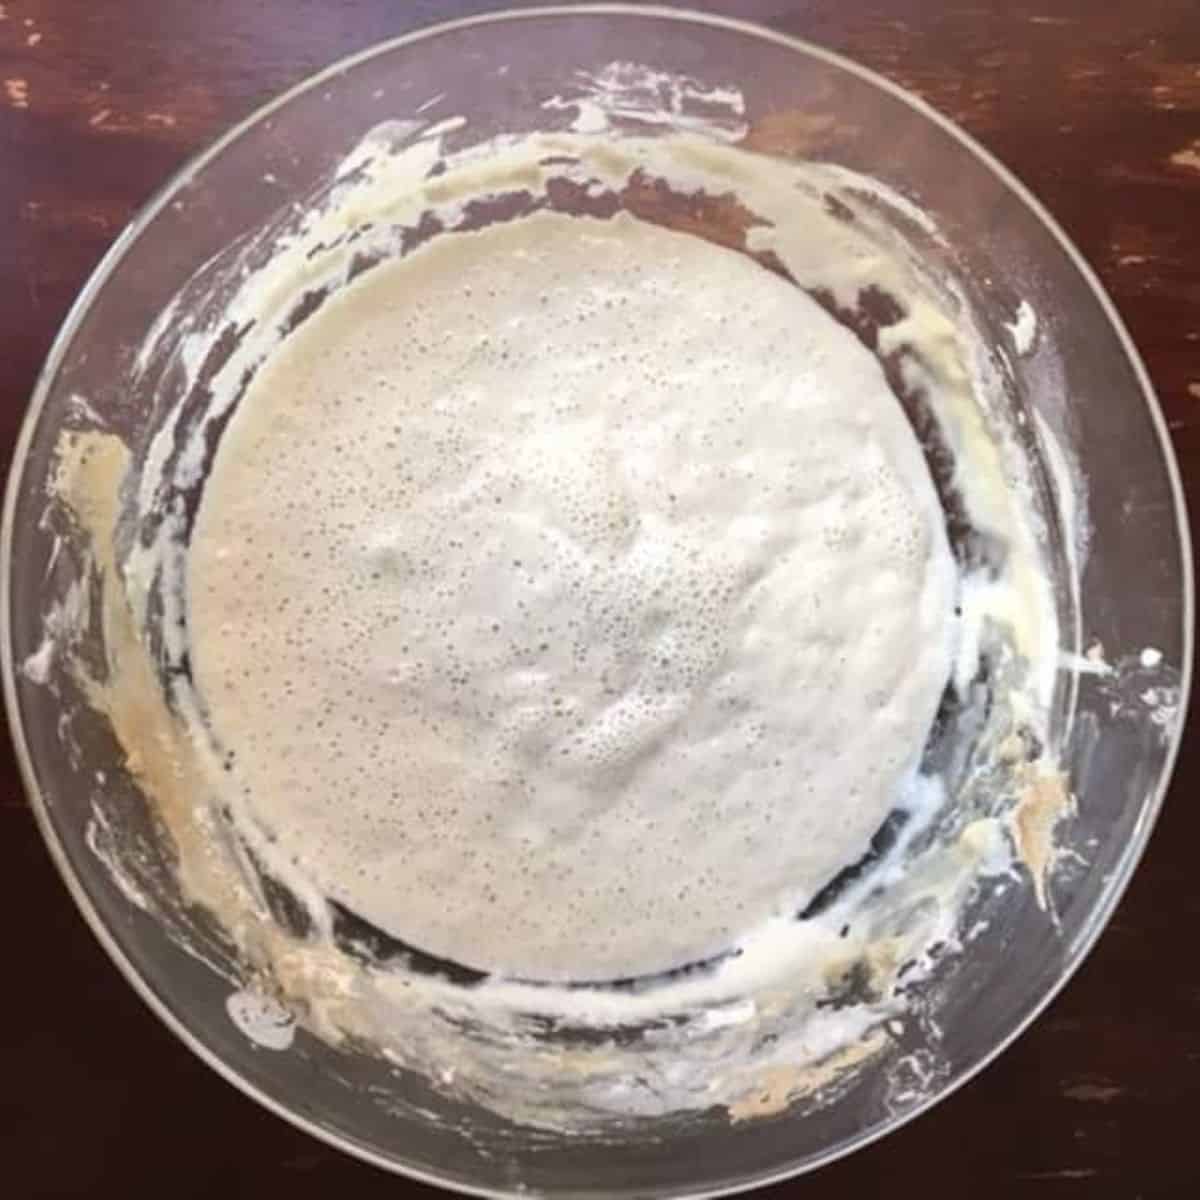
On day 4 the sourdough starter should look quite bubbly and active.
Once again, mix the starter, then discard half a cup and feed by adding half a cup of all-purpose flour and ⅜ of a cup of water (90 mils or 6 tbsp).
Day 5
On the fifth day the sourdough should get quite bubbly, especially about 10 minutes after you feed it. If your sourdough starter isn't showing much activity you can bump up the feedings to twice a day to help it gather strength.
Day 6
The sourdough should be quite strong now and should rise easily after feeding.
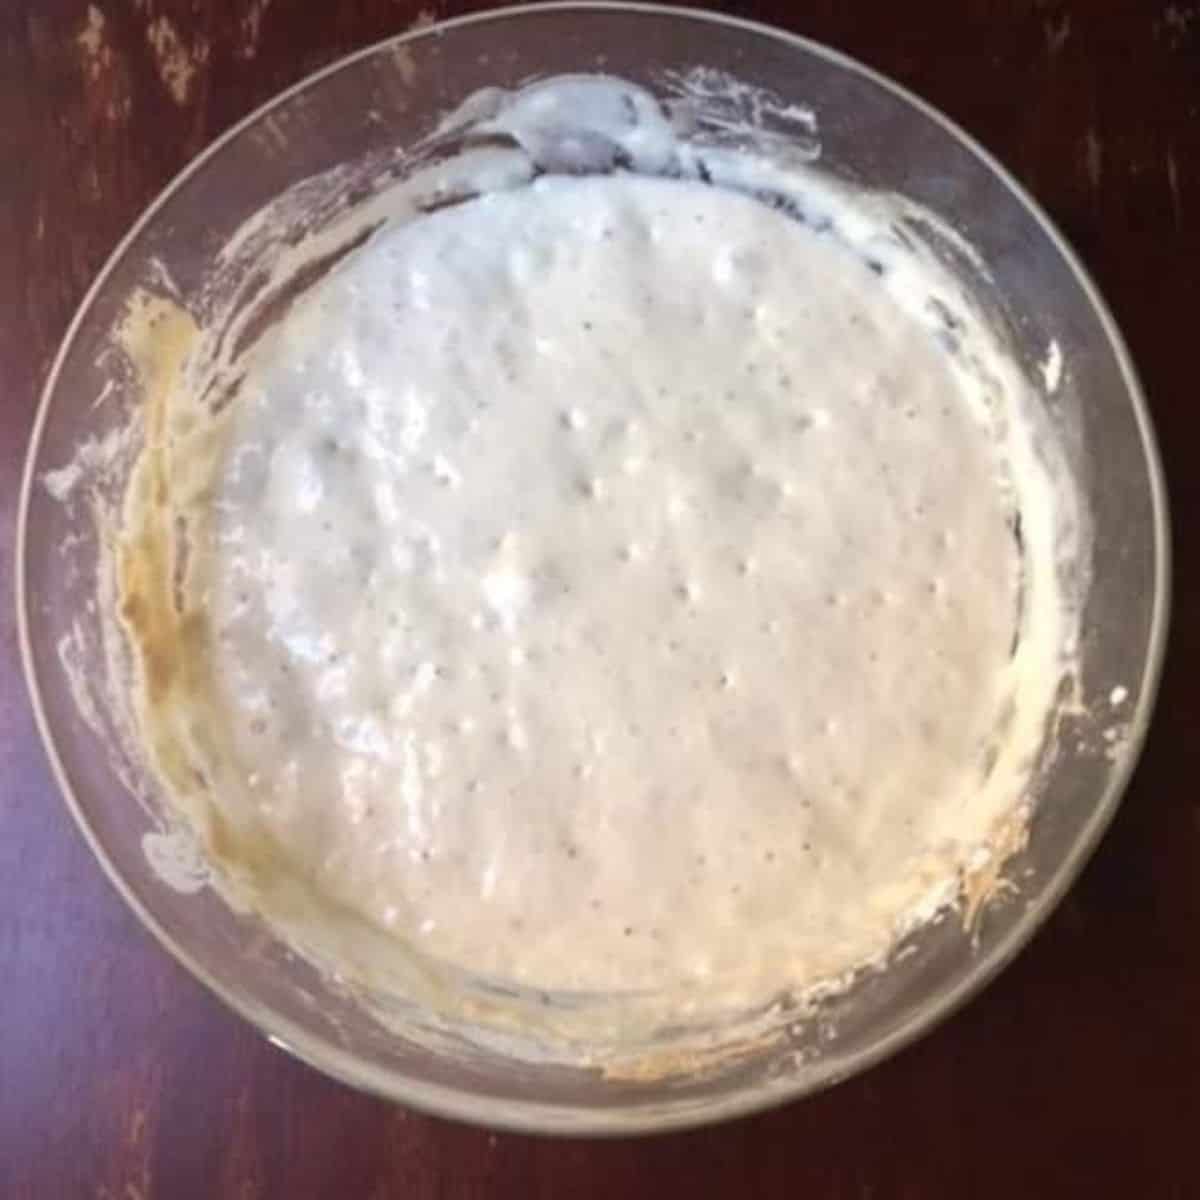
Feed the starter once or twice on the sixth day, depending on how strong it is.
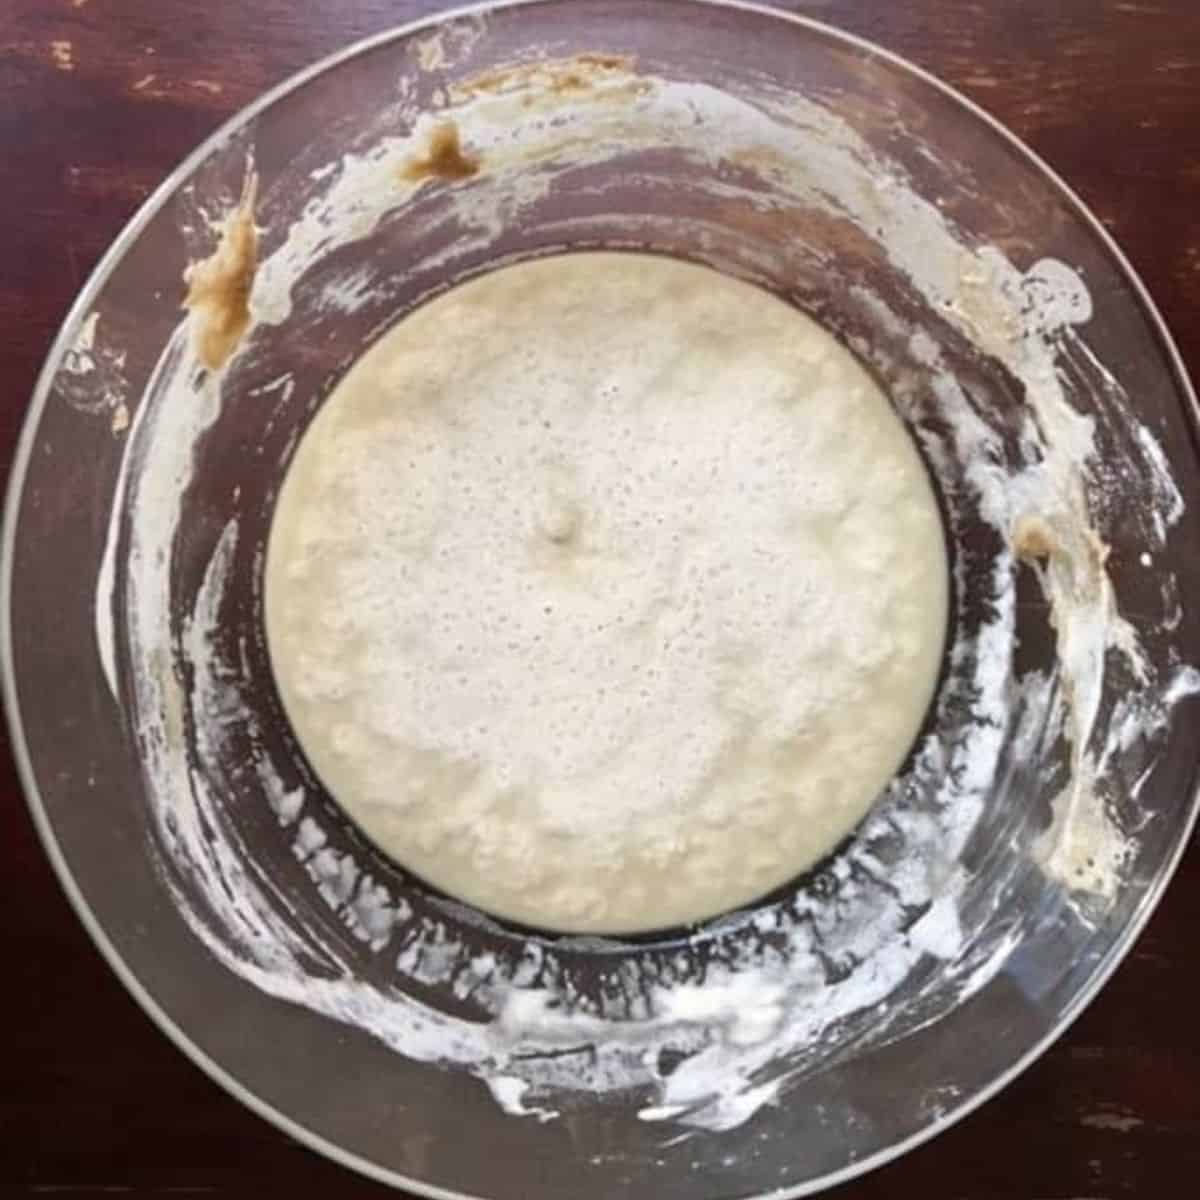
Day 7
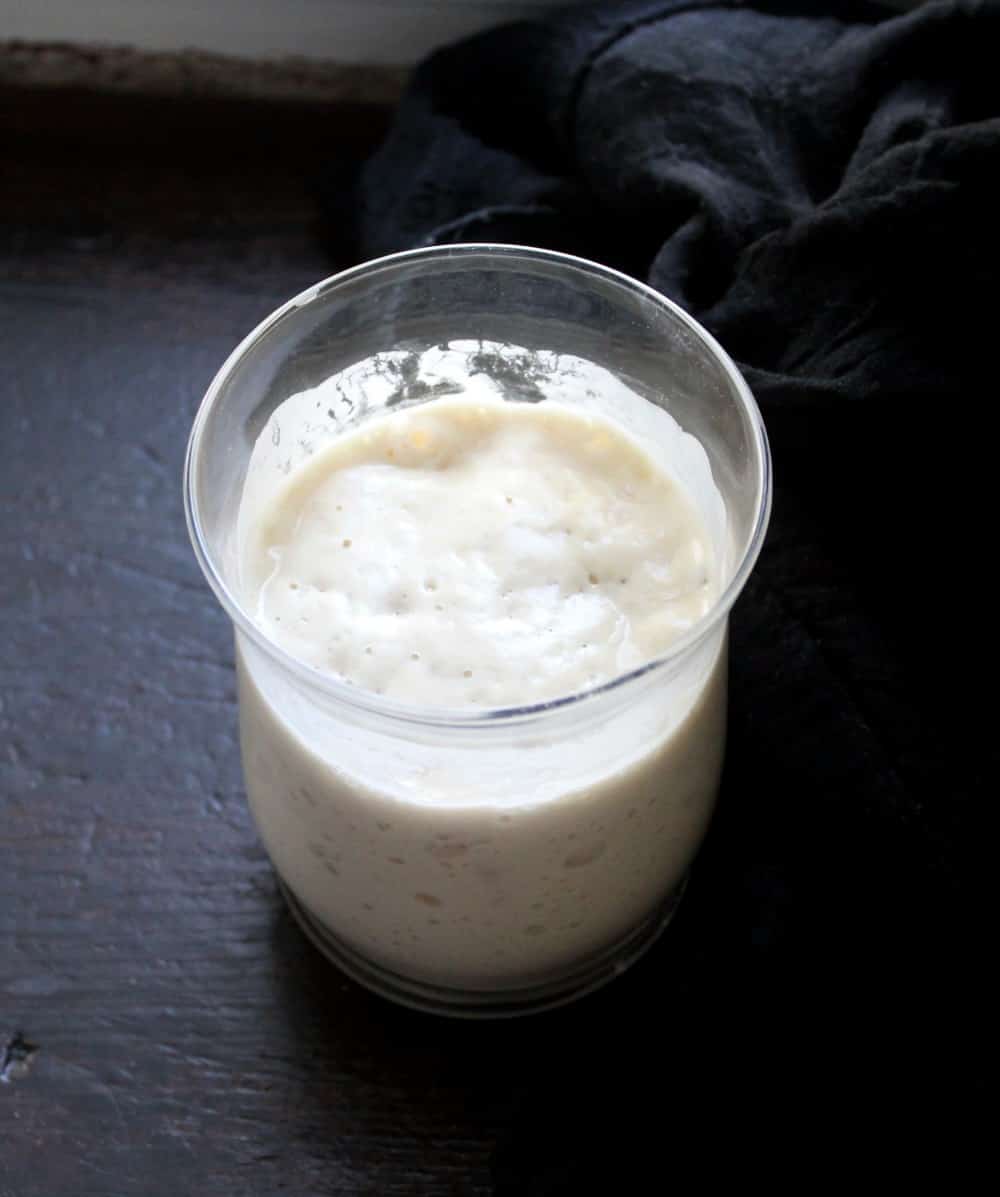
By the seventh day, your starter should be ready to use. It should look healthy and bubbly, like in the picture above. If your sourdough starter is still slow in developing, continue feeding twice a day and keep it warm. It will eventually strengthen.
How to use sourdough starter
To use the starter, mix it well, especially if some of the liquid has separated on the top. Then take out about the amount of sourdough starter you need to bake with, and replace it immediately. So if you take out 1 cup of sourdough, you should "feed" the remaining starter by adding to it cup of flour and ¾ cup of water.
Keep in mind that if you make my sourdough recipe and bake a recipe for sourdough bread from another cookbook or blog, you should first check what the hydration---or water-to-flour ratio---of their starter is. So, for example, if the starter they used has a lower hydration, you might need to cut back on the liquid in the bread recipe when you make it. If it has a greater hydration, you might need to add more liquid.
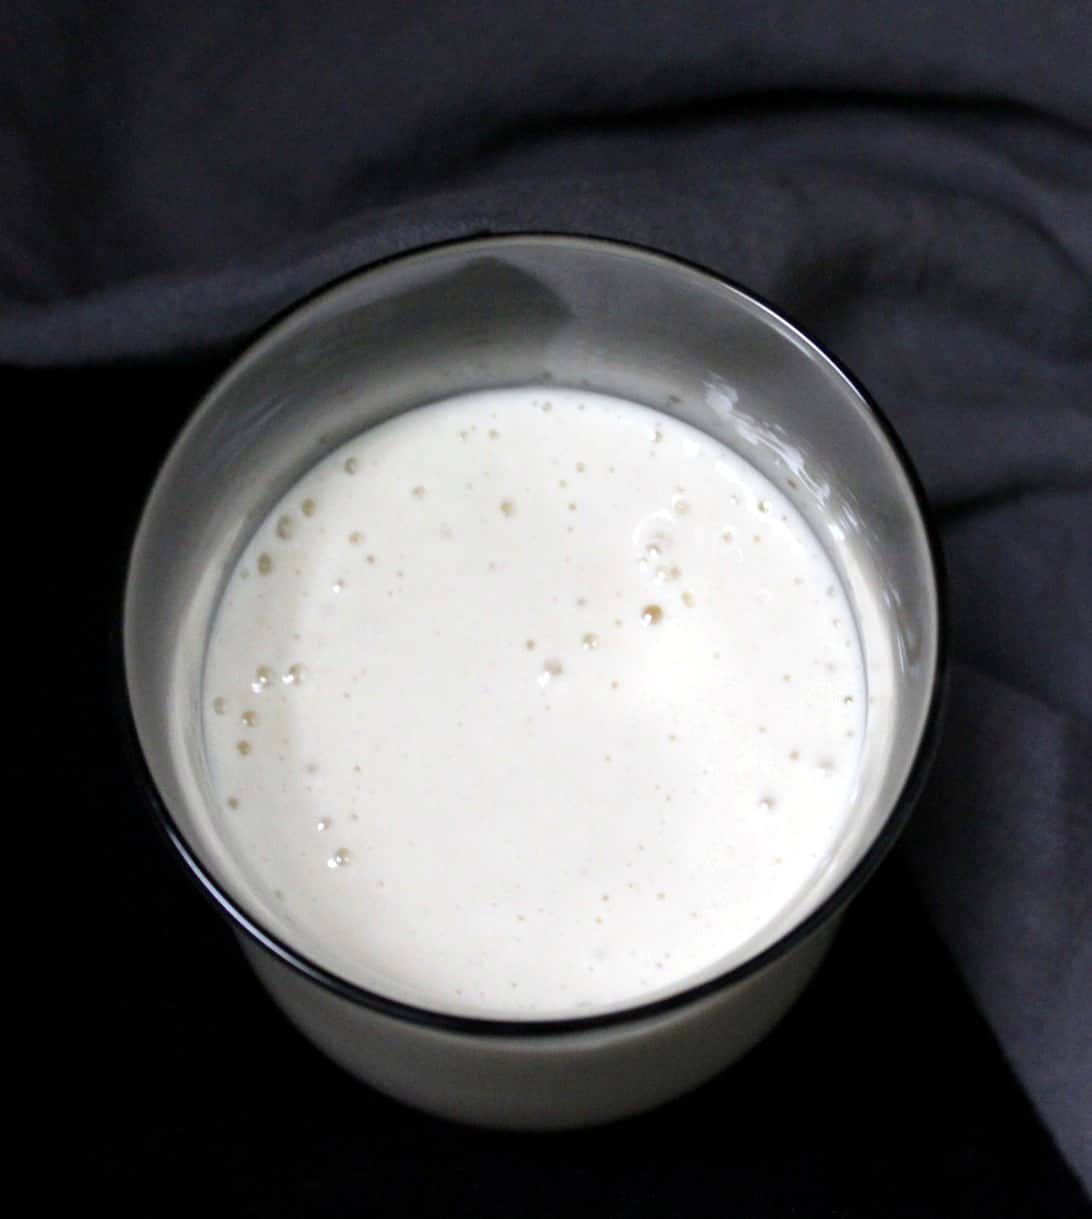
Here's a picture of my mature sourdough starter, a couple of hours after feeding, and then a day after he was last fed. He rose overnight and was beginning to fall back in the morning.

How to feed sourdough starter
It is good practice to feed your sourdough starter each week so it's ready--or close to ready--for baking at any time. But if you forget to feed it for a couple of weeks, or even for a month, don't panic. You might be able to revive your starter so long as it's not moldy and you refrigerated it in an airtight container. Don't go too long without feeding it, though, and do it as soon as you remember.
Sourdough starter FAQs
Sourdough starters in different temperatures perform very differently. For instance, if you're in 90+ temperatures, your sourdough might ferment too fast and taste extremely tangy within a day or two. On the other hand, in a cooler climate, you might not see any activity at all for a few days after beginning.
To get a strong and healthy starter that'll give you the best results when you bake and taste your baked good, you want to try and keep your sourdough starter in a room where the temperature is between 75 and 80 degrees Fahrenheit (24 to 26 degrees Celsius).
After seven days. You might find that the starter ferments more quickly in warmer temperatures, but to get the best flavor, try and keep your sourdough in a room at a temperature no more than 75 to 80 degrees Fahrenheit. Feed it every day for seven days.
Yes and no. You can make a sourdough starter with any proportion of water and flour but the hydration will matter for the baked goods recipes you'll make with it because it will change how much liquid you will need to add to that particular recipe.
If you do accidentally add more or less water to your starter, don't worry, it won't go belly up on you. Just continue feeding it in the right proportions in future and it should be fine.
You will know it's ready when it starts to rise within six to eight hours of feeding and gets really puffy.
The sourdough starter, once it begins to bubble, will have a smell similar to buttermilk. It should smell fresh and somewhat fruity, and not moldy or spoilt.
A sourdough starter will keep for years, even decades, and there are sourdough starters out there that are family heirlooms. A mature, well-established sourdough starter is a treasure - one day you might pass on this gift of good health to your sons and daughters.
For the first seven days, between feedings, leave your starter outside at a room temperature of no more than 80 degrees F. Make sure it's covered with a kitchen towel.
If you find that your starter is forming a hard crust on top, but otherwise appears to be developing nicely, stir it, feed it, and cover it with something more airtight or even cling wrap after the first couple of days.
Once your starter is ready, you can store it in the refrigerator. Each time you feed it, leave it out at room temperature for a few hours or until it gets puffy and expands, then put it back in the fridge.
No. One of the reasons you discard a portion of the sourdough each time you feed it because you don't want the sourdough starter to keep growing. The other is that your starter will grow stronger if there's more food for the hungry yeast in your starter. If you don't discard, there will be more hungry yeast cells competing for the same food and they won't grow as strong, see?
You don't have to waste a drop of your discard. See my post on easy recipes for sourdough discard. You can also add the sourdough to flatbreads like this sourdough roti from day 1.
You can also share your discard with a friend so they have their own sourdough starter without making it from scratch. Just give them a quarter to a half cup of discard and ask them to begin feeding it, preferably with a cup of flour and ¾ cup of water.
Troubleshooting tips
- Not enough starter for a recipe. If a recipe calls for, say, two cups of starter, just make sure you feed your sourdough starter the day before with more flour. Stick with the correct proportions of water and flour.
- Sourdough starter not bubbling after a few days of feeding: This could be caused by cool temperatures. Remember the ideal temp to maintain sourdough is between 70 and 75 degrees Fahrenheit. In cooler temperatures it might take a while and extra days of feeding for your starter to kick off.
- Sourdough starter getting too bubbly, too tangy, too fast: Just as cold temps will delay your starter process, extremely hot climates will make it act like it's on steroids. Again, make sure you move the starter to a cooler part of your house, where the room temperature is no more than 75 degrees.
- Sourdough bread made with starter doesn't taste tangy enough. There could be two reasons for this: your sourdough starter is either really new, or your starter was just fed. Starter that's just been established will not taste tangy enough because it just hasn't been around that long. But don't fret, it will still have loads of flavor and with regular feeding you will get there. And you'll still be able to make great bread and other baked goods with the starter. If your starter is mature with a lovely tang, but you recently used most of it up and fed it and then used it again the next day to make bread, you might find that the starter simply doesn't have the same tang (although it will develop faster once your sourdough has matured further).
- Brownish/grayish/blackish, hooch-like liquid forming on top: This does not mean your sourdough starter has gone bad, it just means it's hungry. When you are still creating the starter, just stir it back in and feed your starter. Once your starter is established, and you see the liquid on top, you can either stir it back in or, if it's too strong-smelling, pour it off, then feed the starter.
- Sourdough smells like acetone or nail polish remover: This just means the starter--or rather the bacteria in your starter--are hungry, and it's time for feeding.
- Forgot to feed starter: Not a biggie, just feed it immediately and continue feeding according to schedule.
- Added too much water to starter. Is it spoilt? No. You can't spoil a starter by adding too much water to it. See the hydration tips in my FAQs above for more detail.
- Neglected the sourdough and now it looks dry: Don't beat yourself up if this happens, it's happened to me, more than once. An established sourdough starter is extremely hard to kill. To revive a dry but not moldy sourdough starter, pour some filtered water into the container, let the sourdough starter sit for some time, and then try to stir it until you have a smooth paste. You can discard some of the starter at this point and feed it for 2-3 days, twice a day, to build up its strength. (I once spent two to three days soaking and crushing my dry sourdough starter between my fingers to crumble it up (it was my gluten-free starter which dries more readily), but I brought it back to life and it's bubbling away now. :)) Try not to get to this point, though!
- Sourdough starter has pink or orange streaks and it smells moldy: If you have an established starter that gets moldy, you may be able to save it in some cases. If the mold is only on top, carefully skim the layer of mold off and save a small amount of the clear starter underneath. Place the retrieved starter in a new container and feed it a few times to build up its strength. But if the mold has penetrated through into the entire starter, just discard it and start over.


Debbie says
I can't wrap my head around the way you feed your starter. I take out what I need for baking, I know how many grams I have left and add equal amount flour and water. For example 20 g starter left so 20 g flour and 20 ml water. Sometimes a couple of more ml water if it seems too stiff. To me that is ~100% hydration. But I can't figure out what your hydration is? Is it 75%? Because I made your crusty sourdough rolls and the dough was definitely too wet. They turned out good though. And 2nd question, can I do a cold ferment? Thank you!
Vaishali Honawar says
Glad you enjoyed the sourdough rolls and yes, you can do a cold ferment. It would take longer, as you know. And yes, the hydration is 75 percent.
John says
I dehydrated my starter, which I had for three years. Can I add that to my new starter and rejuvenate my old starter?
Vaishali Honawar says
That should work!
kelly perkowicz says
hello,
i am just about to make my first sourdough bread, using your starter. very excited, however how do i store it in the fridge. do i put a lid on it or keep the cloth on it. i would store it in a saved yogurt tub. would that be ok?
thank you
Vaishali says
You can save it in any airtight container in the fridge, preferably a glass container. A lid is better because a cloth could cause it to dry out.
Cheryl A Pugh says
Hello, My name is Cheryl, we left a big city and moved to a small town of 1700 people to retire. I am so happy to have found you can can not wait to try some of your recipes soon, specially as the cool weather is starting. I love soups and stews and homemade breads. Comfort food at its best.
Vaishali says
Hi Cheryl, congratulations on your move. You are living the dream. ❤️ I hope you will love the recipes here. I have lots of soups and stews and breads so be sure to look around. 🙂
sasha rea says
I was wondering, after the 7 days and when leaving the sourdough discard in the refrigerator do I continue to feed 2 times a day or not?
Vaishali says
No, you should just feed it once a week or a few hours before you need to use it to make a recipe.
Anonymous says
thank you for replying also one more question,how much do i feed it now and do i still have to discard 1/2 cup when i feed it?
paul h. housman says
Do you have to use all purpose flour to feed your starter?? Why can't you continue to use the whole wheat???
Kim and David Korevaar says
We have a starter and named it "Fread."
Get it?
: - D
Vaishali says
Very nice! 😂
Julia L Davis says
My starter is on day 4..I forgot it was in the oven, and started to preheat for baking something else. It got to about 300, before I realized it was in there...Is it ruined..?
Vaishali says
Hi Julia, I would say it is dead, unfortunately. But you can watch it for a bit and see if it is still bubbly and indicates any signs of life.
Natalie says
I just wanted to first say my starter has been going strong thanks to your clear instructions. Now that it's not summer, it's not runny per my last comment 🙂 But I have a new problem:I just started the process for your no-knead artisinal bread and when I replaced the starter, I accidentally used King Arthur Bread flour instead of the all purpose. First time I've ever made this mistake! What should I do?
Vaishali says
Don’t worry it will be fine. Just feed it with all purpose flour the next time. The bread flour won’t hurt the starter.
Natalie says
I've had my starter for a few months now. However, I've noticed that the past few weeks, it is very runny. I am pretty good about following your ratios when I replace it after I use some. I keep it in the fridge and use it once a week. I need some advice please! I don't want to hurt Breadface 😞
Vaishali says
Hi Natalie, the starter gets a bit runny in summer, I am not sure why. It won’t hurt Breadface, don’t worry! Love the name btw 😀
Aggie says
This is my first attempt at a starter. Do I have to use all-purpose flour to feed the starter? Would replacing it with whole wheat flour work fine?
Kayla says
This is my first time trying a starter. Do I have to use all purpose flour to feed it, or can I use bread flour?
Vaishali says
Bread flour is fine!