

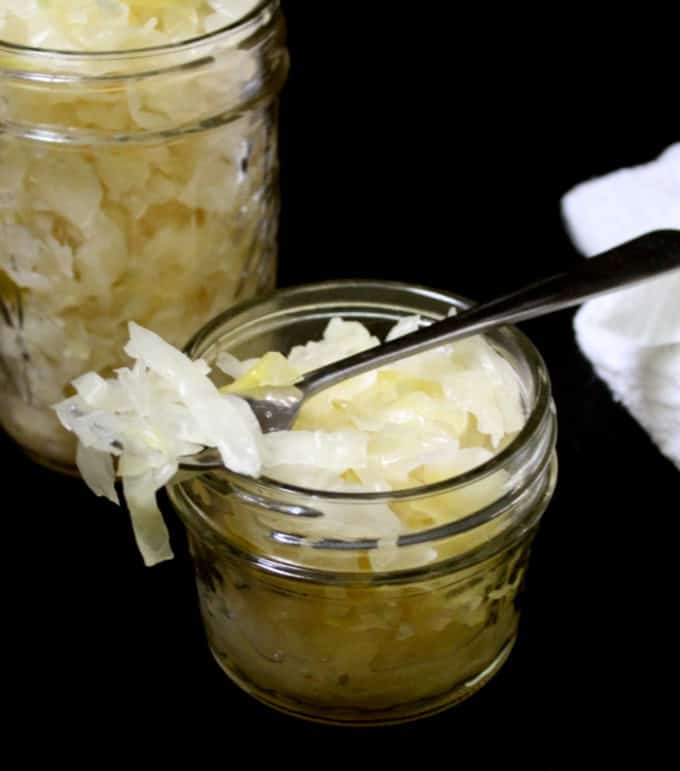
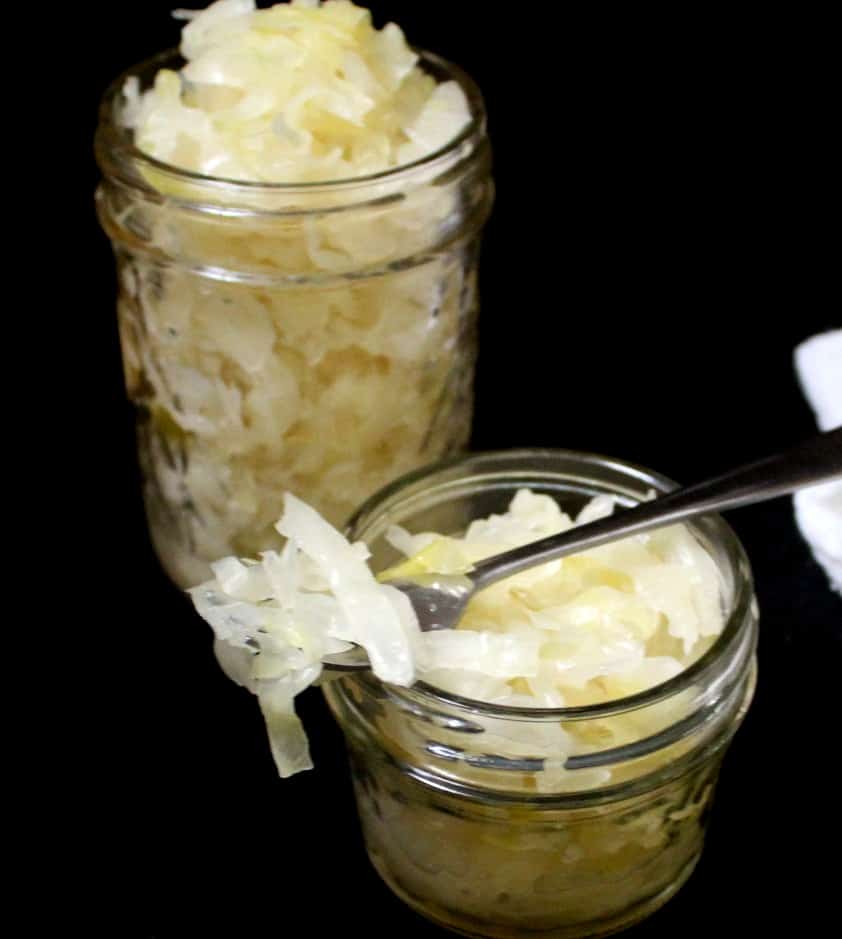
This recipe for homemade sauerkraut is as easy as shredding a head of cabbage. It is loaded with gut-friendly health benefits and it takes under 15 minutes to put together. All you need are two ingredients--cabbage and salt--and you get to have so much fun as you watch that sauerkraut bubble up and come to life!
I'm sharing with you today my recipe for homemade sauerkraut, a condiment that's almost always in my refrigerator because of its amazing taste and immense health benefits.
I started making my own sauerkraut years ago, and I stuck with it because it's just so much fun to do.
For one, it's the easiest thing anyone can make. All you need to do is shred cabbage, add salt, and then knead and massage the cabbage until it lets go of the juices inside it. It's immensely therapeutic work and once you've got the hang of it, you'll be looking forward to it.
As your sauerkraut ferments, you will love checking on it and seeing it bubble up with life. 🙂 And after it is ready, there is so much you can do with it, besides using it as a topping for your veggie burgers and sandwiches, or stirring it into a salad. You can add it to dishes like mashed potatoes to make them healthier, and even some cooked foods (studies show that the benefits of probiotic foods are not altogether lost during cooking). If you have a salty tooth, like I do, you could even just eat it by itself.
I've been meaning to post this sauerkraut recipe for a while, and some of you have asked for it, but I wanted to wait until I could begin a new batch so I could show you, step by step, how I make it.
There's not much of a recipe here, so this is going to be more of a tutorial. I'm going to attempt to answer common questions that could come up as you make your sauerkraut, and help guide you through some of the most common pitfalls.
While making sauerkraut is easy, you do have to exercise some care to make sure the cabbage does not get moldy. But that's easy enough to avoid so long as you follow instructions and understand what you need to do to make sure the cabbage is not exposed to the elements during the fermentation process.
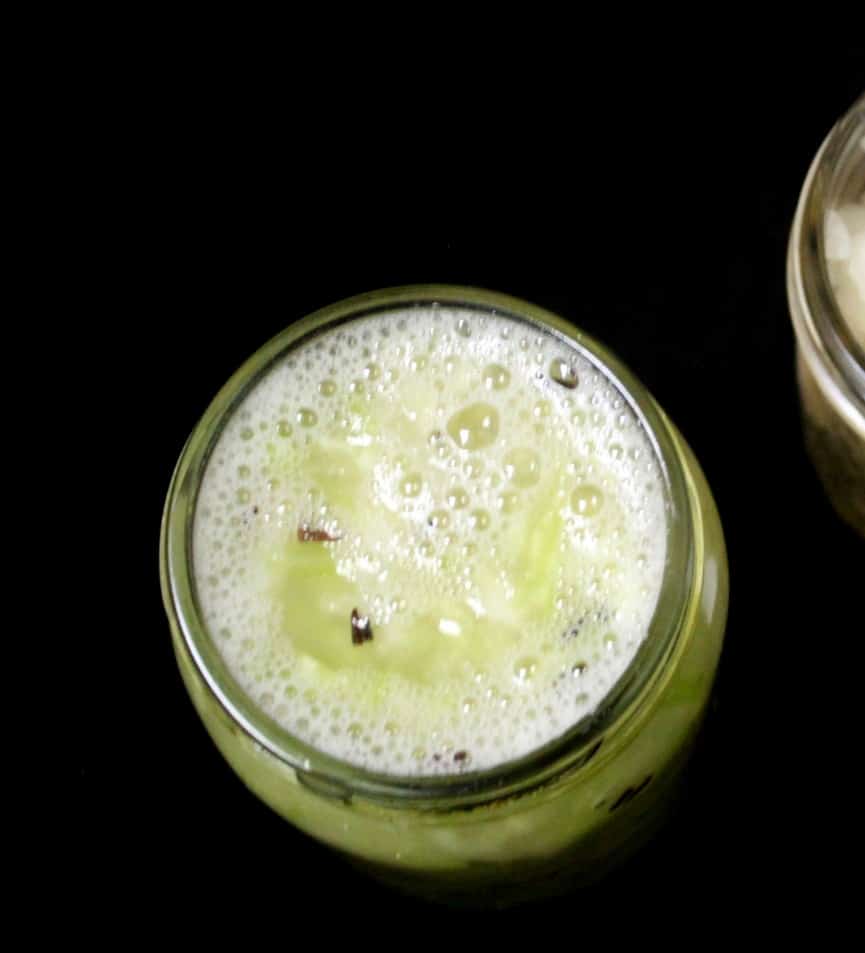
To be clear, you are not going to see daily changes in the sauerkraut the way you would with a sourdough starter (and I hope you already have one of those). But you will see the cabbage soften and change color and you'll see some bubbling as the good bacteria go to work on the cabbage.
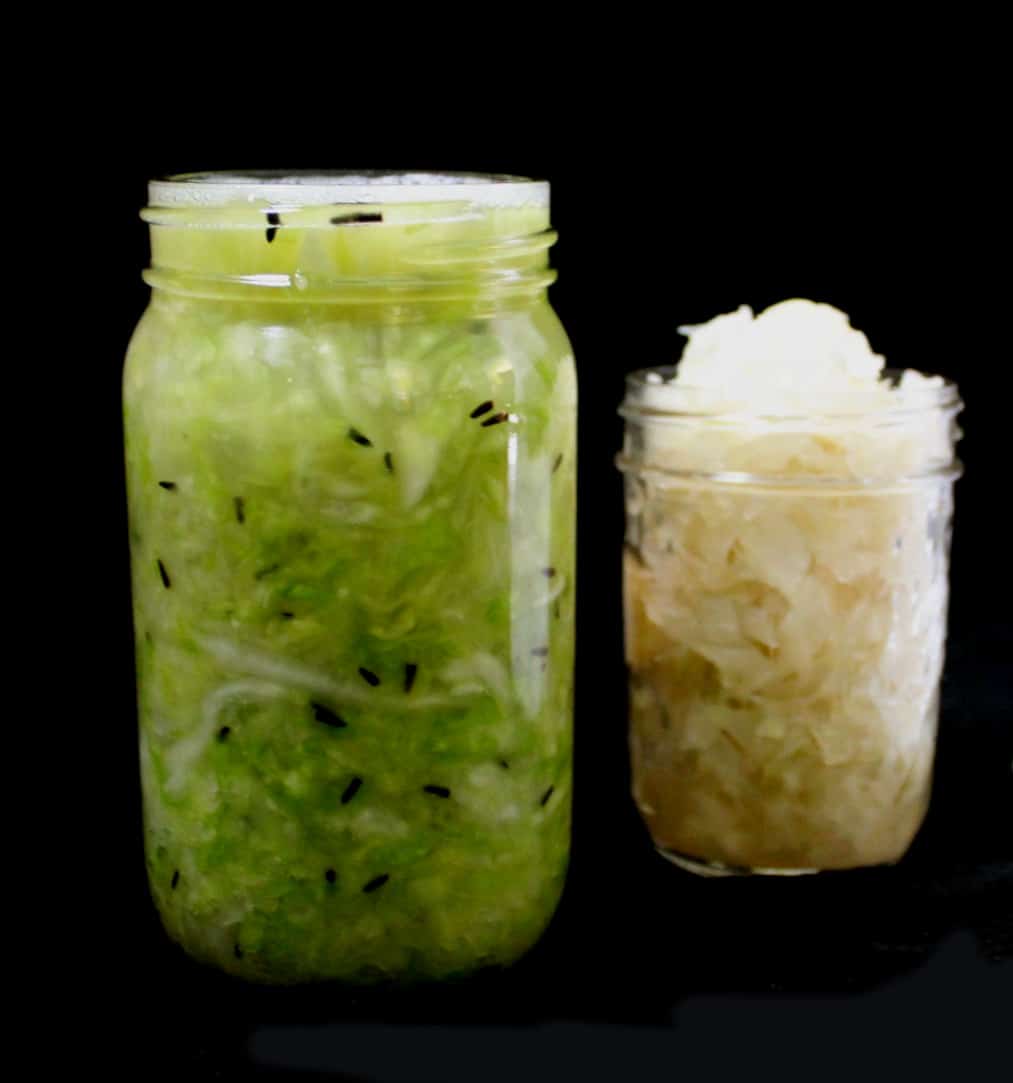
I used green cabbage for my sauerkraut this time, but you can use purple cabbage as well. And although the sauerkraut is delicious by itself, you can add in some flavors to it, like caraway seeds, ginger and dill.
Table of Contents
The science behind sauerkraut
Sauerkraut is created by a lactic acid fermentation process. Once you've shredded the fresh cabbage and packed it into a glass jar with its own juices and the brine, you leave it alone to "pickle" for a week or so. The cabbage ferments over time, thanks to air-borne lactobacilli and other bacteria, which live on the cabbage leaves. The bacteria that populate the sauerkraut are the friendly kind, with lots of benefits for humans--benefits you get when you consume sauerkraut. You can use the basic pickling process used to make sauerkraut to make other fermented vegetables as well, including carrots and beets.
Why you'll love this sauerkraut recipe
- Easy recipe. Making homemade sauerkraut is easy and simple with just a few basic instructions and tools.
- So healthy. Sauerkraut is an amazing condiment. It is low in calories and utterly healthy. Sauerkraut contains friendly gut bacteria that will do your digestive system a world of good. It's also packed with healthy Vitamin C that will help keep your immune system working smoothly. And it's a great aid for weight loss.
- Delicious. It is just fermented cabbage but sauerkraut is one of my most favorite condiments because it goes with just about everything. It is perfect to pile onto burgers or cook into this Vegan Colcannon with Sauerkraut or Vegan Potato Sauerkraut Pancakes.
- Everyone friendly. There are no nuts, soy of gluten in sauerkraut and it's just cabbage and salt so it's vegan, of course.
Ingredients
- 1 medium head cabbage. Purple cabbage and green cabbage are both perfectly good here.
- 1 tablespoon salt. It can be pink salt or sea salt or kosher salt.
- 1 cup distilled or filtered water
- 1-2 teaspoon caraway seeds (optional)
Top tips
- Choose a good looking, preferably organic cabbage: It's best to use organic produce for pickling, and make sure the cabbage you use is fresh. Remove any wilting leaves or anything that's turning brown. You don't want that in your sauerkraut. Both green and purple cabbages are fine here.
- Shred the cabbage finely: And by that I do not mean throw it in the food processor. I am not above taking the help of a processor to shred veggies more often than not, but you really want to hand-cut the cabbage here because you want thin, even, longish shreds. I do this by halving the cabbage, coring it, then cutting it into quarters. Start shredding the cabbage as finely as possible. If you want shorter strands, cut them into halves or thirds, it really doesn't matter.
- Use the right kind of salt: This means you should not be using table salt or iodized salt, the kind commonly found in supermarkets. In addition to being devoid of any natural chemicals, like the ones you'd find in Himalayan pink salt, table salt and iodized salt have chemical additives that will inhibit the bacteria in the sauerkraut. Use the pink salt if you have it, or use kosher salt at a pinch.
- Take time to massage the cabbage: You need about 10 minutes of hands-on time and by that time the cabbage should have expressed enough juices to provide all the brine you need. I usually salt the cabbage, rub it in, crushing the cabbage shreds at the same time, for about two minutes. Then I leave the cabbage alone for 15 minutes or so and come back and continue massaging it. The break gives the salt enough time to soften the cabbage and release more juices, making my work a little easier. Although, like I said, it's a fun and therapeutic job you will really enjoy.
- Use a glass jar: Don't use plastic jars for anything that will be fermenting, it's just not a good idea. A glass mason jar with a two-piece lid is ideal because it allows the sauerkraut to vent. But if you don't have that, any recycled glass jar with a lid will work. In that case don't screw the lid on too tight, or just cover the mouth of the jar with cheesecloth while the sauerkraut is fermenting. You can replace the cheesecloth with a lid once the sauerkraut is ready to be refrigerated.
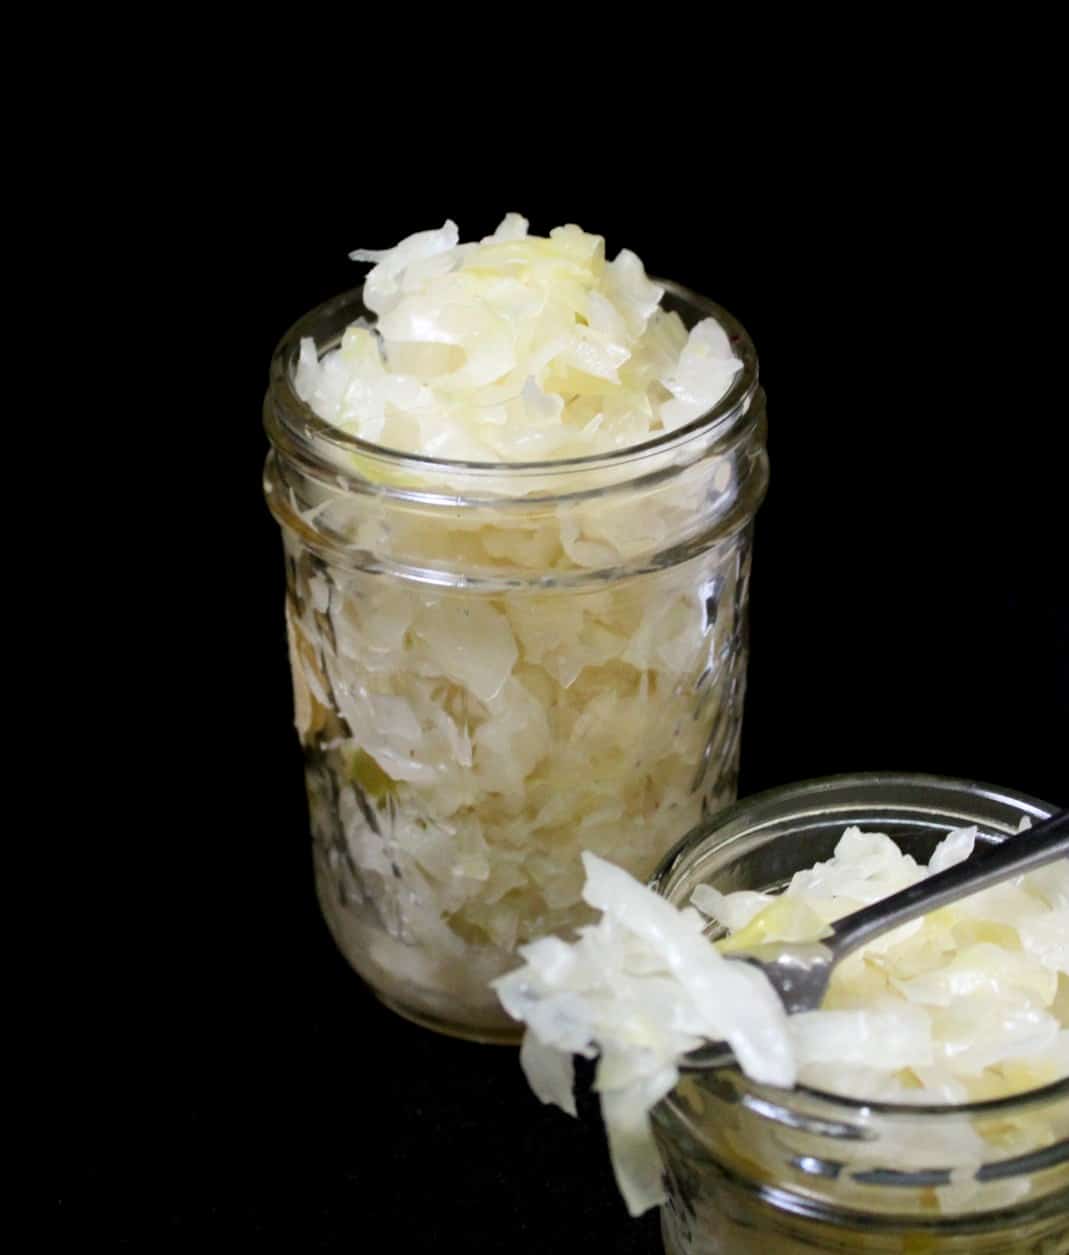
- Pack the cabbage tight into the jar: This is important because you want to minimize any air in the jar and also make sure that the cabbage remains submerged in brine. I do this by adding a couple of spoonfuls of cabbage to the jar, pressing down on it with the back of a heavy spoon, then two more spoonfuls, and so on. You'll be surprised at how much sauerkraut you get into a single jar this way.
- Make sure the cabbage is covered in brine: I am going to repeat this because it's the most important thing you can do to ensure the success of the sauerkraut recipe: ALWAYS KEEP THE SAUERKRAUT SUBMERGED IN BRINE. Cabbage is a veggie and exposed to the air at room temperature it will develop mold. If you don't, for any reason, get enough juice from the cabbage itself, I'll include instructions for a brine solution you can make and add to the jar. To ensure that the cabbage remains submerged, use one of the big outer leaves of the cabbage. Fold the leaf to roughly fit into the mouth of the jar and place it on top of the cabbage shreds. The leaf should also be submerged in brine at all times. Leave at least an inch of space at the top of your jar to give the juices room to expand and vent.
- Don't screw the lid on tight: Again, to give the juices room to come out, if they want to. I place the jar in a shelf with kitchen towels underneath in case there is any overflow. You can also place it in a bowl or dish.
- Place the mason jar in a cool, dark place and let it do its thing: There's no daily feeding here, like you have with sourdough. Just let the sauerkraut stand and let the probiotic bacteria on the surface of the cabbage go to work, fermenting it and turning it into something delicious. I like to vent the sauerkraut every couple of days. I take the jar out, open the lid, and let any juices overflow if they want to. This also gives me an opportunity to make sure everything is still submerged in brine. If you need to top off with more brine, although this should not be necessary.
- Refrigerate the sauerkraut: After seven days, your sauerkraut should be ready. You can eat it at this point and store the rest in the refrigerator where it will continue to slowly ferment, getting even tastier. Sauerkraut can last in a refrigerator for at least a couple of months or even longer.


Troubleshooting
As easy as making sauerkraut is, remember you are dealing with bacteria and veggies, and that combination, if not handled properly, can easily go the wrong way. But you shouldn't get to that point if you follow a few basic tips:
- Shred the cabbage finely and evenly.
- Pack it very tightly into the mason jar.
- Keep the cabbage submerged in brine at all times. All of the cabbage should be covered with brine, and not a single shred of it should be exposed to the air, which would encourage mold. If your jar isn't completely filled, make sure you don't have tiny bits of cabbage stuck to the sides and not covered by brine. Remove any that may be before you set the jar aside for fermentation.
- When I say "brine" here, I mean the salty juices expressed from the cabbage. You should have enough juice from the cabbage itself to cover the shreds completely, but if you don't you will need to make a separate brine solution and top the sauerkraut with it.
- Don't fill the mason jar all the way to the top. You want to give at least a half inch of space at the top because as the cabbage ferments and the bacteria bubble, the liquid will expand.
- To that end, also don't screw the lid of your mason jar on very tight when the sauerkraut is fermenting, in case the liquid needs to vent. I screw on the lid loosely, then keep the jar in a dark shelf in my kitchen with a paper towel under it to catch any overflow. You can also cover the jar with cheesecloth instead of a lid.
- Every couple of days I'll open the jar and give the liquid a chance to vent if it wants to.
- If, at any point, the cabbage looks moldy, the brine gets clouded, or anything smells off, do not try to sneak a taste. Just throw it away.
Recipe FAQs
Fermented foods like sauerkraut and sourdough contain beneficial bacteria that can provide immense benefits for your gut and your overall health. That's important at any time, but it is particularly important right now when our world has been turned upside down. One of the things you can do to keep yourself safe, in addition to social distancing and quarantine, is to eat healthy. Probiotic foods like sauerkraut can give your diet -- and your immune system -- a definite boost.
Sauerkraut is easily available on grocery shelves, and it's not expensive, so you might wonder why you should go to the trouble of making your own sauerkraut. But storebought versions of sauerkraut are often not probiotic because they are pasteurized, so you won't be getting any of the benefits of the good bacteria. Plus, homemade sauerkraut is just that much tastier--it's crunchy, tangy, salty, and once you eat it you will be hooked for good. And did I say it's fun to make it?
No. All you need is a mason jar. Any recycled glass jar you have lying around will work too. And you will need a bowl or any large pot that you can place the shredded cabbage in and knead it to release the juices. If you have a canning funnel (I don't) you might find it easier to pack the cabbage into the jar, but you definitely do not need one.
You need to let the sauerkraut ferment for at least seven days for the best flavor and most benefit. Once you have crossed that point, you can place the sauerkraut in the refrigerator and it will continue to ferment there, albeit slowly, getting tastier and healthier.
More gut-friendly vegan recipes


Recipe card

Homemade sauerkraut recipe
Ingredients
- 1 medium head cabbage (finely shredded. Reserve one of the larger outer leaves of the cabbage)
- 1 tablespoon salt (or sea salt)
For the optional brine:
- 1 cup water
- 1 ¾ teaspoon salt
- 1-2 teaspoon caraway seeds (optional)
Instructions
- Place the shredded cabbage in a bowl. Sprinkle the salt on top and start kneading and massaging the cabbage, squeezing firmly to release the juices. I find it helpful to walk away after a couple of minutes and let the cabbage stand and soften further, before kneading further.
- Continue doing this for 10 minutes at least. You will see the liquid pool at the bottom of the bowl. Mix in the caraway seeds, if using.
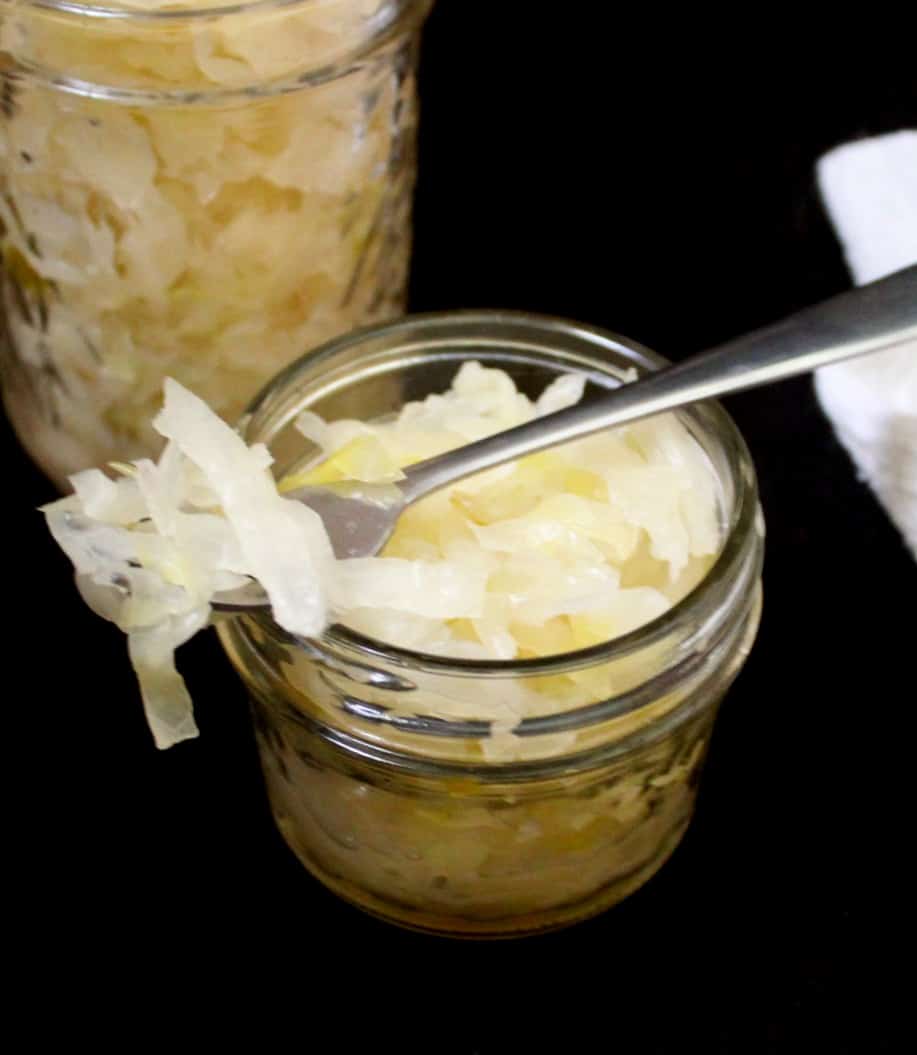
- Start packing the cabbage into a very clean or sterilized quart-sized mason jar, pressing down firmly on the shreds after every couple of tablespoonfuls to pack it tightly. Continue packing in the rest of the cabbage this way. Stop when you're about an inch from the top and place the heavy outer cabbage leaf you reserved, folded to fit into the jar, on top of the shredded cabbage.
- You should have enough brine now to cover the cabbage shreds and the outer leaf, but if for any reason you don't have enough brine, make extra brine by mixing 1 cup water with 1 ¾th teaspoon salt. Pour it into the jar until all of the cabbage is completely submerged. None of the vegetable should be exposed to the air. This is really important.
- Cover the jar with cheesecloth and put a rubber band around the neck to hold it in place, especially if you don't have a two-piece mason jar lid. If you have a two-piece lid, screw it on loosely so the water can vent if needed. Place in a bowl or dish, or on paper towels, in a cool, dark place out of direct sunlight.
- Every couple of days check on the sauerkraut. You should start seeing some bubbling in a couple of days, telling you the bacteria is at work. The liquid might overflow when you open it. Make sure there are no shreds of cabbage floating on top, cover and put away again.
- I ferment the sauerkraut for seven days and then place it in the refrigerator, but you can let it go as long as two weeks to ferment further and then refrigerate. If at any point the cabbage looks moldy, smells off or looks spoilt, do not taste it. Just throw it away.
- Enjoy the sauerkraut in sandwiches, salads, and in just about anything you want some extra flavor and crunch.
Nutrition Information
To print recipe card without images, uncheck "instruction images" after clicking the "print recipe" button.


Diya says
I don’t have any cabbage left and hard to find organic ones because of quarantine but i guess carrots and beet will do good. I’ll try that. Thank you for your quick response.
ROBYN says
So great. It's detail step, easy to follow. Thank you for sharing!
Randall L Givens says
Can I freeze The cabbage before I make sauerkraut with it?