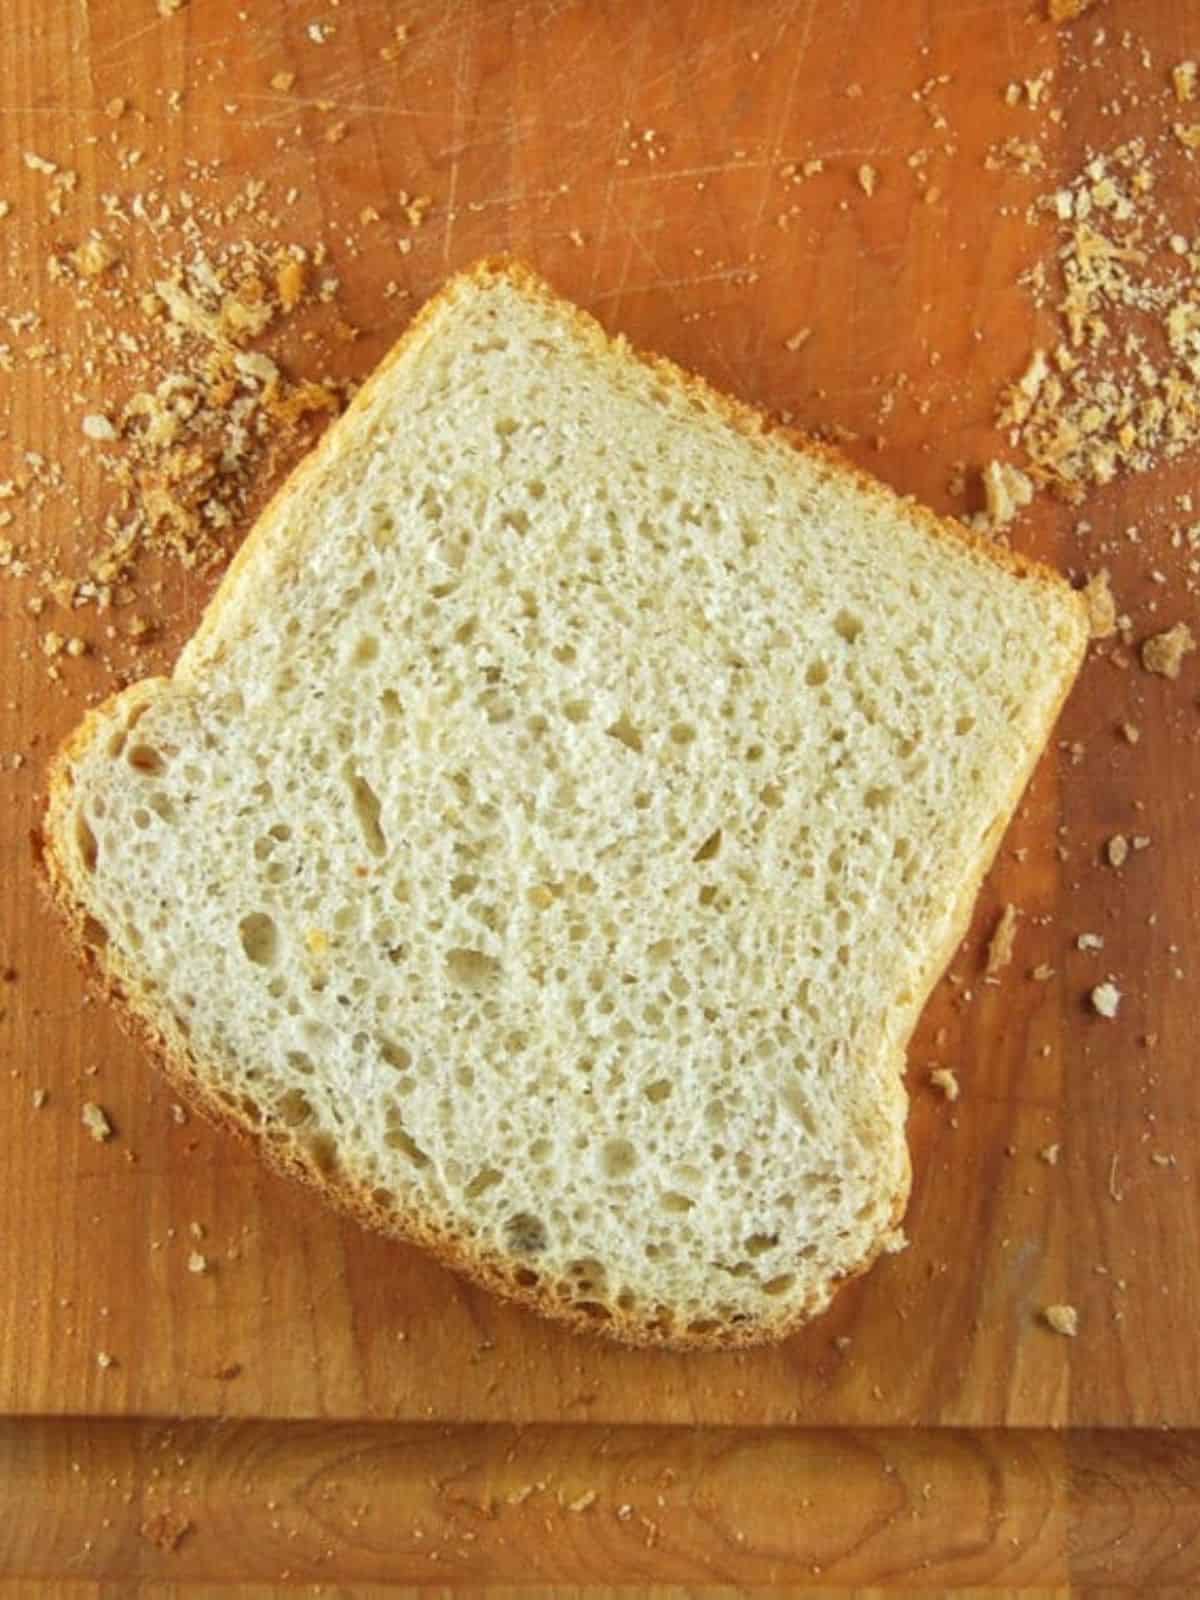
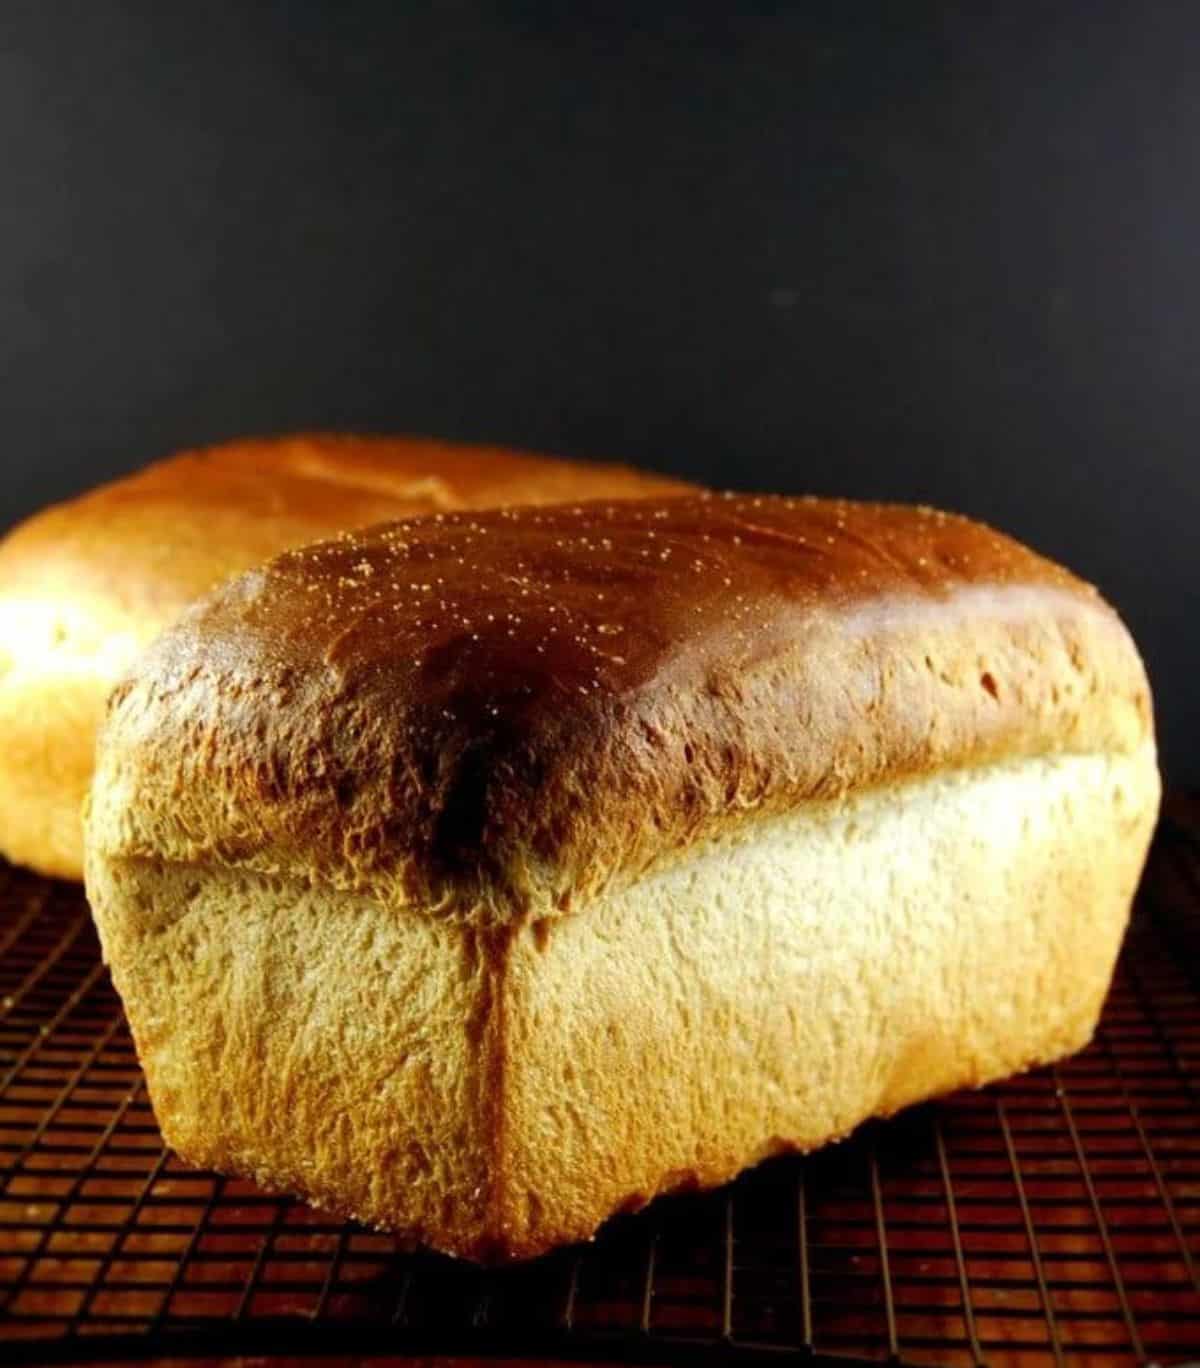
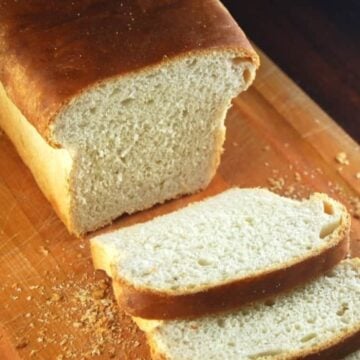
Learn how to make the most perfect, soft and fluffy sourdough sandwich bread! An active sourdough starter gives this bread a beautiful rise without any need for added yeast.

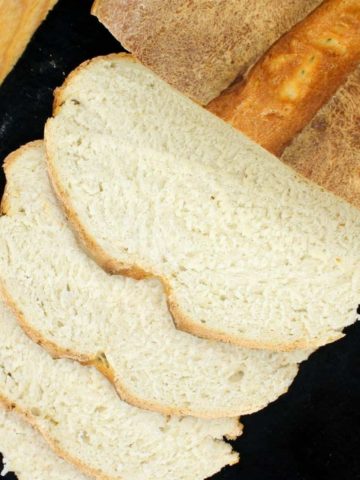
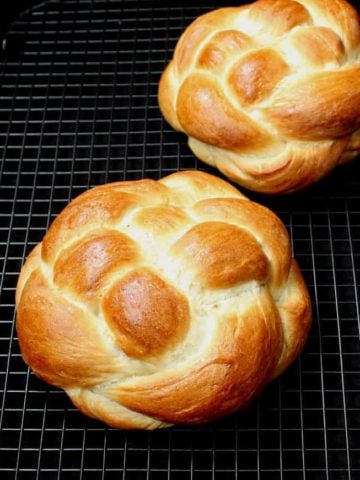
Sourdough breads, like this amazing no-knead sourdough bread, these crusty sourdough rolls, this bread machine sourdough bread and this sourdough olive and sage loaf, are some of my favorite breads to bake. This reader-favorite sourdough sandwich bread, with more than 320 five-star reviews, is on a par with these excellent breads and one I make most often in my kitchen.
The bread turns out just right each time and the recipe makes two sandwich loaves, which last us all week long. And yes, it's mostly white flour, but I don't feel like the devil about it. Research shows that the healthfulness of white sourdough bread exceeds that of wholegrain and multigrain breads.
That's because sourdough has a powerful effect on blood sugar: when left to work its fermenting magic, it breaks down the starches in the foods it's added to, making them easier to digest. Sourdough is also probiotic, which means it is packed with healthy gut bacteria, so you can feel truly holier-than-thou when you smear this bread with some peanut butter or use it to cradle a delicious vegan burger.
Many sourdough breads need to be started a day before, but this sourdough sandwich loaf can easily be made in about eight hours from start to finish, including three rise times. So if you start your bread late in the morning, you can easily have some in time for dinner.
Table of Contents
Why you will love this sourdough sandwich bread
- Buttery and delicious. The sourdough gives the bread a wonderful, buttery flavor in addition to the soft, fluffy texture.
- Healthy bread. Because sourdough starter is fermented, it is full of healthy bacteria that are probiotic and extremely beneficial to the gut microbiome.
- Quick recipe. This bread needs about eight hours of proofing time, total, which is pretty quick for a bread leavened entirely with sourdough and with no added yeast.
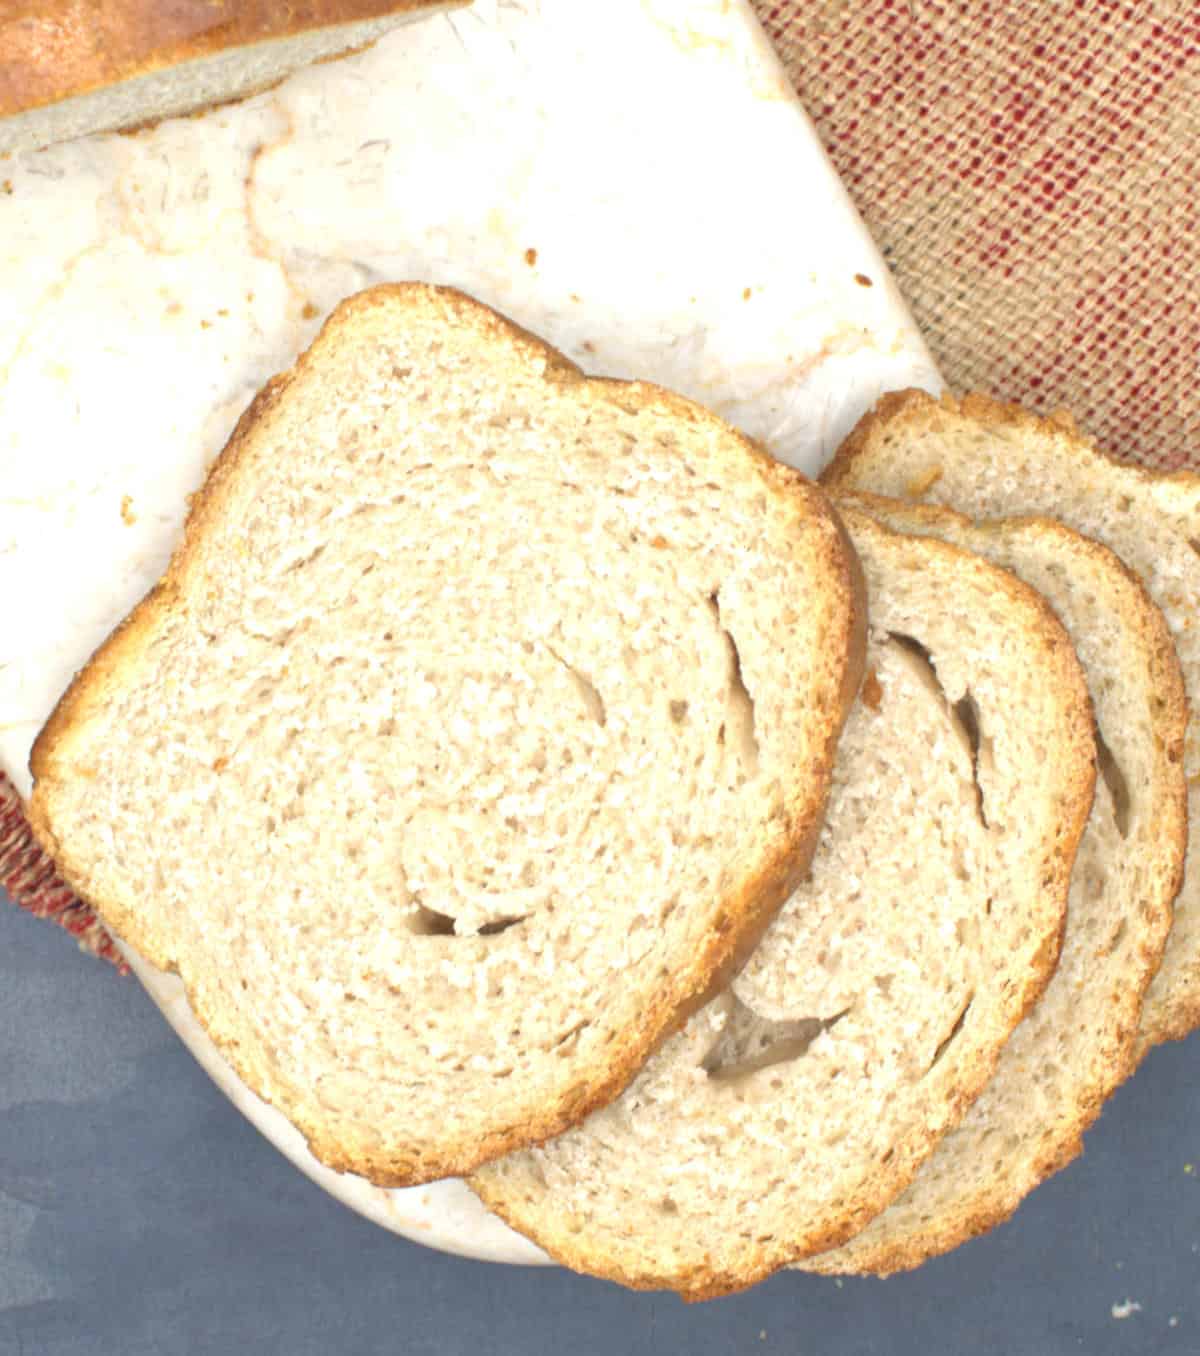
- Perfect, fluffy texture. The crust is just lightly chewy and the crumb is soft and fluffy (without any eggs) and just perfect for cradling your favorite sandwich fillings. Stale bread makes great toast.
- Vegan, soy-free, nut-free recipe.
Ingredients
- Sourdough starter: Make sure you use an active, bubbling, recently fed sourdough starter for the best results.
- Unbleached all-purpose flour and whole wheat flour
- Extra virgin olive oil. Or any neutral oil of your choice.
How to make sourdough sandwich bread
Place the sourdough starter in a large bowl or the bowl of a stand mixer.
Add to it the wholewheat flour, 1 cup of all-purpose flour, and water.
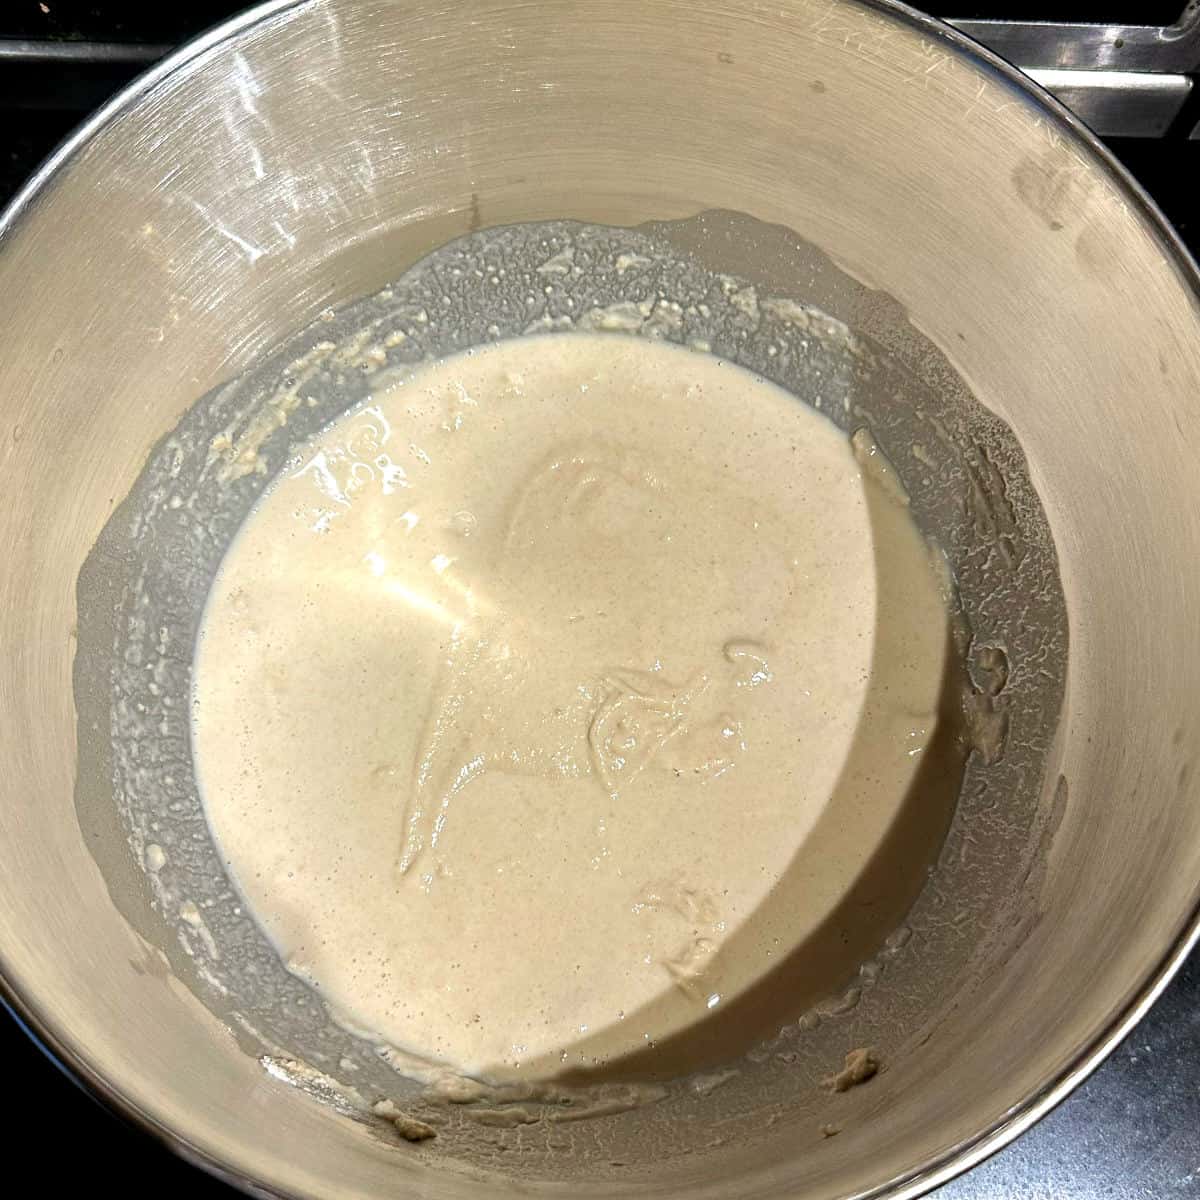
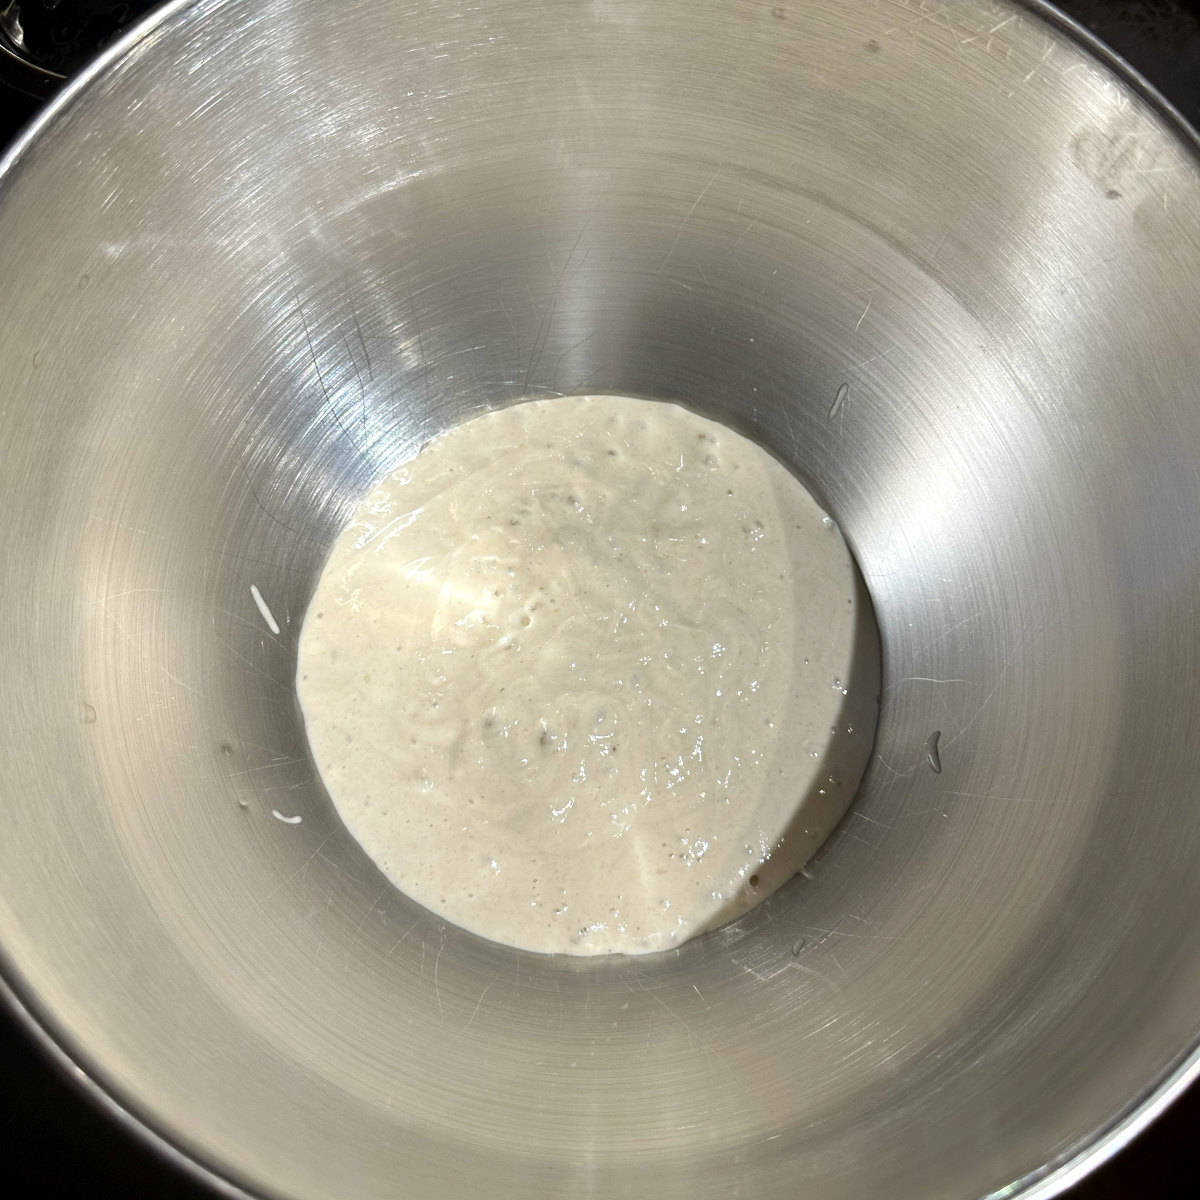
Mix well and set it aside, covered, in a warm place for four hours.
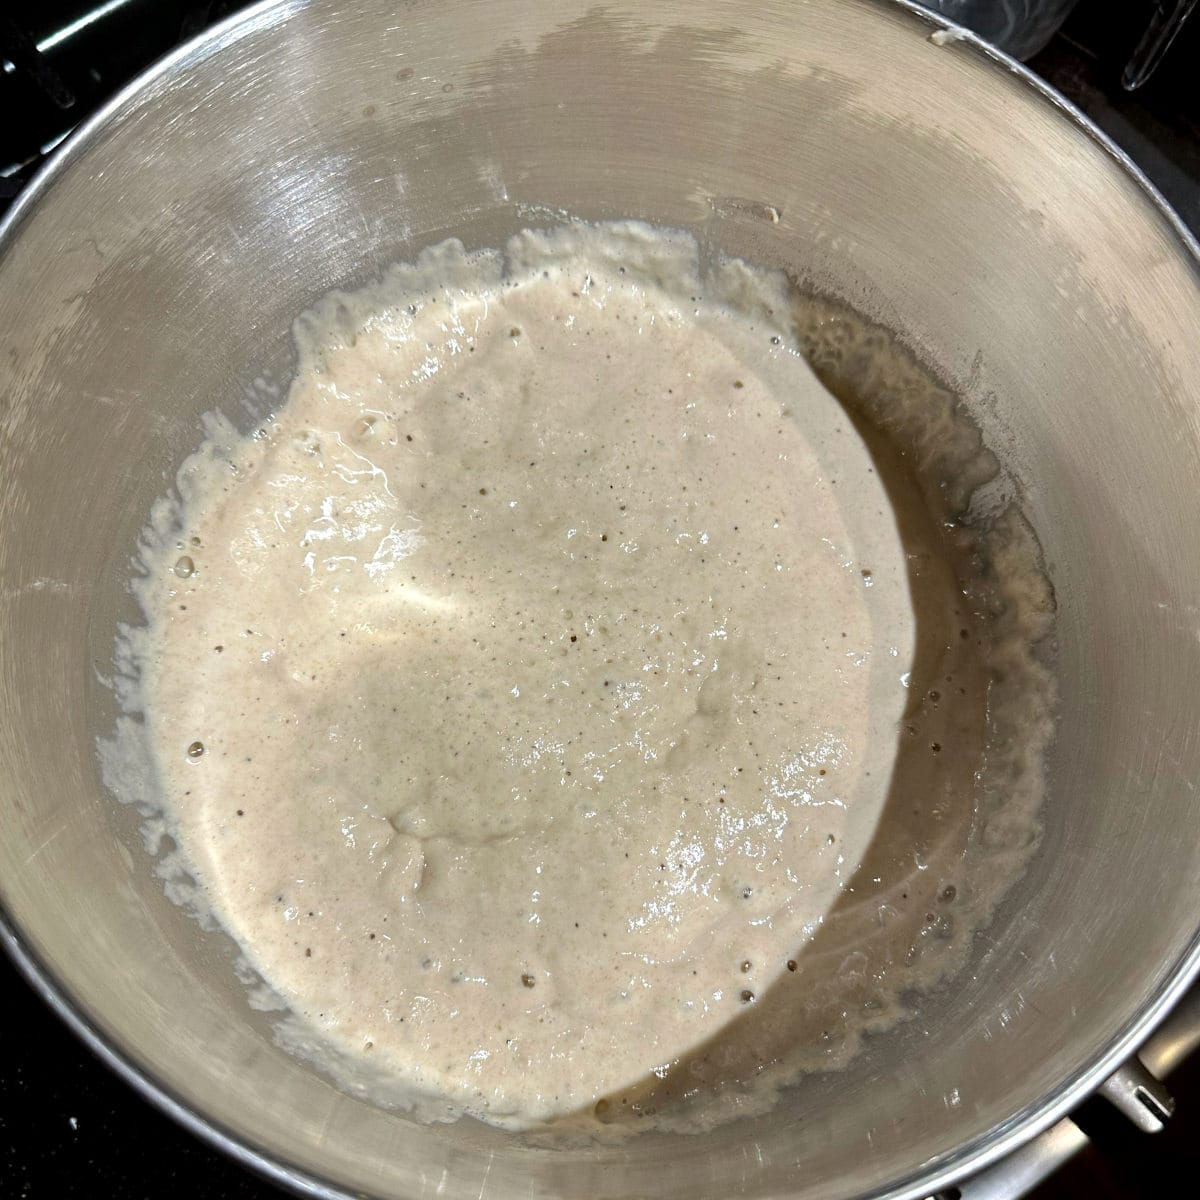
After four hours the starter should be fluffy and bubbly.
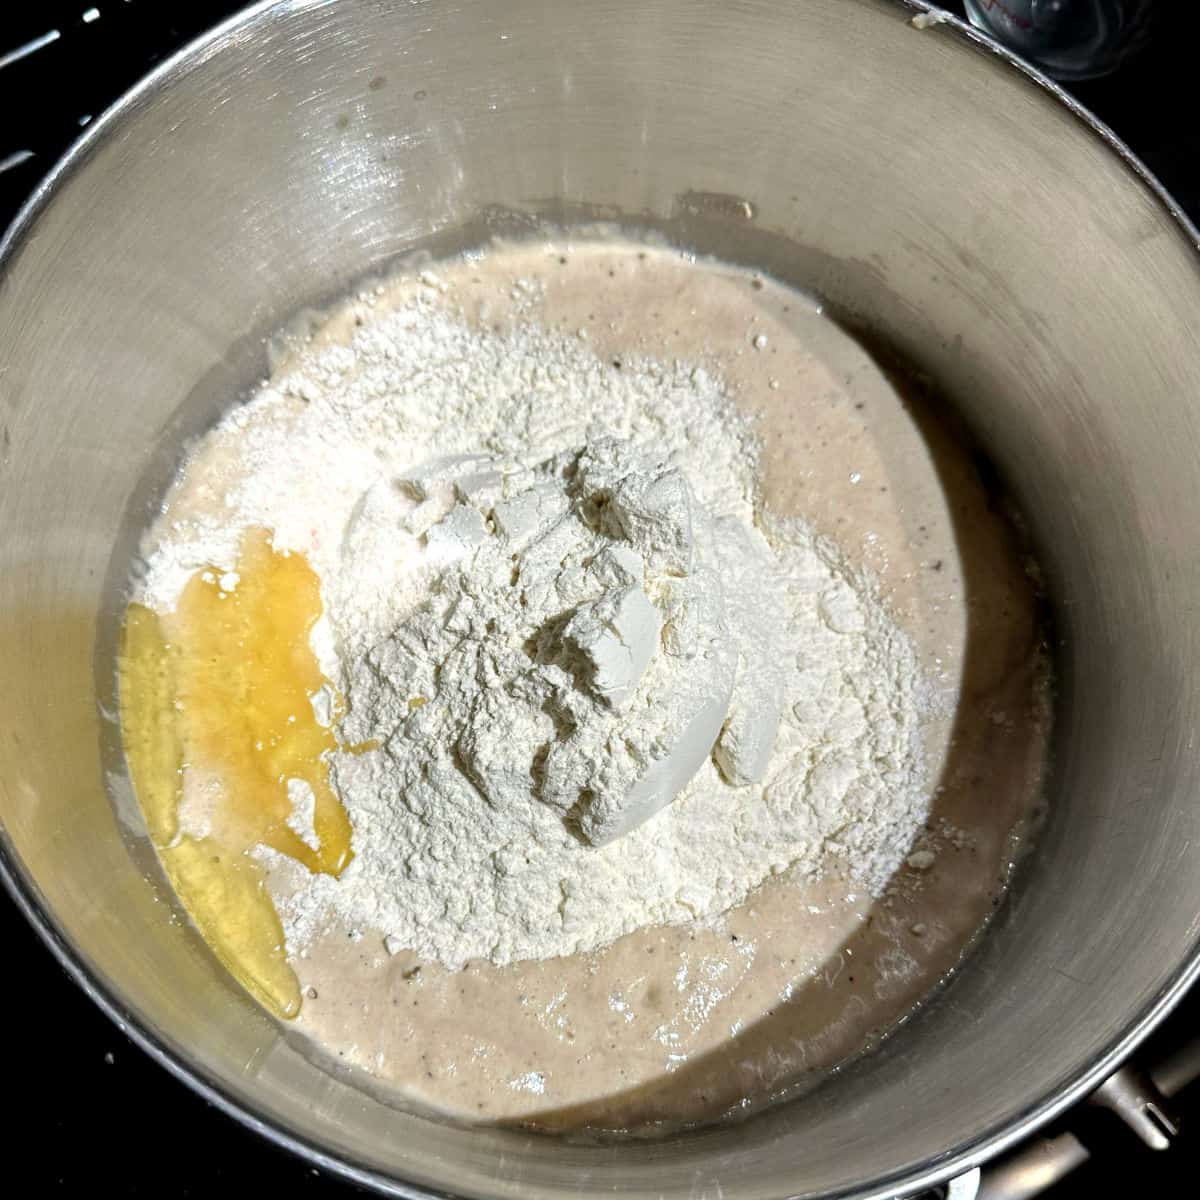
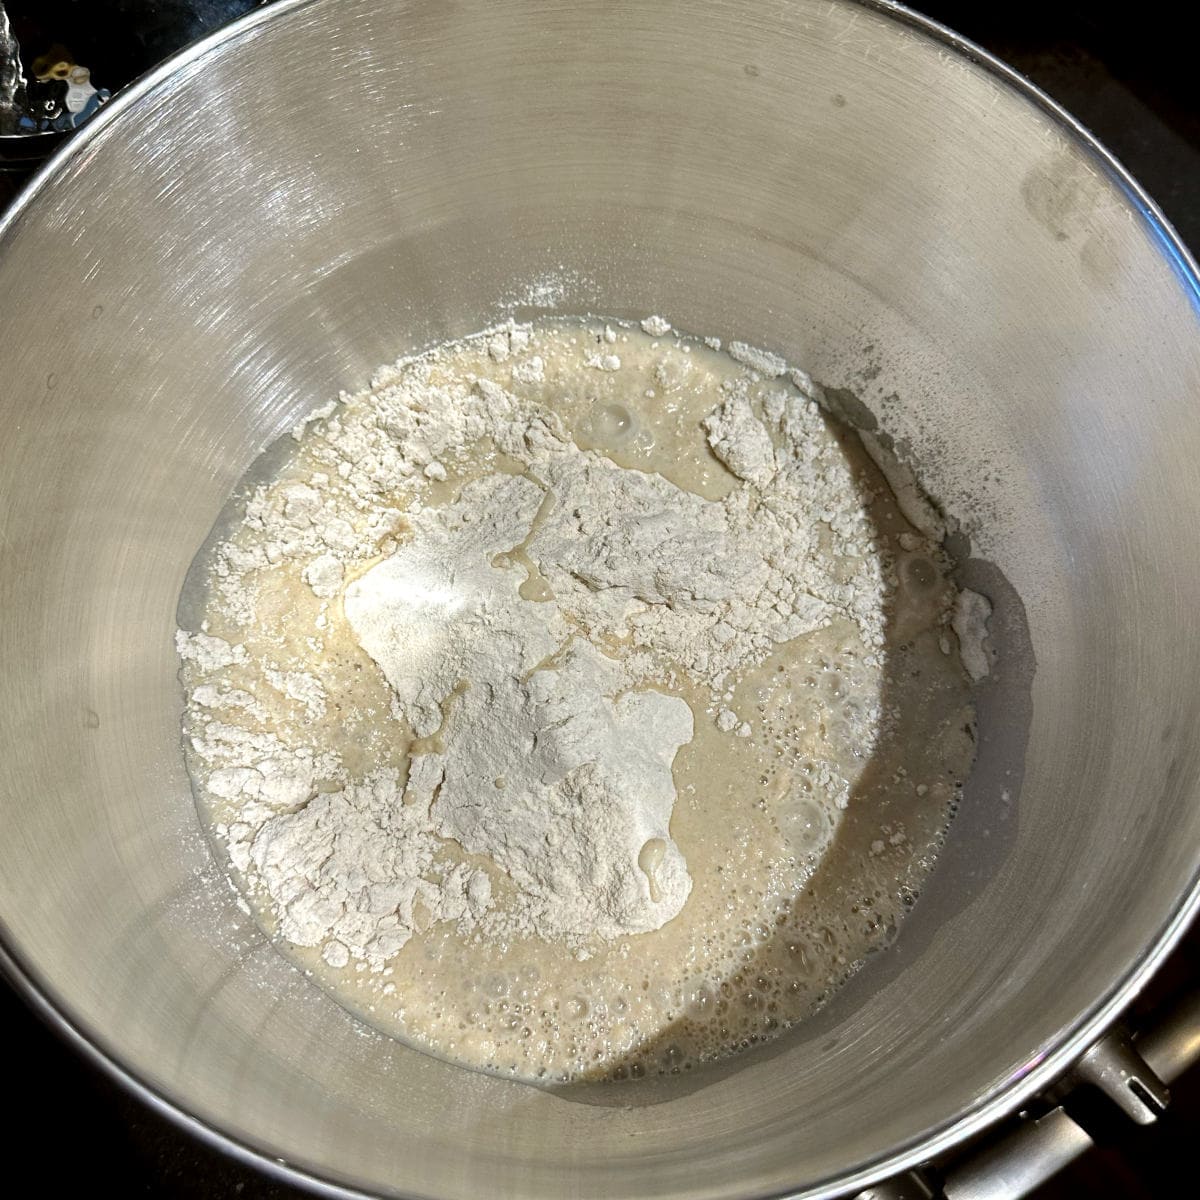
Add 2 cups of all-purpose flour, olive oil and salt to the bowl and mix.

Add more flour as needed and knead until the dough becomes quite firm but still feels a little sticky to your fingers. You can do this by hand or in a stand mixer on medium-low speed.
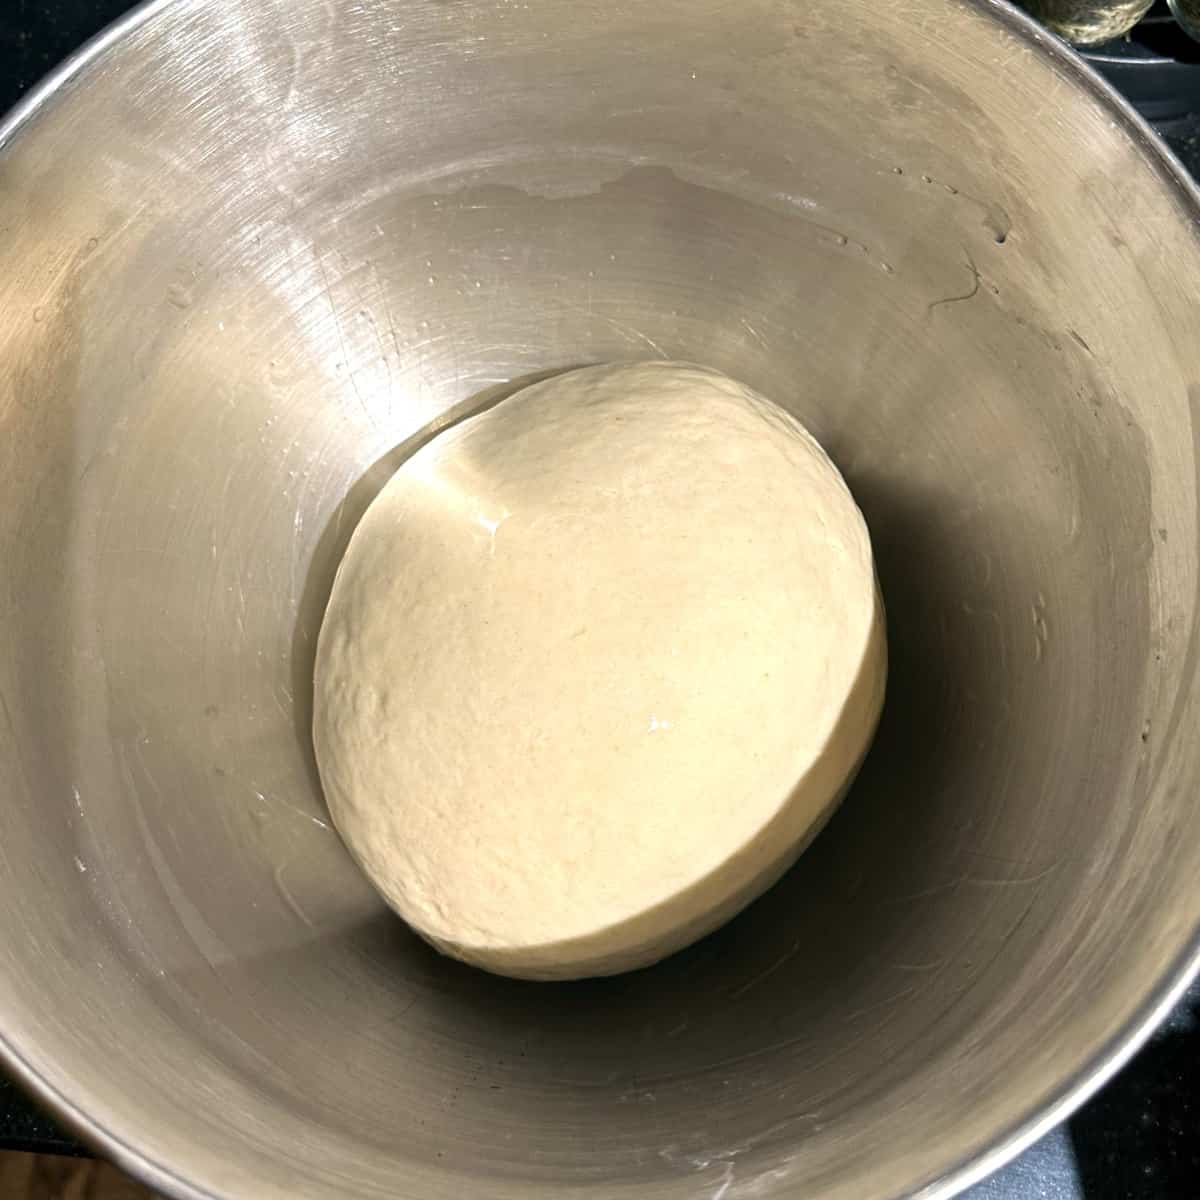
Turn out the dough on a flat surface and knead by hand for 4-5 minutes or until the dough feels smooth and springy. Shape into a ball and place in an oiled bowl, turning the ball of dough around once to coat the top with oil.
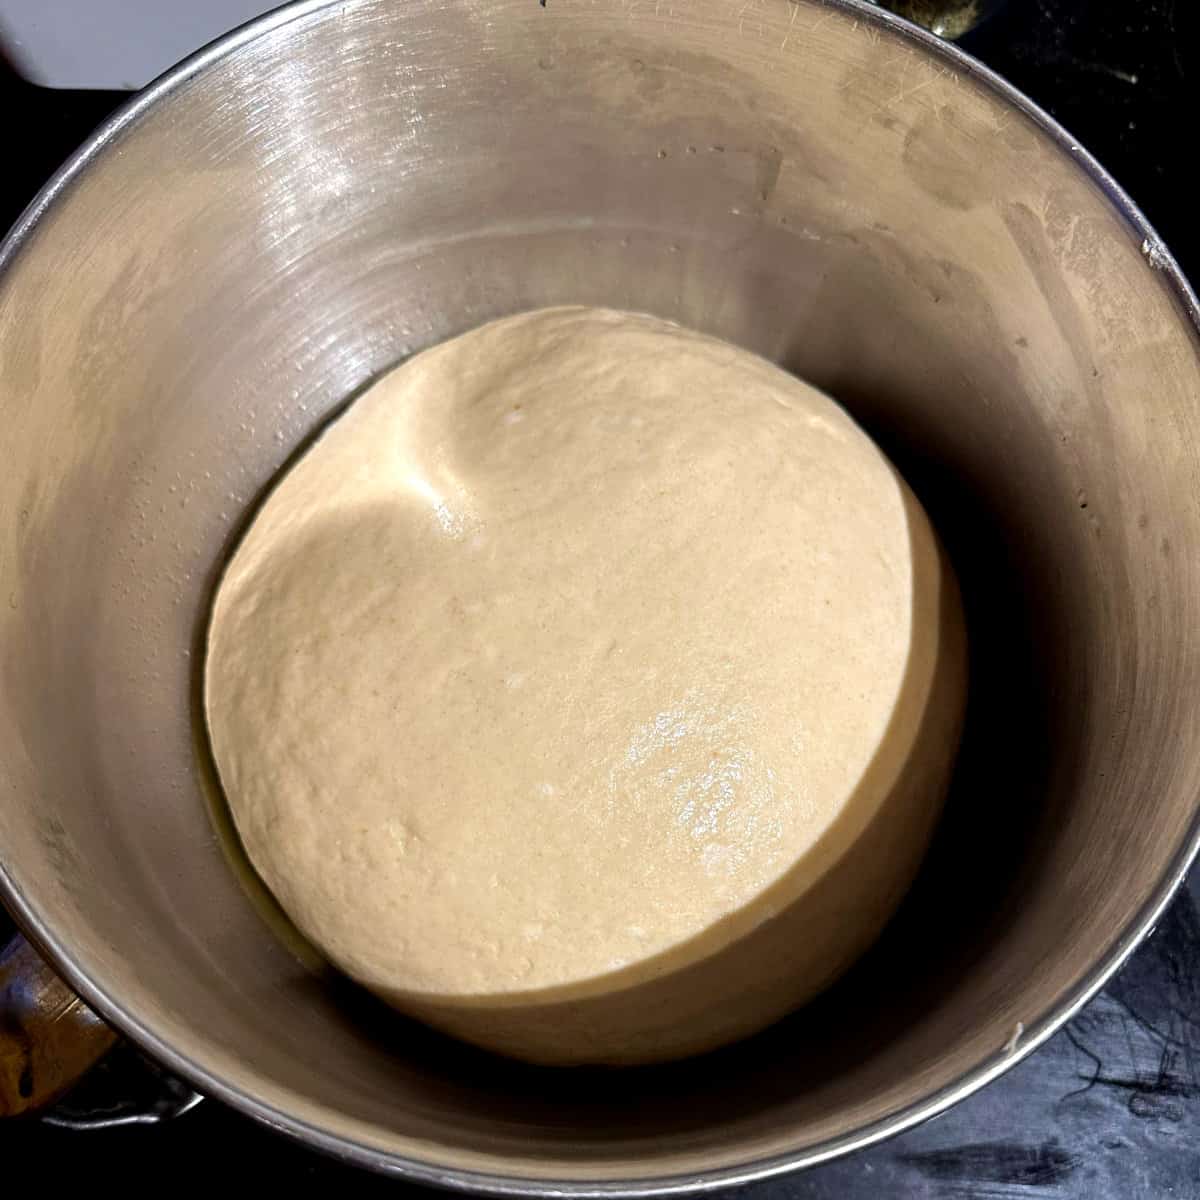
Cover tightly with a lid or plastic wrap and let the dough rise for two hours in a warm spot. After two hours it should have doubled.
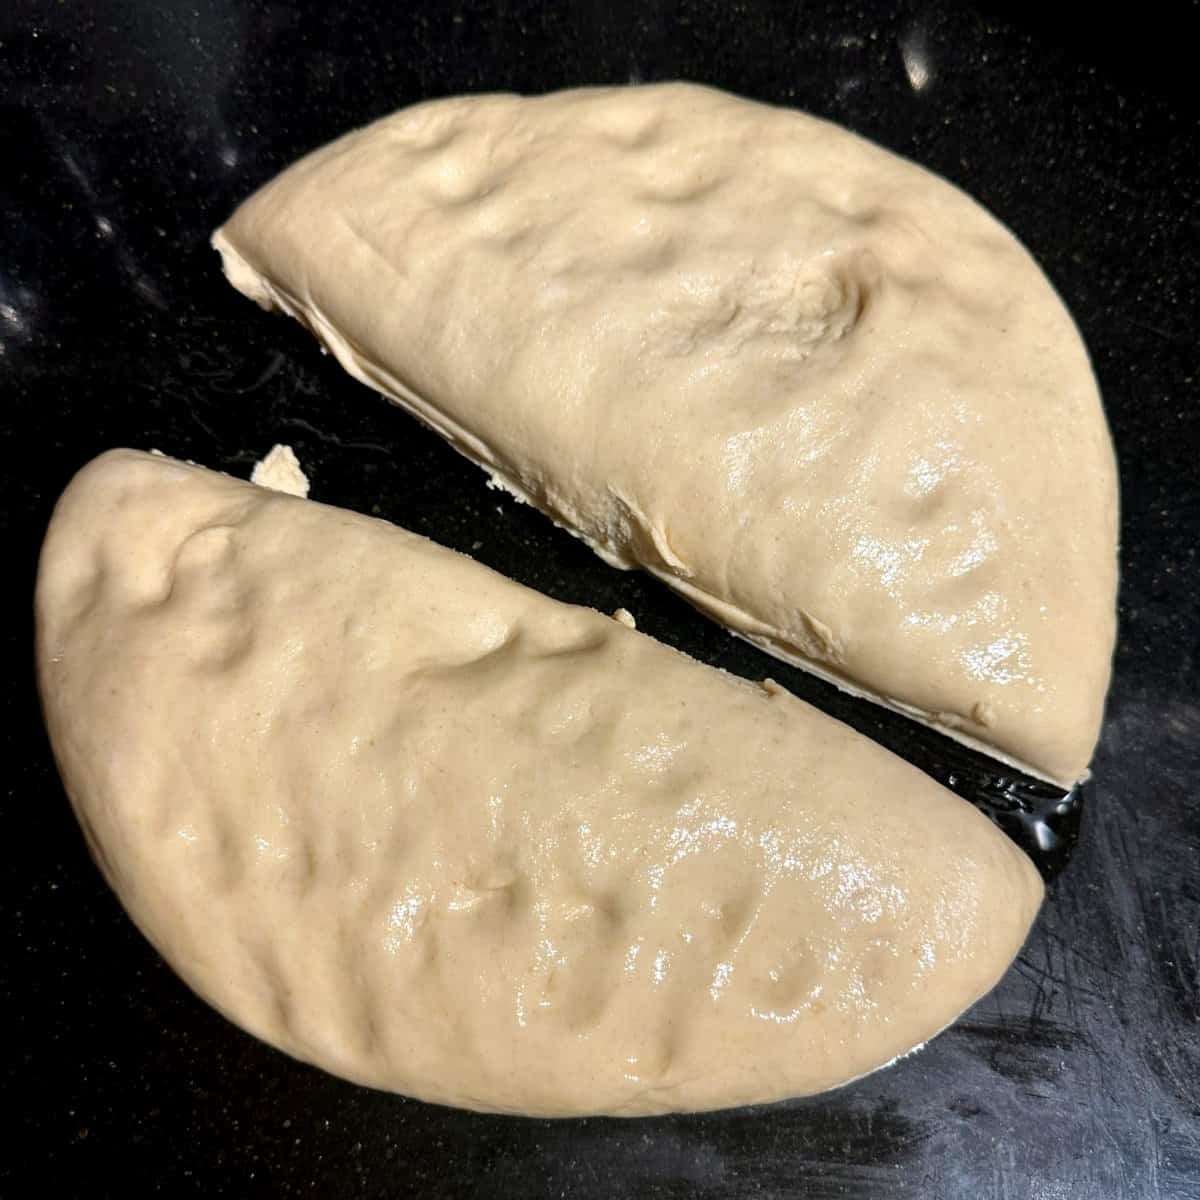
Punch down the dough and divide into two.
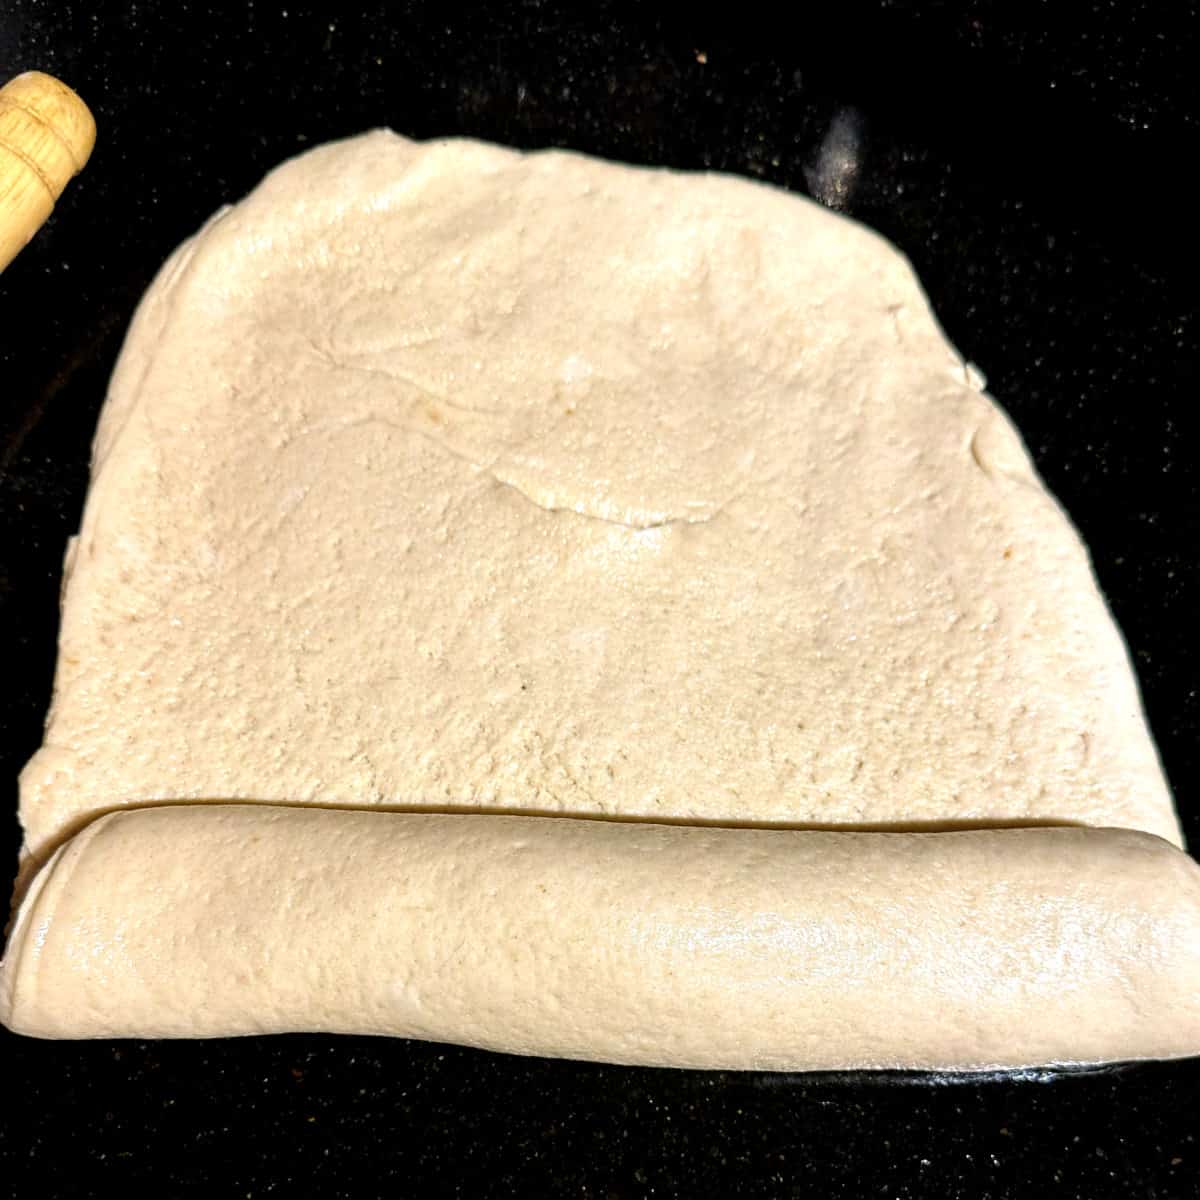
Roll out each half into a rectangle, then roll it like a jelly roll and tuck in the ends to form a loaf. The dough should be very pliable.
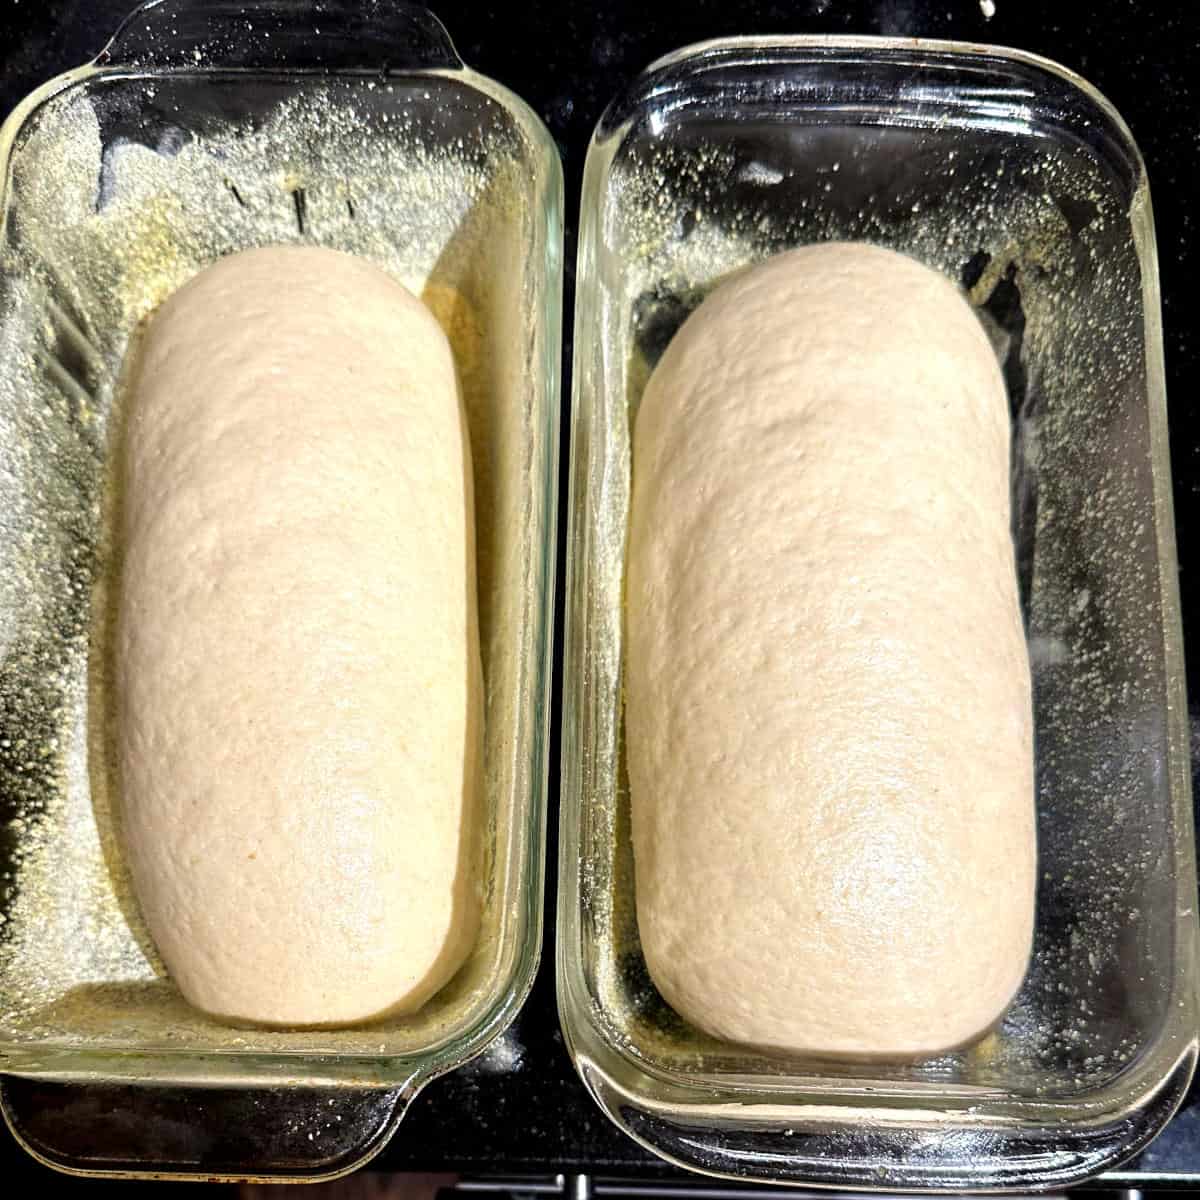
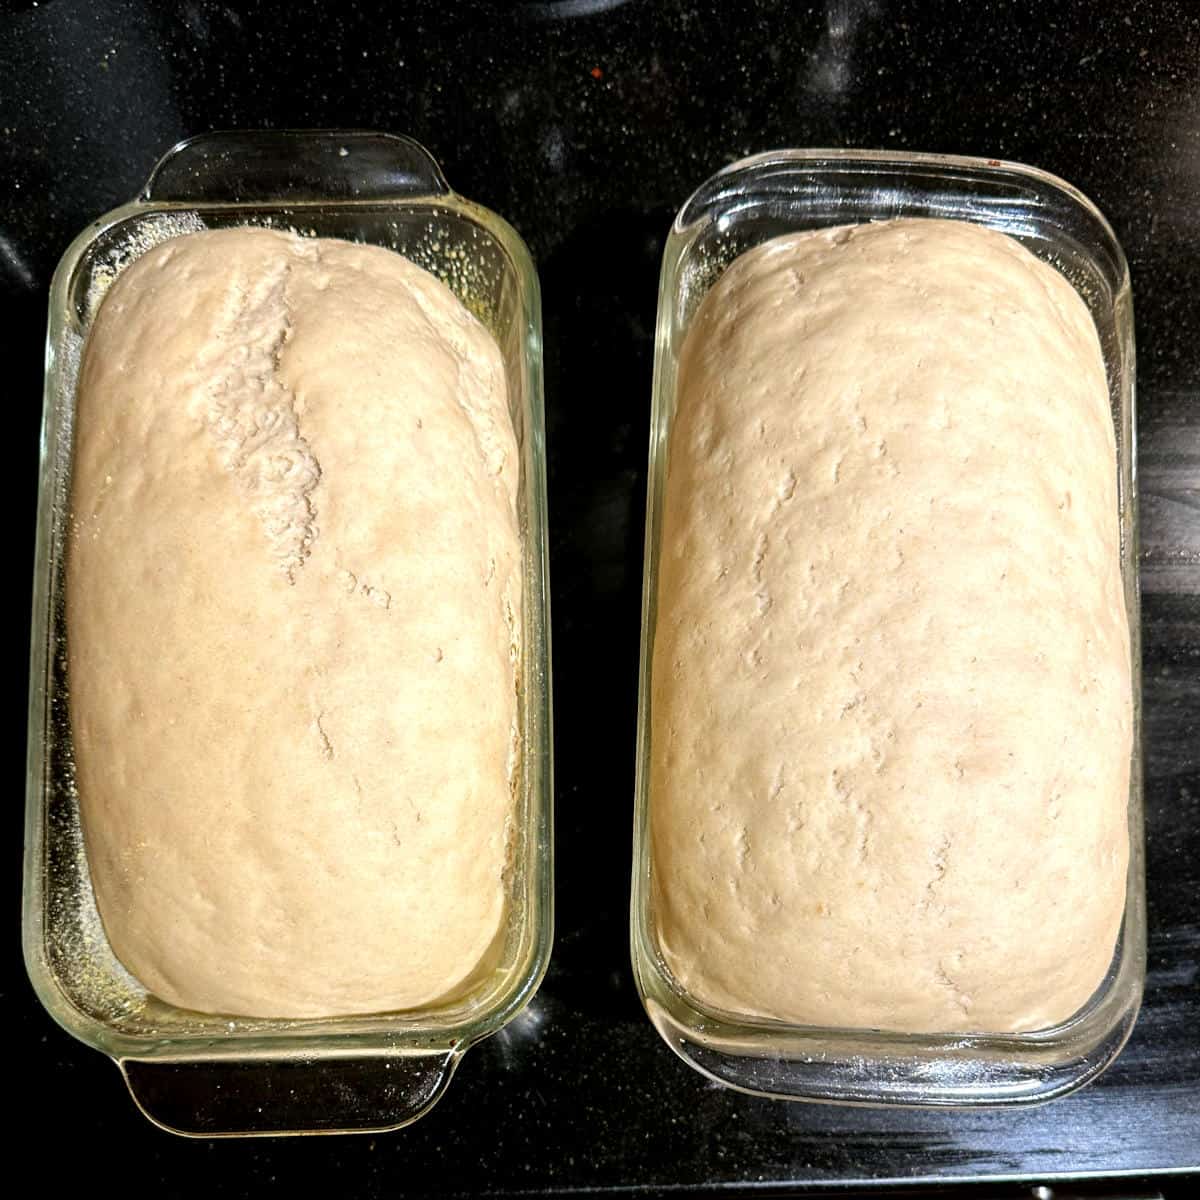
Prep two standard loaf pans by spraying lightly with oil and then sprinkling on some cornmeal or semolina. Place the formed loaves in the prepared pans. Cover with a kitchen towel and let them stand in a warm place for at least two more hours or until the dough rises above the top of the loaf pans.
About half an hour before baking, preheat the oven to 425 degrees. Place the loaves in the oven and bake 40 minutes. Remove the loaves from the oven, turn them out on a rack, and let them cool thoroughly before slicing.
Top tip
How much water you need for the bread could vary depending on the hydration of your sourdough starter and the weather where you live. If you find that adding two cups of water results in a very sticky dough, reduce the amount of water next time to 1 cup and trickle in the remaining water while kneading the dough, if needed.
Recipe FAQs and troubleshooting
Yes, just halve the amount of ingredients and you are all set!
The culprit here is your sourdough starter. If it is not active and fed recently (as in eight hours to 24 hours before use) you simply won't have enough natural yeast in the starter for the dough to rise.
For a softer crust, replace half the water with soy milk.
Bread flour will give you a crustier loaf and the crumb won't be as soft. But it will still be a pretty good loaf of bread.
Storage instructions
- Refrigerate: The bread can be stored at room temperature for four days and in the refrigerator for up to two weeks.
- Freeze: Freeze the bread for up to three months in a freezer-safe bag, whole or sliced.
- Thaw fully before reheating.
More sourdough bread recipes


Sourdough Sandwich Bread Recipe
Equipment
- Large mixing bowl or stand mixer
- 2 loaf pans
Ingredients
- 1½ cups sourdough starter (bubbling and active)
- 1½ cups lukewarm water
- 1 cup whole wheat flour
- 4-5 cups unbleached all purpose flour
- 1 tablespoon extra virgin olive oil (or any neutral oil of your choice)
- 1 teaspoon sea salt (or any salt of your choice)
Instructions
- Place the sourdough starter in a large bowl or the bowl of a stand mixer. Add to it the wholewheat flour, 1 cup of all-purpose flour, and water. Mix well and set it aside, covered, in a warm place for four hours.
- Add 2 cups of all-purpose flour, olive oil and salt and mix. Add more flour as you knead until the dough becomes quite firm but still feels a little sticky to your fingers. You can do this by hand or in the stand mixer, using the dough hook attachment, on medium-low speed.
- Turn out the dough on the kitchen platform or any flat surface and knead by hand for 4-5 minutes or until the dough feels smooth and springy to your fingers and barely sticks to the platform.
- Shape into a ball and place in an oiled bowl, turning the ball of dough around once to coat the top with oil.
- Cover tightly and place in a warm spot (like an oven with the light turned on) for at least two hours or until the dough has doubled.
- Punch down the dough and divide into two. Roll out each half into a rectangle, about seven by 10 inches, and roll it up like a jelly roll. With the seam side down, tuck in the ends to form a loaf.
- Prepare two loaf pans by spraying or brushing lightly with oil and then sprinkling on some cornmeal or semolina on the bottom and sides.
- Place the loaves into the prepared loaf pans. Cover with a kitchen towel and let them stand in a warm place for at least two more hours or until the dough domes above the top of the loaf pans.
- About half an hour before baking, preheat the oven to 425 degrees. Place the loaves in the oven and bake 40 minutes.
- Remove the loaves from the oven, turn them out on a rack, and let them cool thoroughly before slicing.
Recipe notes
- You can increase salt by another teaspoon if you want to.
- If your sourdough starter is made using someone else's recipe, you may need more or less water to form the dough. In that case add 1 cup water in step 1 and trickle in more as needed when kneading the dough in step 2.
Sue
I’ve only been baking with sourdough starter about a month and this was my first real successful attempt. I’ve had multiple flops and was about to give up. I followed the directions exactly. Took out my sourdough starter from the fridge the night before and fed it. It was ready in the morning to bake with and the timing of your recipe at 4 hours + 2 + 2 worked perfectly to be able to bake during the day without overnight rises. Used half white whole wheat and bread flour. Also used 8 x 4 pan and 8 1/2 x 4 1/2 and the 8x4 pan definitely had a much nicer rise. Thank you for sharing. This is now my go-to recipe!
Ann
I just printed and followed this recipe but have decided that I did not understand the language accurately. I used my discard from two days ago directly from the refrigerator. I had to use King Arthur Bread Four since I cannot get anything else. I added it to the discard along with the AP flour and water. I realize it may not work properly. Is there a way to correct the mixture? I just finished it at 11:20 EDT. Thank you!
Ann
Another question: I have two 9 x 5 pans and one 51/2 x 10/12 loaf pan. I was not sure what size pans are needed for this recipe. I measured pans with water and if I use two small pans, I have 1 cup of water remaining that would not fill the larger pan. That is OK if the small pans are proper for the recipe.
Petr
Is this recipe using fed or unfed stater? Thank you
Vaishali
Fed please!
Pammer Kidani
I made this 2x and love it. I have a lot of bread flour. Can I use bread flour instead of all purpose flour in this recipe?
Caren Kelly
Did you trý this with bread flour? As I'm about to do the same. Also how much flour did you use in the end. My starter also is 100% hydration, was yours?
Pammer Kidani
My starter is 100% I had to add a bit more flour I’m in Hawaii and it humid. I followed the recipe the 2x’s I made the bread. I haven’t tried it with bread flour. I might try it next time I make this bread.
Jen
I made this for the first time yesterday and it turned out good for a first attempt. Do you have any suggestions for a less crispy crust? It would have been amazing with soup but it was a little too crispy for sandwiches. Any advice is welcomed and appreciated.
Jennifer
After letting it sit covered overnight it was soft and perfect. I was just too impatient. Thanks for the awesome recipe!
Kathy
Brush with butter when you take it out of the oven.
Jodie
Could you make this in a bread machine?
Anna
I used my bread machine for bake only for 1 loaf and made rolls with the other 1/2 of dough, worked!
Erica T.
I had this same wish! After looking online, I decided to try a few suggestions and the result was perfect. After the part where you add the remaining ingredients and mix and knead--I put the oiled ball of dough in a covered container to rise slowly overnight in the fridge. When it came time to bake them, I preheated my oven to 500° with a pan of water placed on the rack below the one where I would be putting the loaves. Then, I brushed the tops of the loaves of dough with melted butter *before* putting them in the oven (and again after they came out.) After putting them in, I immediately turned the temperature down to 425°.
The slow overnight rise in the refrigerator creates a dough that will have a thinner crust. The higher heat at the beginning helps the bread to bake more quickly, so there is less time where the crust is begging developed. And the pan of water provides moisture to help keep the crust from becoming as dry.
Just remember that the bread will bake more quickly this way!
Michelle
Should you leave your starter on the counter to get to room temperature before mixing anything? I have a starter in the fridge from making sourdough bread the other day.
Valerie
This looks great, thank you. What size are you're loaf pans?
Mandy
Made a delicious (2!) loaves of bread! I dumped all the ingredients in the breadmaker (once my starter was ready) and let the machine do the mixing & the first rise. I baked it at 375 though as I was too afraid to try it at 425!! It turned out wonderfully!! Thanks for the recipe - this one is a keeper ?
Hiba
Hi thanks for replying! In your instructions you said to leave it for 4 hours after mixing the water starter and the 1 cup of whole wheat flour and 1 cup of ap flour. At this point it was like a batter when I did that rather tan a shaggy dough. So I guess to rephrase my question, since this happened should I have went to step 2 and added 2 cups of flour and more if needed and then let it sit for 4 hours? Thanks! I hope I succeed even slightly
Mandy
I find many recipes are a bit unclear re starter. Take your starter (which is usually only about 1/4-1/2 cup), add 1 cup of flour & 1 cup water, mix well and let it sit on the counter for approx 4 hours. Until it has slightly risen and is a bit bubbly. Then remove a small amount (approx 1/4-1/2 cup) And place in the fridge - this will be your starter again for the next time you make bread. The remaining 1/2cups approx will be your ‘yeast’. Continue with the recipe as written (flour, oil, salt etc)
Hope that helps! And good luck ?
Hiba
Hi I've made my starter and it looks ready. This is the first bread I'm making because we eat alot of sandwich bread. I added the starter (I used the metric units) and I added all the water and the 2 cups of flour but it turned into a batter ? Is that what's supposed to happen ? I've just left it hoping the flour would soak all the water . The water looked like it was alot. I'm hoping after these 4 hours when I add the rest of the flour itll be a dough I can work with? Clearly I'm terrible at understanding baking directions! Thanks for the help!
Vaishali
Follow instructions please. You have to knead in more flour until it becomes a dough.
NewRunner09
I had to add less water since I’m in a cooler climate. About 1 1/2 cups was the right amount for me. It is still very watery but comes together nicely in the next step.
Linda
Thanks for sharing and looking forward to trying this recipe. Your ingredients list 1 cup whole wheat & 4-5 cups all purpose flour. However, step 1 calls for 1 cup all purpose flour and Step 2 adds an additional 2 cups all purpose flour. This is only 3 cups all purpose flour not 4-5 cups as listed in the ingredients. Thanks for the clarification.
Vaishali
Yes it's in the instructions-- knead in more flour as needed.
Penny H
I don’t have whole wheat flour can I just use all purpose flour only? Thanks
Joyce
Did you make it with all purpose flour and how did it turn out? I would love to try the recipe but I only buy all purpose flour.
Valerie
Once the dough is in the oiled bowl, can I put it in the fridge overnight and proceed with the recipe in the morning? Or should I put the dough into the loaf pans and put them into the fridge overnight?
My starter is named Yumi. I developed her in the beginning of April and sourdough baking has turned into my new favorite hobby.
Rebecca
I find that different starters have different density, particularly at different stages of the rise. When you call for 1.5 cups of starter, can you provide a weight?
maria
Hi, right below the ingredients if your press metric it will convert all the measurements 🙂
Kat
I love this recipe! I've never made bread before, but after learning I could make a sourdough starter with the milk kefir I've been brewing, I figured I'd give it a shot since it really just takes time and flour and I have plenty of both at the present moment.
My first batch turned out so well, we had bread for lunch until it was gone. I followed others advice of the pan of water and melted butter for softer crust, but I really missed that chewy crust that makes sourdough so good. I've got my second batch on the counter doing it's thing now and I think I'll skip the water/butter extra steps this time around.
Thanks for making this so easy!
Tiffany
Just made this sandwich bread and it is lovely! My toddler, husband and I have all had a slice and love the lightly sour flavour, and soft, airy texture. Will definitely add it into my baking routine.
Pia
I followed the instructions & used my own starter. The bread came out perfect!