

My ultimate guide to homemade roti, an unleavened whole wheat flatbread I ate every day growing up in India. I'm spilling all my secrets so you can learn how to make soft, silky, error-proof rotis each time.
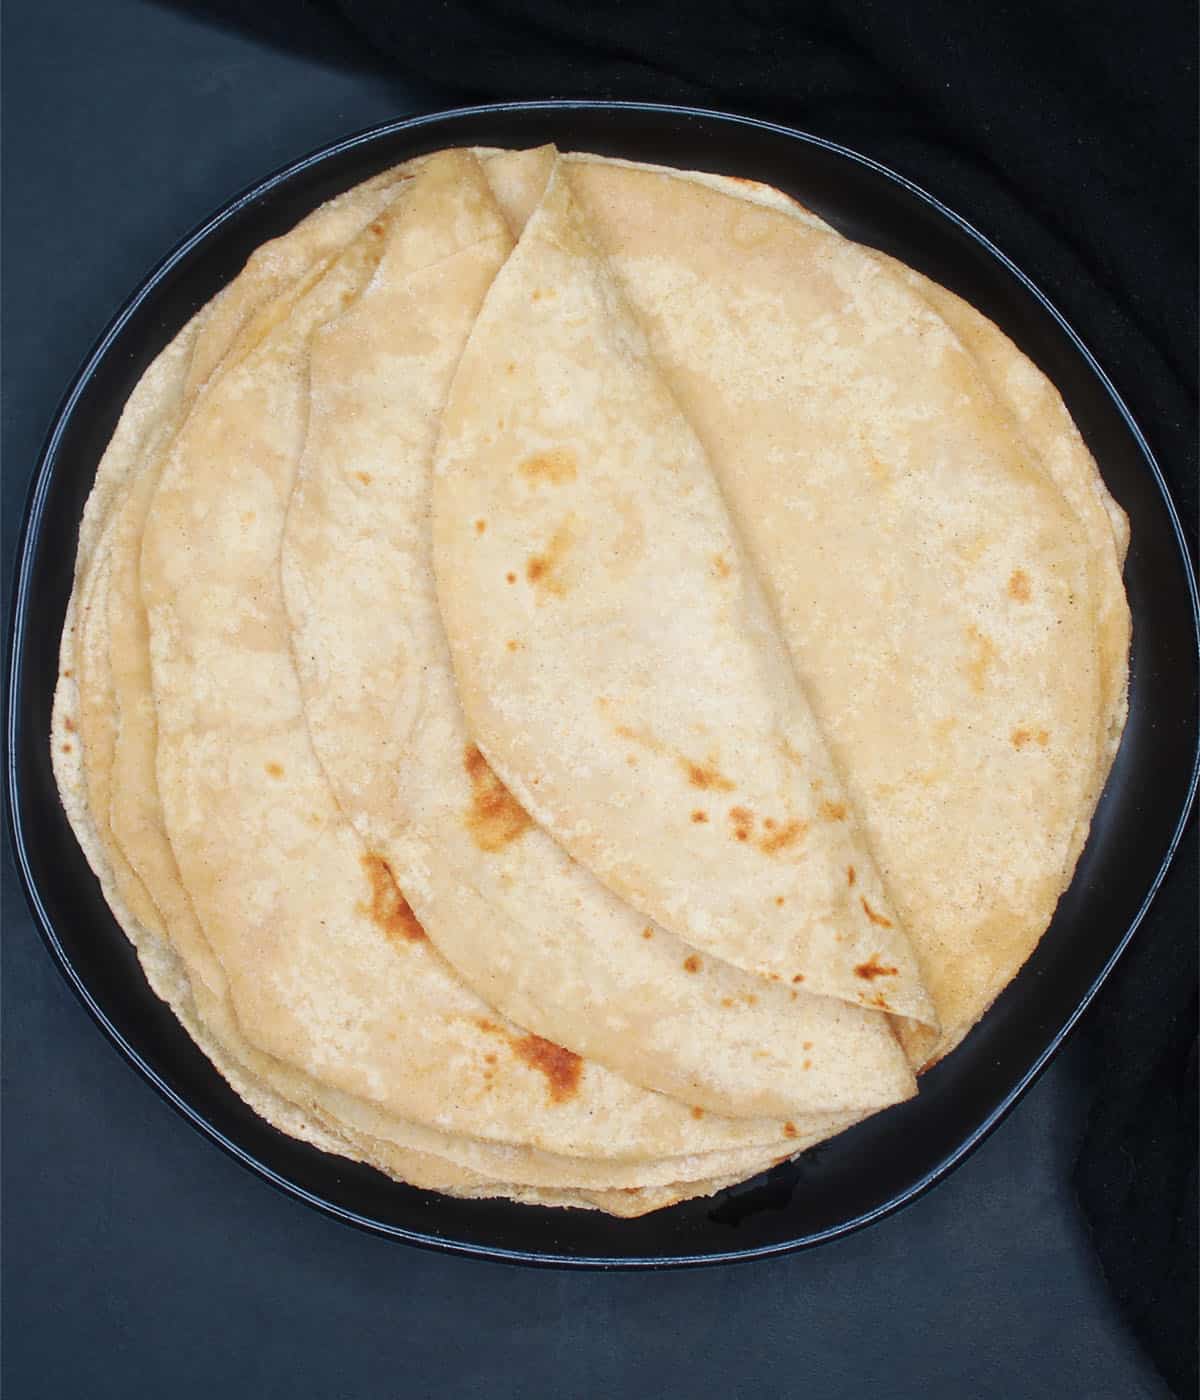
Table of Contents
Roti
Roti is a simple, three-ingredient bread common to nearly every regional Indian cuisine, with slight variations and known by many different names, like chapati, poli, rotli and phulka. It's delicious and healthy, and it's the perfect bread to tear with your fingers and dip into spicy Indian curries, dals and sabzi.
This is a bread I make in my kitchen several times each week, as did my mom, who was from Maharashtra, a western Indian state famed for its soft, squishy rotis (called "poli" locally). Every day, minutes before dinner, she'd roll out the dough, oil and fold it over into a triangle, then roll the triangle into a perfectly round roti. It would balloon up on the hot griddle as she pressed down on the edges with a kitchen towel.
A roti, she would say, should be so soft, you should be able to crumple it into a ball and open it back up without a single break or tear. It should also separate into three distinct layers after roasting.
Even with that early guidance, it took me years to perfect rotis to the point where I'd be proud to serve them to my mom. These are the valuable lessons I learned from her and through my own mistakes:
- Make a pliable but not soft dough. Poori dough is stiff, and naan dough is soft. A roti dough should be in between, neither stiff nor too soft but firm and pliable.
- Knead the dough by hand. When you are new to making roti, don't knead the dough in a stand mixer or food processor because you could add too much or too little water. Use your hands at first and move on to the machines once you have a good feel for the dough.
- Rest the dough. Soon after kneading the dough will feel a bit rough. You don't have to spend a lot of time kneading roti dough. Just let it sit for 30 minutes, then knead lightly again and you'll find it is smoother and much easier to work with.
- Don't roll roti too thin. When learning to make rotis, make them a little thicker. Practice first on rolling them as evenly as possible. Don't press down too hard on the rolling pin.
- Flip the roti quickly, before large char spots form. You don't want large char spots on a roti, the way you would on a naan because that would make the roti brittle. Keep the heat on medium and flip the roti as soon as it begins to turn opaque with small bubbles. It should barely have any color. After 10-15 seconds flip again, then one more time, and one last time if necessary. You can also brush some oil on the roti after the first flip, or after it comes off the griddle to keep the roti soft.
- Wrap the rotis in a kitchen towel. Do this as soon as they come off the stove and they will remain soft until you are ready to serve.

Equipment for making roti
- Rolling pin : Indian roti rolling pins, called "latne" or "belan," are lightweight and made of wood. They don't have ball bearings, like heavier pie pins do, for better control. If you can, use an Indian rolling pin or a French rolling pin. In India rolling pins are usually sold along with a small, round wood board called "polpat" or "chakla," but you don't need it - any flat surface or chopping board will do.
- Cast iron griddle: To roast the roti, use any cast iron or nonstick griddle or skillet. Tava, a very thin Indian cast iron griddle, is best for roasting rotis, but you can use any griddle you have.
Recipe card
Roti recipe
Video
Ingredients
- 260 grams atta flour (can use regular whole wheat flour but it will make stiffer rotis)
- ½ teaspoon salt
- ¾ cup water (approximately. You might need more or less.)
- 2 tablespoons oil (For brushing on the rotis. You can use cooking spray, or no oil at all.)
Instructions
Make the roti dough
- Place two cups of flour and salt in a bowl.

- Trickle in water, a little at a time, until the dough comes together and is not sticky. Knead for another minute or so. The dough shouldn't feel sticky but it may seem a bit rough. That's okay. Resting the dough will resolve this.


Rest the dough
- Place the dough in the bowl and cover with a tight lid or a damp kitchen towel. Set aside for at least 30 minutes to an hour. After resting the dough should feel much more pliable. Knead it briefly into a smooth ball.
- Divide the dough into 10 equal-sized balls -- called "pedha" in Hindi. Keep the rest of the dough covered while you work on each roti.


Roll the rotis
- Dust the working surface. With the rolling pin, roll one ball of dough into a three-inch round. Brush a small amount of oil on it with your fingers or a pastry brush. Fold over once, brush a little more oil, then fold over one more time to form a triangle.

- Roll the triangle into a six- to seven-inch round as best as you can. You can also make the roti triangular, if that's easier. Focus not so much on the shape but on rolling out the roti so it's of even thickness. If you are learning, make smaller and thicker rotis - you will eventually be able to make thinner rotis with some practice.


Roast roti
- Heat a tava or griddle over medium heat. Place the roti on the hot griddle and wait for the roti to turn opaque with small bubbles. This should only take a few seconds.
- Flip the roti over and press on the edges with a spatula to help the roti puff up. After about 15 seconds, flip the roti once more. You want the roti to be opaque all over and have small, pale brown spots scattered across the surface. There should be no black spots or large char spots.
- As soon as the rotis comes off the griddle, brush on some oil and store them wrapped in a soft kitchen towel until it's time to serve.


Nutrition Information
To print recipe card without images, uncheck "instruction images" after clicking the "print recipe" button.
My top tip for round rotis
Rolling rotis into perfect rounds can be very challenging for a beginner but it's a skill you'll get better at with practice. Use light pressure to keep the pin rolling - eventually the rolling pin will feel like an extension of your arms, and the dough will move with the pin, helping you create round, evenly thick rotis. Another trick you can use is to move the roti a quarter turn after each roll, which will result in perfectly round rotis!

Frequently asked questions about making roti
To make authentic tasting rotis you need durum wheat flour, called "atta" in Hindi. This is a very finely ground, soft winter wheat that grows in north India. There are several good 100-percent whole wheat brands you can buy online or at an Indian grocery store, including Ashirvaad, Mantra (organic, my favorite), Taj, Sujata and Golden Temple.
You can make roti with any wheat flour, but rotis made with regular wheat flour - the kind you can buy off supermarket shelves and is more coarsely ground than atta - will be far too stiff and won't feel or taste like roti should.
Store the dough in an airtight container for up to three days in the fridge. The longer you leave it in the fridge, the softer it will become and the harder it will be to make rotis. Discard the dough if it begins to feel sticky or smells off.
Yes, store the rotis in an airtight container in the fridge for up to three days. You can also stack the rotis, separated by wax paper or parchment paper, and freeze them in a freezer-safe bag of container for up to four months. Reheat the rotis on a griddle.
Roti is unleavened, but sourdough helps make the rotis softer and adds lovely flavor. You can find my recipe for soft sourdough rotis here.
No, tandoori roti is a puffy, restaurant-style flatbread that resembles naan. It's leavened with yeast and is baked in a round oven called "tandoor."
Dip roti into spicy Indian curries, like vegan butter chicken, vegan palak paneer, vegan paneer butter masala, bhindi masala or baingan bharta. Roti is also delicious with dal. Try this delicious vegan dal makhani or dal tadka or masoor dal.


Jessica says
My roti making skills are getting better and better. My family thanks you. Great tutorial!
Vaishali says
So happy to hear, Jessica!
Lucky says
Hi can u pls forward me ur soft butterd roti recipe I really wana know how to bake it pls.
Anaya says
Vaishali, this tutorial has been a game changer. These are by far the best rotis I've made. We love them with spicy eggplant curry.
Vaishali says
Yay! I love it with eggplant too.
Anita says
My rotis have never looked so good or felt so soft. This is a superb resource.
Vaishali says
So happy to hear Anita!
Heena says
Hi Vaishali, I had made rotis a few times before but could not really pin them down, but your video and clear instructions really helped. I've made the rotis per your instructions a few times now and I am already upping my roti game! They are much softer (and rounder) now although I know I have a lot to learn and a long way to go, still. Thank you for your awesome blog and particularly for this roti recipe.
Vaishali says
Hi Heena, making rotis perfectly definitely takes practice--it took me years! Stay with it and you'll get even better with time. So happy you found the post and video useful.
Rashmi Sarin says
Great video but most of us don’t put oil before puffing roti. We puff it and then brush ghee, butter or oil on one side after you take it off the flame.
Vaishali says
Good to know, Rashmi. Most people I know would brush on oil before puffing it. To each his own, I guess, so long as it works.
Stephen says
What is the circular red thing you are rolling out the roti's on? Is it available through a link? Do you have links for the rolling pin and griddle as well? I've tried to make these before, without much success, but watching your video has inspired me to try again. (I even bought atta flour!)
Vaishali says
Hi Stephen, that's the rolling board usually used to roll rotis--you can buy a traditional wooden rolling board online or at an Indian store. The red one I am using is made of silicone and is from a company called Gitadini. You can find them online, it's called a Rotito rolling board and it's great--I love it.
I couldn't find a rolling pin exactly like mine (I got mine at the Indian store) on Amazon but here's one that should work just as well. https://amzn.to/3EQfaja. Or look for a French tapered rolling pin.
For the griddle, here's a link for something similar to what I use. https://amzn.to/31yGFPT. You can buy an Indian tawa on Amazon, but those tend to heat up very fast and can make the rotis stiff if you're not too experienced with them, so I'd advise using the thicker, comal-type griddle I linked.