

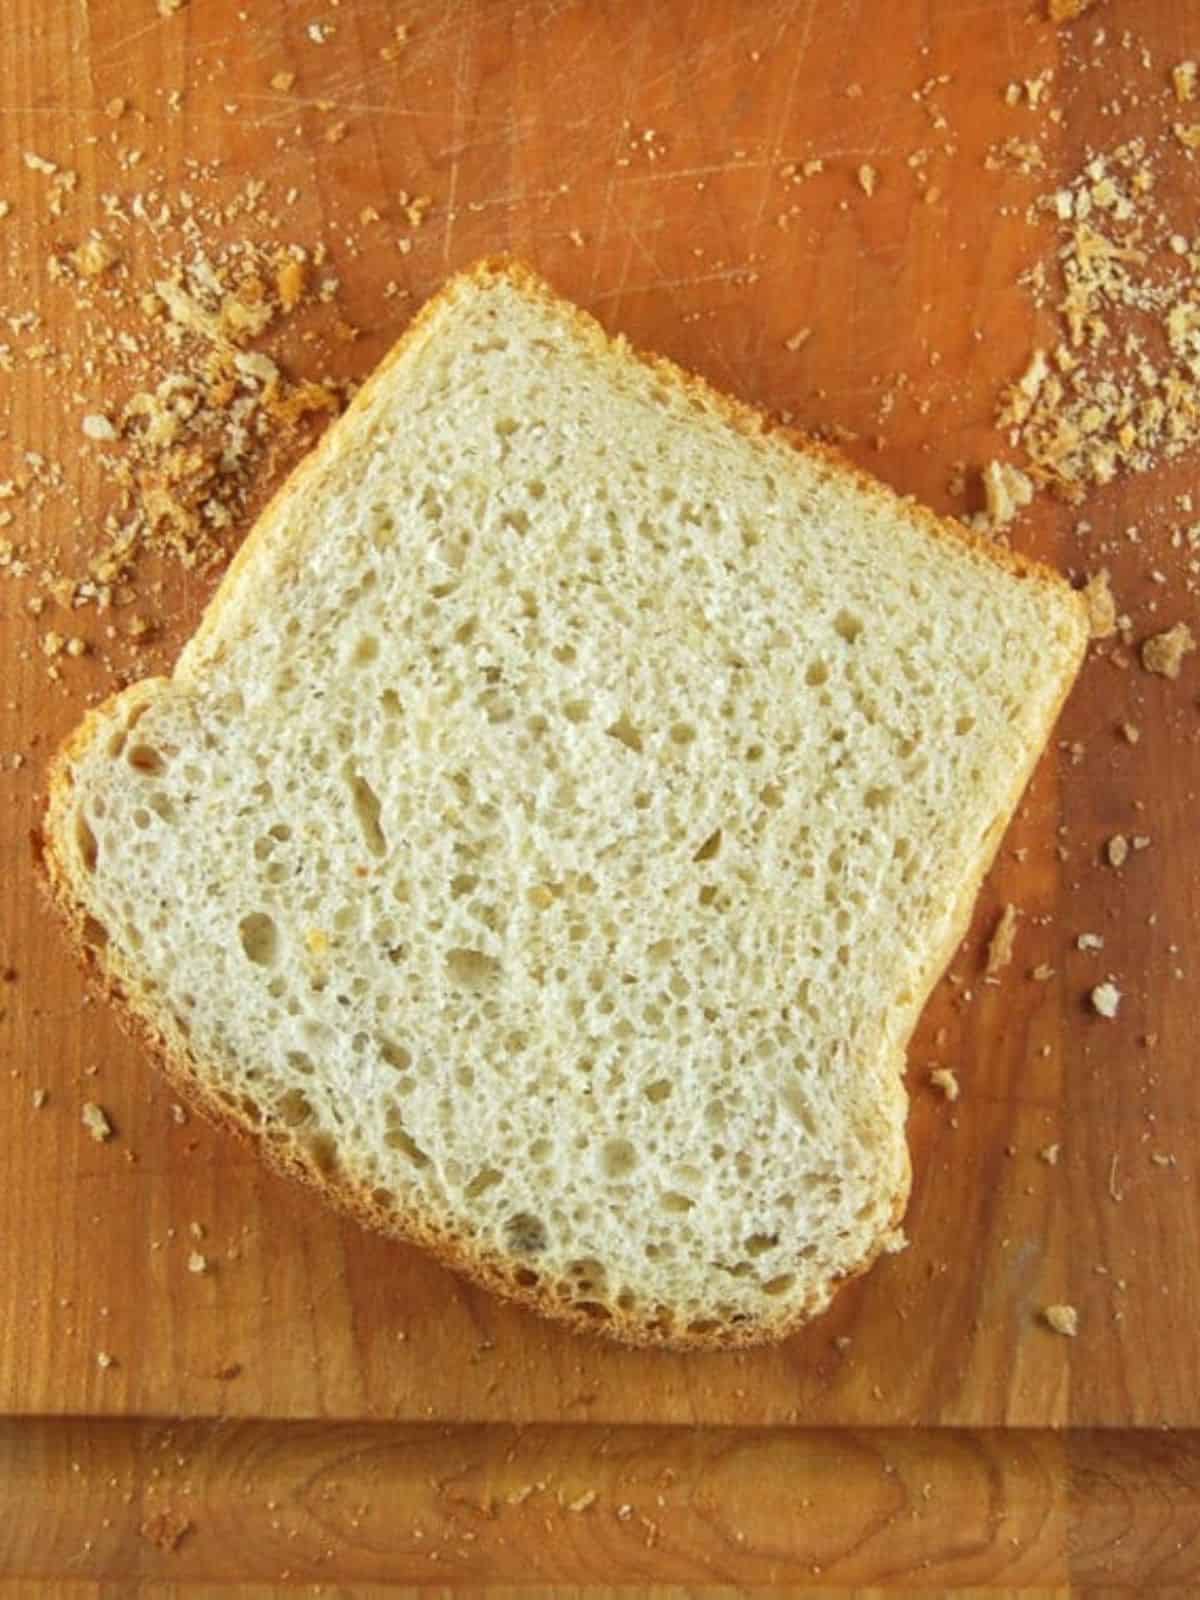
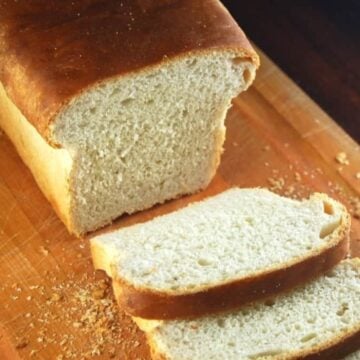
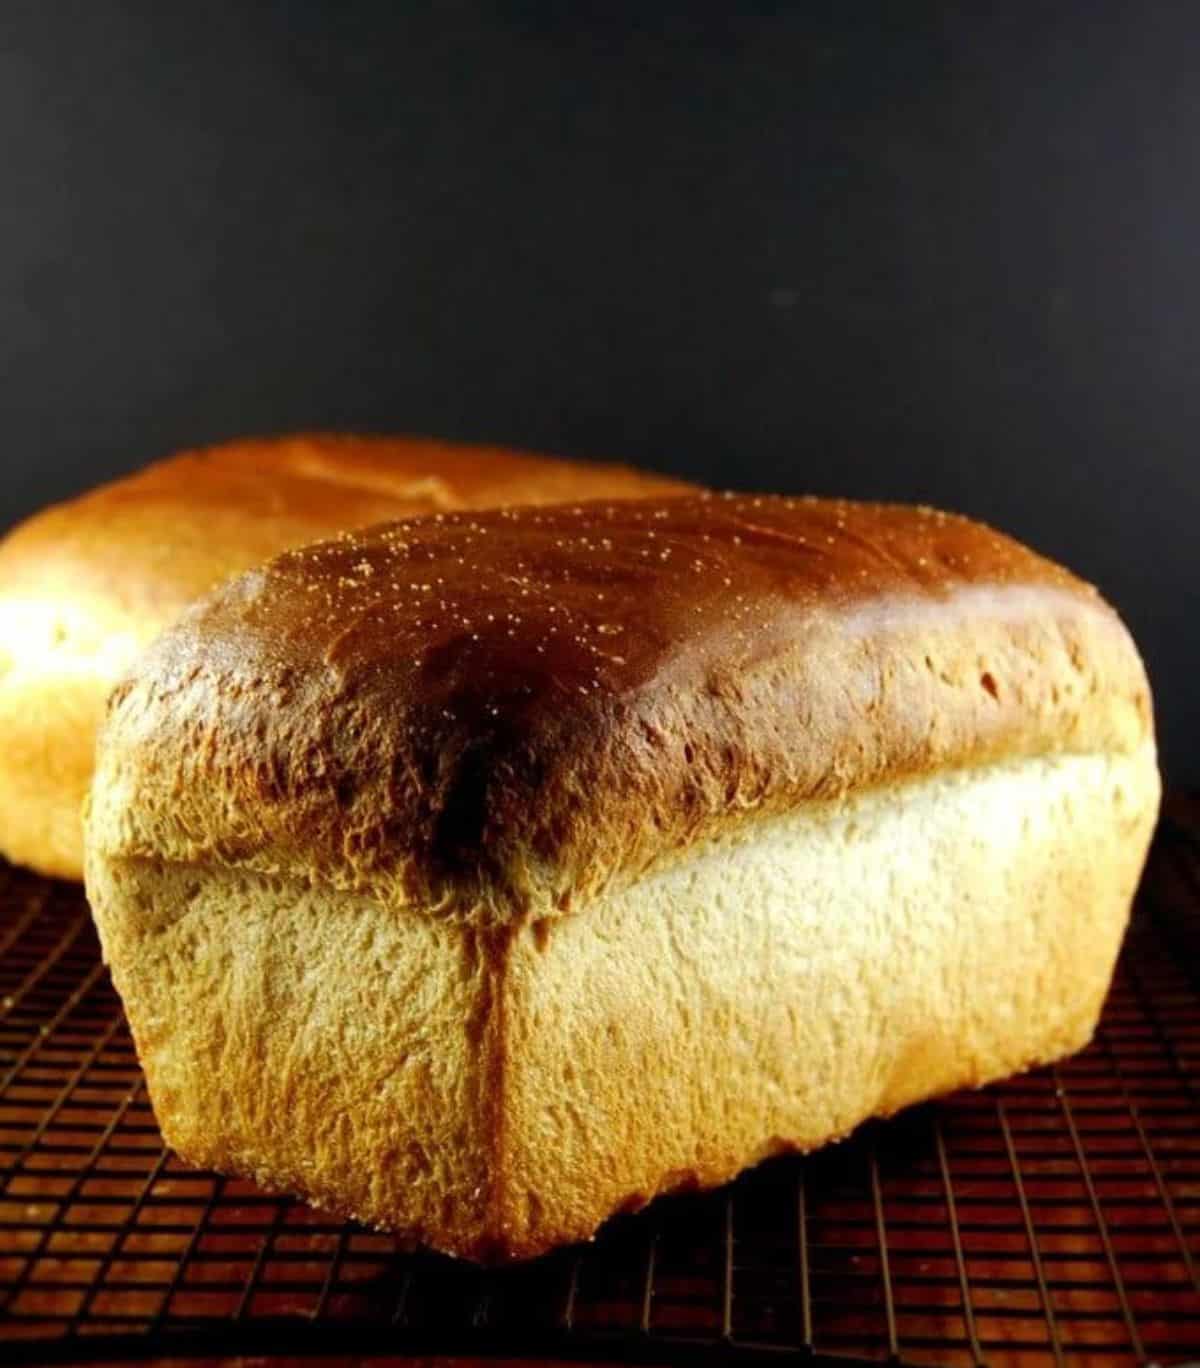
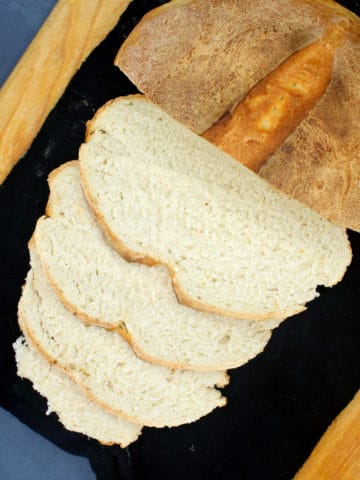
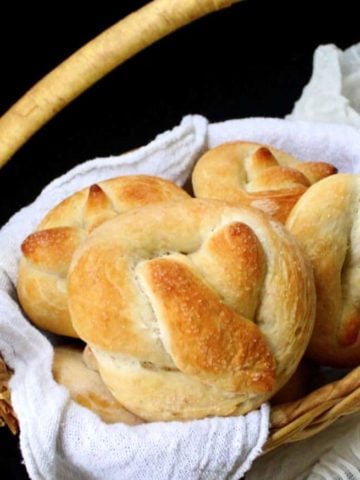
Every home baker needs a foolproof recipe for soft, fluffy sourdough sandwich bread and here's one that will reward you with amazing bread each time. My easy sourdough sandwich loaf recipe doesn't need any added yeast; it uses an active, bubbling sourdough starter to create buttery, tangy flavor and a light, airy crumb. It slices beautifully too!

A fantastic same-day sourdough sandwich bread
Many sourdough breads need to be started the night before, but this sourdough sandwich loaf can easily be made in about eight hours from start to finish. So if you start the bread in the morning, you can have it baked and ready in time for dinner.
The recipe makes two sandwich loaves, which last us all week long. I use it to make all of my sandwiches even more delicious, and it's wonderful with peanut butter and jelly. You can even dunk it into soups and stews! But my hands-down favorite way to eat it is to toast it lightly - especially when it's a couple of days old - and slather it with vegan butter.
This recipe uses mostly white flour but I don't feel too bad about that because research shows that sourdough-based baked goods - even white sourdough bread - are healthier. Sourdough starter is full of healthy bacteria that are probiotic and extremely beneficial to the gut microbiome. These bacteria help partially break down gluten in the dough and make the bread easier to digest (they also improve the texture of the crumb, rewarding you with that soft sourdough bread you love).
Sourdough bread also has a lower glycemic index, which means it releases glucose into the blood more slowly. This recipe is vegan so it uses no eggs or milk, and consequently has no cholesterol and no natural sugars.
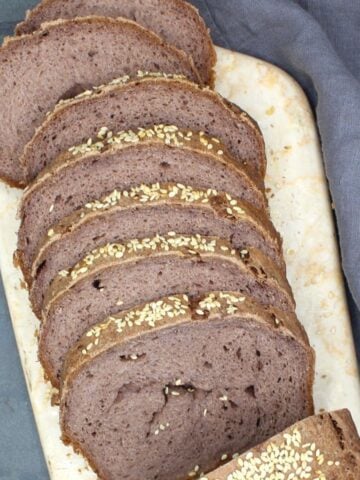
Even if all of that doesn't sway you, don't you know at least that one person who refuses to eat wholegrain bread? This bread would be perfect for them! If you still prefer a wholegrain version, I have a fantastic whole wheat sourdough sandwich bread recipe on the blog.
Sample schedule for baking sourdough sandwich bread
This is the timetable I follow when I make this sandwich bread for dinner:
- 8 a.m.: Make the first starter and set it aside to rise four hours.
- 12 noon: Make the dough and let it rise two hours.
- 2:30 p.m.: Shape the loaves and set aside to rise two more hours.
- 4: 45 p.m.: Bake bread for 40 minutes. Cool on wire rack before serving.
I made this bread a few weeks ago and it's AMAZING. Super easy and just perfect. I have made SD sandwich bread a few times and this is by far the best! Thank you!!!
- Ryan
Recipe card
Sourdough Sandwich Bread Recipe
Ingredients
- 1½ cups sourdough starter (bubbling and active)
- 1½ cups lukewarm water
- 1 cup whole wheat flour
- 4-5 cups unbleached all purpose flour
- 1 tablespoon extra virgin olive oil (or any neutral oil of your choice)
- 1 teaspoon sea salt (or any salt of your choice)
Instructions
First starter and rise
- Place the sourdough starter in a large bowl or the bowl of a stand mixer. Add to it the wholewheat flour, 1 cup of all-purpose flour, and water. Mix well and set it aside, covered, in a warm place for four hours.

- After four hours the starter should be quite fluffy and bubbly.

Make sourdough sandwich bread dough
- Add 2 cups of all-purpose flour, olive oil and salt and mix. Add more flour as you knead until the dough becomes quite firm but still feels a little sticky to your fingers. You can do this by hand or in the stand mixer, using the dough hook attachment, on medium-low speed.

- Turn out the dough on the kitchen platform or any flat surface and knead by hand for 4-5 minutes or until the dough feels smooth and springy to your fingers and barely sticks to the platform.

Second rise
- Shape into a ball and place in an oiled bowl, turning the ball of dough around once to coat the top with oil. Cover tightly and place in a warm spot (like an oven with the light turned on) for at least two hours or until the dough has doubled.

Shape loaves
- Punch down the dough and divide into two. Roll out each half into a rectangle, about seven by 10 inches, and roll it up like a jelly roll. With the seam side down, tuck in the ends to form a loaf.

Third rise
- Prepare two loaf pans by spraying or brushing lightly with oil and then sprinkling on some cornmeal or semolina on the bottom and sides. Place the loaves into the prepared loaf pans.

- Cover the loaves with a kitchen towel and let them stand in a warm place for at least two more hours or until the dough domes above the top of the loaf pans.

Bake bread
- About half an hour before baking, preheat the oven to 425 degrees Fahrenheit/220 degrees Celsius. Place the loaves in the oven and bake 40 minutes. Remove the loaves from the oven, turn them out on a rack, and let them cool thoroughly before slicing.

Notes
- Increase salt by up to one teaspoon if you like a saltier loaf.
- For a gluten-free version, try my gluten-free sourdough sandwich bread.
- Refrigerate: The bread can be stored at room temperature for four days and in the refrigerator for up to two weeks.
- Freeze: Freeze the bread for up to three months in a freezer-safe bag, whole or sliced.
Nutrition Information
To print recipe card without images, uncheck "instruction images" after clicking the "print recipe" button.
Top tip
The hydration of your sourdough starter and the weather where you live can change how much water you need for the recipe. If you find that adding two cups of water results in a very sticky dough, reduce the amount of water next time to 1 cup and, if you need it, trickle in the remaining water while kneading the dough.
Sourdough sandwich bread FAQs
Yes, just halve the amount of ingredients and you are all set!
The culprit here is your sourdough starter. If it is not active and fed recently (as in eight hours to 24 hours before use) you simply won't have enough natural yeast in the starter for the dough to rise.
To create a softer crust for the sourdough sandwich bread, replace half the water with soy milk.
Bread flour will give you a slightly crustier loaf. Use it if you like a crustier bread, it will be fantastic.
If you have some experience baking bread, but are new to sourdough baking, you should have no trouble making this easy sourdough sandwich bread. If you are new to both bread making and sourdough bread making, you might have a learning curve.
You can use sourdough discard but make sure it's no more than two to three days old and comes from a very active, bubbly sourdough starter. I did use sourdough discard in the past for this recipe, but I find an active starter gives a better rise and therefore a fluffier loaf.
This happens to me too, especially when I get busy and don't knead the dough long enough or let the loaves proof too long after shaping. Next time knead the dough longer until it is very supple and smooth, and make sure you don't overproof the loaves, i.e. don't let them rise for longer than the recommended time.


Benjamin Hill says
I have been using this recipe each weekend for at least 6 weeks. It mixes very wet for me. I knead with a scrapper in my right hand and left hand caked with sticky, sticky bread dough. It comes out of the oven very soft but firms-up quite a bit after 1.5 days. I’ve found the loaf stays softer longer with the addition of finely shredded Asiago cheese. I’ve found it rises better with 1/4 cup of local, raw honey. I don’t know if the author looks down on my patronization of honey-theft from the bees.
My question is this: Has anyone mastered how to freeze this particular dough? If so, when and how exactly do you interrupt the recipe instructions with the freezing of the dough?
Laurie M LaDow says
At what point do you add the honey?
Ben says
I add the honey before the final rise, before separating into bread pans.
I have been trying to freeze just after separating and before the final rise.
So far, with those I’ve frozen, I find myself having to add in a teaspoon of yeast (or 1/2 teaspoon per loaf), because it simply cannot muster the strength to rise much (if any at all) over the sides of my bread pan.
At 4.5” wide by 2.75” high, this bread still tastes great, but it is not as practical as a nearly-square slice for sandwiches or fishing out of a toaster.
The only shot I have of getting it to rise enough after being frozen is by letting it sit in my microwave oven with a fairly large amount of water in a pan, straight from the boiling kettle. Even then, it sometimes starts falling back down, before rising enough.
Saira says
Would this work even if I put all the ingredients in one go instead of separating it into two steps?
I'm thinking to make the dough before work so that it's ready to bake when I get home.
Lisa says
This is a lovely recipe. I make sourdough but wanted a sandwich loaf. I did cheat and add an egg for extra lift and some extra oil. The bread was fantastic and the dough was so easy to handle. This is my new favourite recipe!
Vanessa says
Thanks for sharing! Do it keep long?
Michele Holland says
New to sourdough. Need to let the second proof rise at least 12 hours, but by that time the top is hard, so slicing it deflates the loaves. I have oiled the tops and covered also. any advise is appreciated. Michele
Vaishali says
Hi Michele, are you covering the loaf pan during the rise? I use a shower cap which fits snugly around the pan and also gives the loaf room to rise. 🙂
Michele says
I have just started making sourdough, and like this recipe quite a bit. I am having trouble with the long time it takes to rise the second time because by the time it is a good size, the top of the crust is hard despite my having oiled it. When I go to mark the crust before baking the top deflates a bit. Any advise would be appreciated. TIA Michele
Joann says
Hi Vaishali,
On your 75% hydration of 3/4 c of water and 1 c of flour, how much starter? Looking forward
to trying your loaf pan recipe.
Anonymous says
Is there a sourdough shortcut with yogurt? Very much appreciate your inputs!
Irene says
Love this recipe! I'm a very relaxed Baker who is not very finicky with Rufus (my sourdough). Because I don't always have time for waiting, I use a slower fridge rise regularly. I'll put it in the fridge after kneading, sometimes for a few days. Then I shape or right out of the fridge, and either let it rise, or throw it back in the fridge. If I put it back in the fridge, I bake it straight into a hot oven right from the fridge. No kidding this week I got a cold and forgot about the bread in the fridge, so I'm currently baking two loaves that got started a week ago! So nice and forgiving!!!
Fiona says
Ive been trying out sourdough sandwich bread recipes and this is absolutely the best ive found.
Worked really well. wish i knew how to post a photo of it here. Lovely golden crust(dark tins) Had to turn them upside down for 10 minutes at low gas 4 to get the bottoms cooked properly and that hollow tap.
Im not Vegan, but enjoy Vegetarian/vegan days and try to cover all dietary requirements at my BnB in Scotland UK
Wee point...I will put a bit of extra salt in the next bake.
Thank you
Tanja Turney says
Hello,
Thank you for the recipe. I have made it twice and I Love the Taste. I do have a question, I have followed your recipe exactly and my starter is very active. The dough rises fine during the proofing phase but it won’t rise for the last proofing phase after it put it in the pans. Any ideas? I am using the starter recipe from King Arthur flour.
Michele says
Hi
I made this recipe, all seemed to go very well throughtout the process. But after rising over 3 hours the dough in the pan didnt rise over the top. However, it did rise above the top during the bake. But the top split on one side. It doesn't have the same shape as your photo. I used an 8x4 pan and made 2 loaves. It was a little crustier than I thought it would be.
Did I do something wrong or just expected different results?
Thanks for sharing the recipe, I will make it again.
Michele
Vaishali says
Hi Michele, one of the wonderful aspects about cooking with sourdough is that you can never quite tell how the bread will change in the oven. Usually it's a good surprise. 🙂 I wouldn't worry too much about the split top, because that's just the gases escaping -- you can try to control the split the next time by making a quick cut on the top of the loaf with a serrated knife before baking, to let the gases escape. And this bread does have a slightly crisp crust, but that too can change depending on your baking pan and even the weather where you are.
Nan says
Would love to see this demonstrated on video. I wish you have a Youtube channel. I've never made bread and not sure what you mean by 'punch it down'.
Jess says
I have made this several times... I have never gotten it to rise out of my loaf pans. Wondering if it may be my pan size verses yours? I know my starter is good- when you add it to the ww flour, water and all purpose flour it bubbles well.
Vaishali says
You can try making it in a different pan -- I use a standard pan which is around 8 X 4 inches, I think.
Bridget says
My bread turned out more like a bagget as my husband put it..but still very good and flavorful..it definitely was not sandwich bread like I hoped not sure why but at least it turned out good
N says
Loved your bread. Just cant get over throwing away the starter every time you feed it. Does anyone have ideas of how to use the discarded starter?
Vaishali says
Hi N, I just started a post for five delicious recipes to use sourdough discard and I'll post it this week. Stay tuned.
JoAnn says
I don’t discard anymore. Once I had a good, mature starter, I just found it easier to keep it in the refrigerator. That way you don’t have to feed it daily. Take it out the evening before you want to use it, feed it, then leave out overnight. Take out what you need for your recipe the next morning, then feed it again. Leave out a couple hours, then put back in the refrigerator.
Viv says
Hi Vaishali. I love this Sourdough Sandwich Bread recipe, which is how I found the recipe for your starter. My question concerns how you measure. I prefer to bake by weight measurements but when I tried that my sandwich bread was a huge fail. Since the hydration rate is key to success, will you be so kind as to share your preference for measuring flours by “cup”, ie: the spoon and sweep method, dip and sweep? The results are startling different by method used. Thank you so much!
carol says
I made this today! well, yesterday and today.... great recipe! My starter is 100% hydration. I didn't modify any of the ingredients, but after the levan (first step) i let it go overnight in the refrigerator. This morning, i did the next step, doing most of the kneading in the stand mixer, then let it rise 4 hours instead of 2 for the first rise, and around 3 or 3.5 for the second. The bread is AWESOME!!! i will probably let it rise more the second rise next time, to make it a bit taller, but the flavor and crumb are perfect for us!
Marcella says
I made this bread this past week and it is great! Really easy to follow recipe and the bread is good. It slices easy, holds together for sandwiches, and has a great classic sourdough aroma and taste without being too strong. Thank you for this recipe:). I plan to make some rolls with this dough next week
Katie says
I am fairly new to baking bread and have tried several recipes looking for something to replace my weekly purchase of bread at the store. This is it!! I cut it in half because it is just two of us and add flour during the kneading until it is just barely sticky. I also butter the top while still warm to make it a deeper shade of golden. Otherwise it is exactly as described and so good! Thank you so much for sharing!
ROB says
I made this today, turned out great. Thanks for the recipe.
Vaishali says
Happy to hear! Thanks for letting me know. 🙂
Annette says
Thank you for the recipe, it turned out great! I didn't read the comments first about the water ratio in the sourdough starter and ended up using another quarter cup of flour, and luckily it was a forgiving recipe. Can't wait to make it again with the correct sourdough starter.
Denise says
Since my comment, I've been researching how bakers work with starter. I've learned a TON about sourdough and how to work with starter for a variety of approaches! Cultures for Life has some helpful information, and I tried their bread recipe, but it was not as good as this one. I've finally figured it out, and this recipe is - hands down - our favorite. The biggest secret to sourdough is to work with it visually vs. timing - it may take five hours to rise instead of two. I also went with a longer first ferment time (the 4 hrs can be up to 24 hrs) for an even more sour flavor, and just one rising time in the pans after kneading. The second biggest secret is that sourdough is way more sticky than regular bread dough, and that's okay! I've learned to appreciate and manage the 'taffy' style. I LOVE having learned all of this, thank you very much for encouraging it! I can't imagine my life without sourdough bread - we eat this every day!
Kirsten says
So, I tried it, But ended up doing not following the instructions correctly. I used rye flour to start my starter dough. Its winter here in South Africa so the fermentation was pretty slow. I fed it every second day, which allowed for more fermentation. I made the bread on the seventh day from the discarded feed (had it stored in the fridge, and I hate unnecessary waste) which I left on the counter top overnight to ferment and combined it with the starter dough. I mixed everything together adding one cup flour at a time without the initial step of fermenting the starter dough with 1 cup of flour. It rose but not very high. I kneaded out the air and stuck it in the oven over night to rise and it worked, it doubled in size but I forgot to rise it in the pans I was baking it in, so I had to transfer the mixture to the baking pans. Its quite dense, heavy almost like a ciabatta and such a beautiful flavour... Im now slowly adding in AP flour to my rye starter to create something less dense. Can't wait to try your brioche loaf but will wait until i've worked out the rye out of my starter dough. Thank you for all the wonderful recipes!!
Fran says
How do you measure your starter, do you flatten it?
Vaishali says
The starter is not very firm, so it should level out on its own when you measure it to the top of the cup. Don't heap it.
Pam says
Could you elaborate on your starter? Did you start with wheat flour and feed with all purpose? Thanks
Denise says
I'm running into the same problem as others. The first few times I made this recipe it was great. Now, every time, I get the taffyish dough. It kneads up nicely, but then won't rise and is like gooey taffy when I try to shape the loaves. It doesn't rise at all in the pans. And then barely in the oven. So sad. What's going wrong? I tried the no knead loaf and the same thing is happening. Taffy dough. I make quick dosas from the sourdough, and those are amazing. Help?
Shannon says
So I have made sour dough bread three different times from the recipe following it exactly and it turns out the same way every time. It is really good but my loaves do not get tall enough to use the bread as a sandwich. I am not sure what I am doing. I do notice that I have to use some additional flour to handle the mixture because mine seems to be rather moist and very sticky. I also can't really form the bread into ovals because it is still on the very soft and pliable side. It is hard to make two loaves because it doesn't want to separate. I am assuming that I am doing something wrong I am just not sure what. Any advice? But still very happy with the taste and overall results.
Anonymous says
I just want to thank you for sharing this sandwich sourdough recipe. I tried it last night and the breads came out beautiful. It was chewy, crusty on the outside and moist on the inside.