

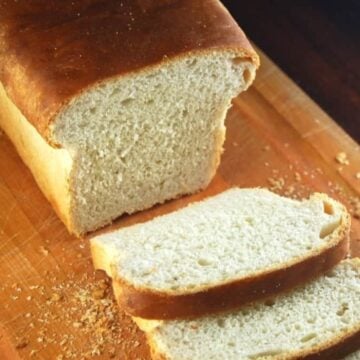
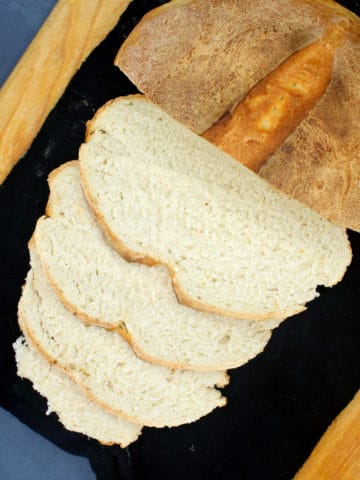
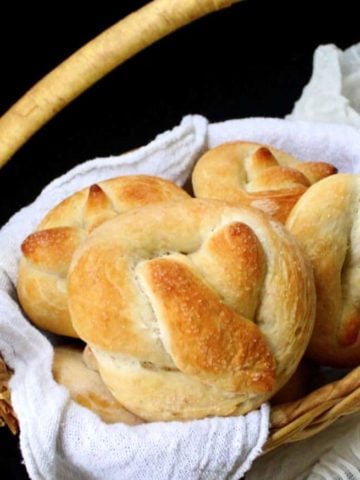
Every home baker needs a foolproof recipe for soft, fluffy sourdough sandwich bread and here's one that will reward you with amazing bread each time. My easy sourdough sandwich loaf recipe doesn't need any added yeast; it uses an active, bubbling sourdough starter to create buttery, tangy flavor and a light, airy crumb. It slices beautifully too!

A fantastic same-day sourdough sandwich bread
Many sourdough breads need to be started the night before, but this sourdough sandwich loaf can easily be made in about eight hours from start to finish. So if you start the bread in the morning, you can have it baked and ready in time for dinner.
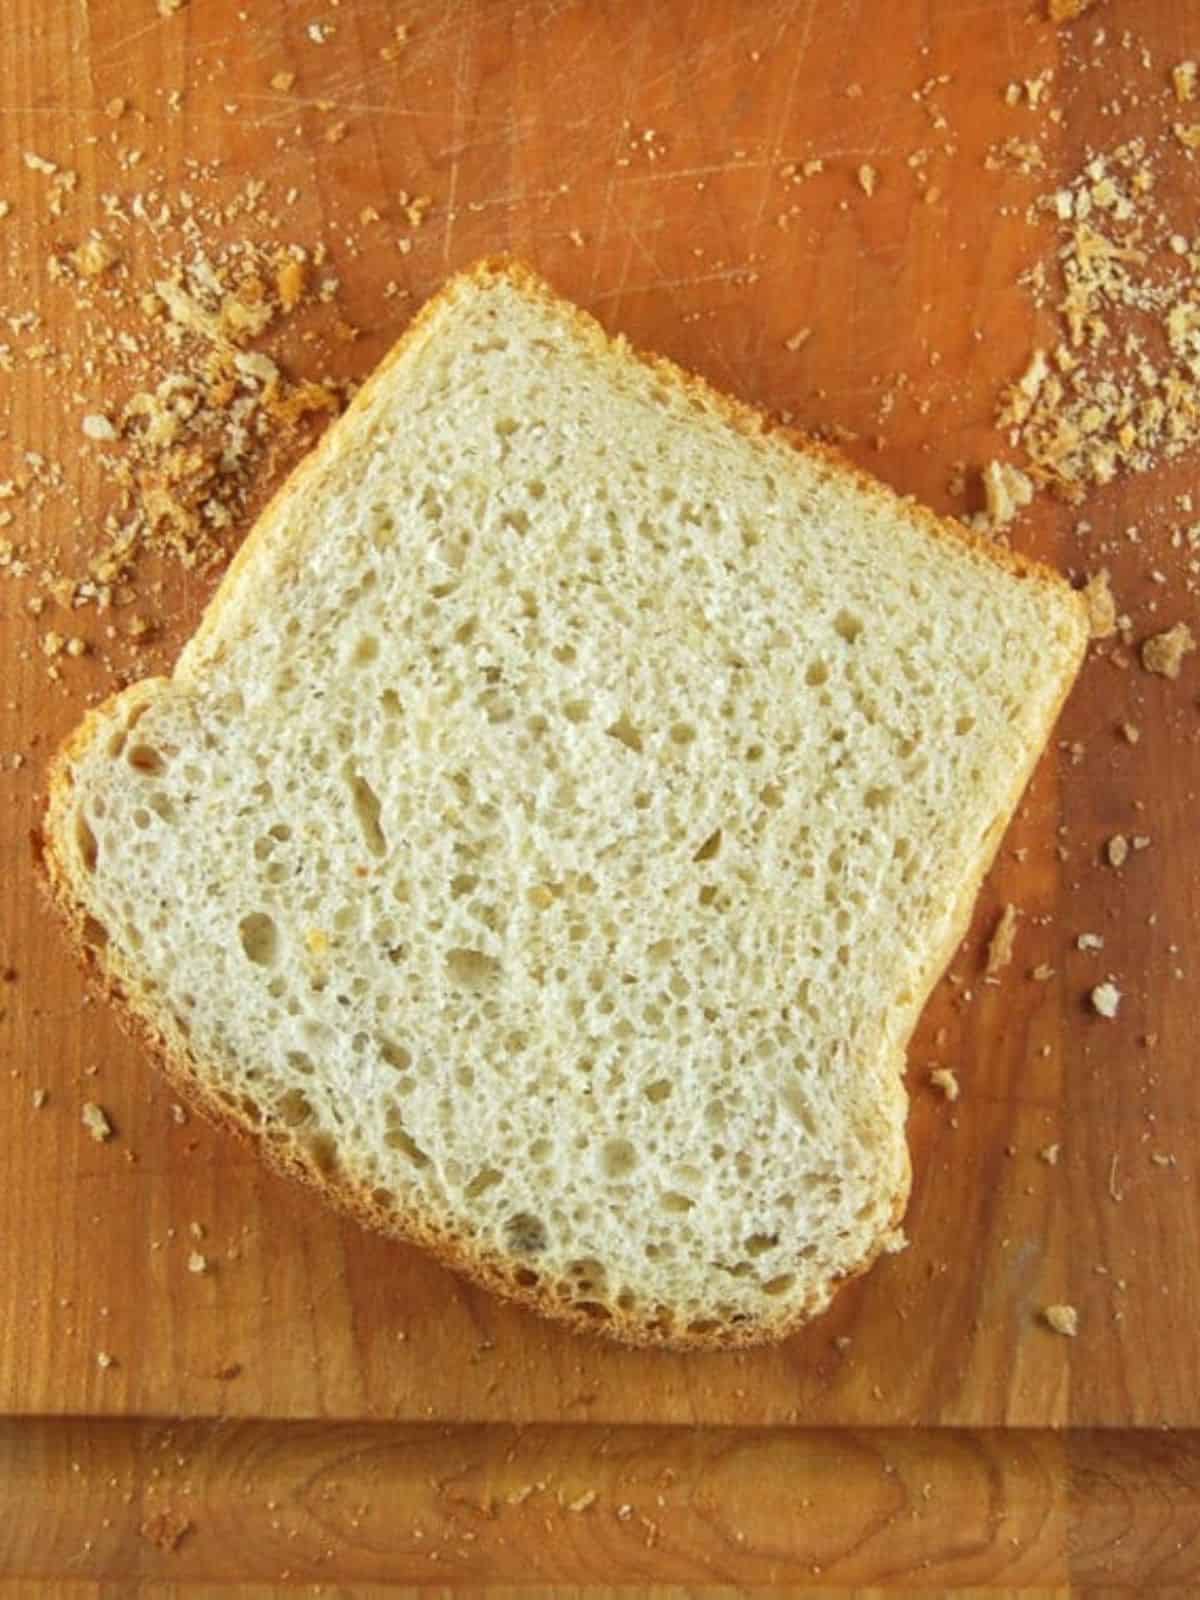
The recipe makes two sandwich loaves, which last us all week long. I use it to make all of my sandwiches even more delicious, and it's wonderful with peanut butter and jelly. You can even dunk it into soups and stews! But my hands-down favorite way to eat it is to toast it lightly - especially when it's a couple of days old - and slather it with vegan butter.
This recipe uses mostly white flour but I don't feel too bad about that because research shows that sourdough-based baked goods - even white sourdough bread - are healthier. Sourdough starter is full of healthy bacteria that are probiotic and extremely beneficial to the gut microbiome. These bacteria help partially break down gluten in the dough and make the bread easier to digest (they also improve the texture of the crumb, rewarding you with that soft sourdough bread you love).
Sourdough bread also has a lower glycemic index, which means it releases glucose into the blood more slowly. This recipe is vegan so it uses no eggs or milk, and consequently has no cholesterol and no natural sugars.
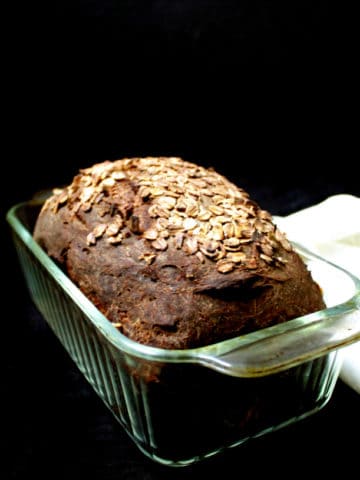
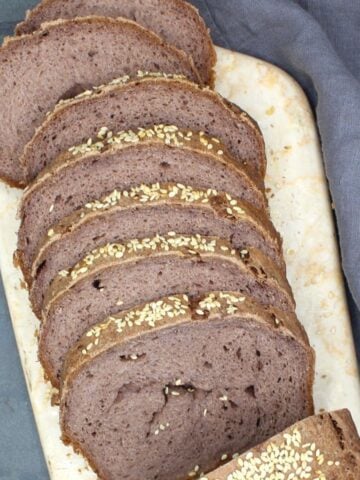
Even if all of that doesn't sway you, don't you know at least that one person who refuses to eat wholegrain bread? This bread would be perfect for them! If you still prefer a wholegrain version, I have a fantastic whole wheat sourdough sandwich bread recipe on the blog.
Sample schedule for baking sourdough sandwich bread
This is the timetable I follow when I make this sandwich bread for dinner:
- 8 a.m.: Make the first starter and set it aside to rise four hours.
- 12 noon: Make the dough and let it rise two hours.
- 2:30 p.m.: Shape the loaves and set aside to rise two more hours.
- 4: 45 p.m.: Bake bread for 40 minutes. Cool on wire rack before serving.
I made this bread a few weeks ago and it's AMAZING. Super easy and just perfect. I have made SD sandwich bread a few times and this is by far the best! Thank you!!!
- Ryan
Recipe card
Sourdough Sandwich Bread Recipe
Ingredients
- 1½ cups sourdough starter (bubbling and active)
- 1½ cups lukewarm water
- 1 cup whole wheat flour
- 4-5 cups unbleached all purpose flour
- 1 tablespoon extra virgin olive oil (or any neutral oil of your choice)
- 1 teaspoon sea salt (or any salt of your choice)
Instructions
First starter and rise
- Place the sourdough starter in a large bowl or the bowl of a stand mixer. Add to it the wholewheat flour, 1 cup of all-purpose flour, and water. Mix well and set it aside, covered, in a warm place for four hours.

- After four hours the starter should be quite fluffy and bubbly.

Make sourdough sandwich bread dough
- Add 2 cups of all-purpose flour, olive oil and salt and mix. Add more flour as you knead until the dough becomes quite firm but still feels a little sticky to your fingers. You can do this by hand or in the stand mixer, using the dough hook attachment, on medium-low speed.

- Turn out the dough on the kitchen platform or any flat surface and knead by hand for 4-5 minutes or until the dough feels smooth and springy to your fingers and barely sticks to the platform.

Second rise
- Shape into a ball and place in an oiled bowl, turning the ball of dough around once to coat the top with oil. Cover tightly and place in a warm spot (like an oven with the light turned on) for at least two hours or until the dough has doubled.

Shape loaves
- Punch down the dough and divide into two. Roll out each half into a rectangle, about seven by 10 inches, and roll it up like a jelly roll. With the seam side down, tuck in the ends to form a loaf.

Third rise
- Prepare two loaf pans by spraying or brushing lightly with oil and then sprinkling on some cornmeal or semolina on the bottom and sides. Place the loaves into the prepared loaf pans.

- Cover the loaves with a kitchen towel and let them stand in a warm place for at least two more hours or until the dough domes above the top of the loaf pans.

Bake bread
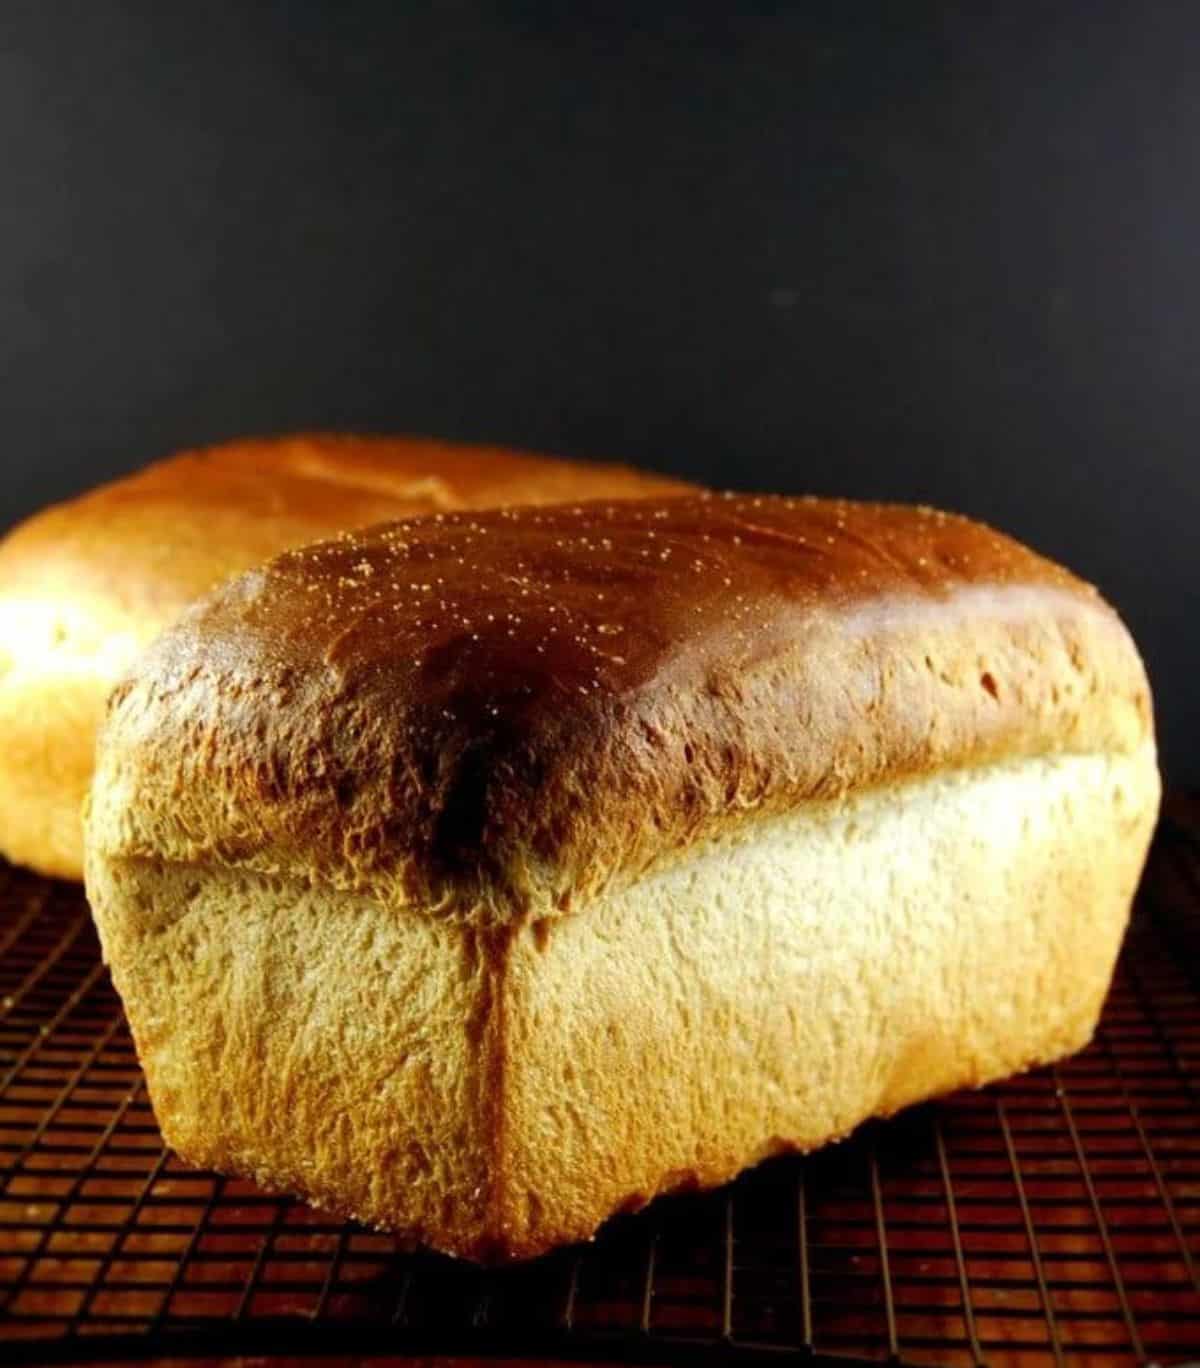
- About half an hour before baking, preheat the oven to 425 degrees Fahrenheit/220 degrees Celsius. Place the loaves in the oven and bake 40 minutes. Remove the loaves from the oven, turn them out on a rack, and let them cool thoroughly before slicing.

Notes
- Increase salt by up to one teaspoon if you like a saltier loaf.
- For a gluten-free version, try my gluten-free sourdough sandwich bread.
- Refrigerate: The bread can be stored at room temperature for four days and in the refrigerator for up to two weeks.
- Freeze: Freeze the bread for up to three months in a freezer-safe bag, whole or sliced.
Nutrition Information
To print recipe card without images, uncheck "instruction images" after clicking the "print recipe" button.
Top tip
The hydration of your sourdough starter and the weather where you live can change how much water you need for the recipe. If you find that adding two cups of water results in a very sticky dough, reduce the amount of water next time to 1 cup and, if you need it, trickle in the remaining water while kneading the dough.
Sourdough sandwich bread FAQs
Yes, just halve the amount of ingredients and you are all set!
The culprit here is your sourdough starter. If it is not active and fed recently (as in eight hours to 24 hours before use) you simply won't have enough natural yeast in the starter for the dough to rise.
To create a softer crust for the sourdough sandwich bread, replace half the water with soy milk.
Bread flour will give you a slightly crustier loaf. Use it if you like a crustier bread, it will be fantastic.
If you have some experience baking bread, but are new to sourdough baking, you should have no trouble making this easy sourdough sandwich bread. If you are new to both bread making and sourdough bread making, you might have a learning curve.
You can use sourdough discard but make sure it's no more than two to three days old and comes from a very active, bubbly sourdough starter. I did use sourdough discard in the past for this recipe, but I find an active starter gives a better rise and therefore a fluffier loaf.
This happens to me too, especially when I get busy and don't knead the dough long enough or let the loaves proof too long after shaping. Next time knead the dough longer until it is very supple and smooth, and make sure you don't overproof the loaves, i.e. don't let them rise for longer than the recommended time.


Nicole says
Hi, I was wondering is the starter supposed to be fed? Or is it the discard? I'm increasing my feedings and not discarding so I have a cup and a half to use for the recipe. Thanks
Vaishali says
You do have to discard part of the starter and then feed the remaining starter. If you want more starter for a recipe, just feed it with more flour and water.
Nicole says
Thsnks, I hope I did not ruin it. In the recipe is the starter used for the bread fed starter or the discard from the morning?I want to make the dough tomorrow morning so in the first step am I using the discard from the morning or feed it and start dough in the afternoon after its had a while to eat lol?
William says
What I’ve been doing is to feed my starter and take the discard ( when I have it ) and feed that as well ( effectively splitting it ) and then using that for my new starter
( as it is essentially the same as the starter I put back in the refrigerator ) and the starter I have is in a quart mason jar so I have plenty to work with and can easily make 1-2 cups starter the next day after my feeding it .. so far it’s been working
Have dough sitting in bowl now on rise before splitting and will bake tonight and is first time trying this recipe
Thank You
Anonymous says
can i do entire kneading in a standmixer (kitchenaid) ?
Vaishali says
Yes!
Nave says
is it possible to half this recipe? I don't a) have two pans to make two loafs at the same time and b) need for two loaves at the same time OR is there a way to keep the rest of the dough from overproofing while one loaf bakes? Thank you!
Vaishali says
Yes, you can definitely just halve it for one loaf.
ERIN M. says
Hello,
I made my first bread ever using your recipe and I was overall pleased. I did find the crust too hard for my liking especially for sandwiches. Is there a trick to help with that?
I'm learning so please bare with me.
Thank you
Vaishali says
You can use milk as the liquid instead of water and butter instead of oil for a softer crust.
❤️ Baking says
We don’t usually like too hard crust in our family either. I found that wrapping loafs in 2 cotton towels, and letting them cool like that makes crust much softer, while still delicious.
Karen says
Looking forward to trying this recipe! What size loaf pans did you use?
Vaishali says
Standard size, approx 8 1/2 by 4 1/2 inches. Slightly bigger or smaller is fine but it will impact how much your bread domes.
Anonymous says
Thank you! Just in time:) getting ready to shape the loaves!
Cami says
I don’t have whole wheat flour. Can I use, either all white flour or rye flour in place of the wheat flour?
Vaishali says
You can do all white. Or you can do a mix--sub the whole wheat for rye and use white for the rest.
Pammer says
I was wondering if you have to use the oil for this recipe?
Vaishali says
Step 2!
Christine Helmus says
Great recipe. Thank you. It is very versatile too. I have made it plain, as garlic cheese loaf and also an onion loaf. Always turns out perfect.
Anonymous says
Is this recipe suitable for a bread machine?
Tanya says
Hi. I made this today and loved the result!! Thank you. I’m curious about the first step...this was the first time I saw this “premixing” of starter, water, and flour. Is this just a way to expand and “liven” the starter? Is this something done specifically for the more dense sandwich type bread or do you do this at the beginning of a boule recipe, too? Just curious
Thanks
Vaishali says
Hi Tanya, yes, it's a way to give the bread a strong start, especially if you happen to be using sourdough that hasn't been fed very recently.
Tanya says
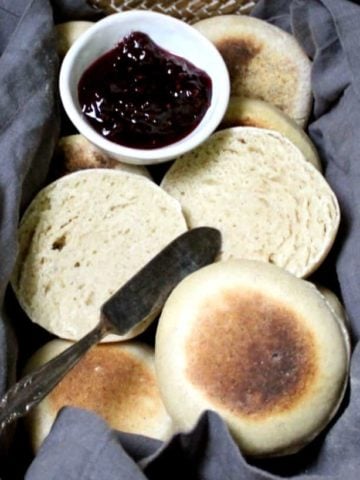
That’s what I thought. My second batch of loaves are in the oven now!! ❤️ And just got your recipe for the English Muffins. They are def next once I let my starter recover ?
Vaishali says
Awesome! I made some small modifications to the muffins after testing again -- i am recommending rolling them thinner so if you already printed take a look again!
Emily says
Following up on this - I'm trying to figure out the "rhythm" of a weekly baking and how that fits with feeding my starter. Let's say I want to bake every Saturday. Could I take out the 1.5 c starter and begin this recipe as written, then feed the remaining starter and put it back in the fridge? Or do I need to feed the starter first to "revive" it, then take out the 1.5 c for the recipe and follow along as written?
Vaishali says
Yes, you can use the discard for the bread, then feed your starter, let it stand for a few hours on the countertop, then refrigerate the starter.
Lois says
Hello I was excited to find your recipe. I have a good starter that is currently in the refrigerator that I would need to feel to get to 1 1/2 cups. I wanted to know if bread flour can be used for part of or all of recipe as I have a bit of that kind of flour. Also I currently can’t eat whole wheat flour so I wanted to know if it is ok to use all purpose or bread flour in place of the 1 cup of whole wheat. Thank you!
Vaishali says
Yes, bread flour is fine!
Joslynn B says
This turned out so good! My first couple loaves for attempts at artisan sourdough. This was much quicker and turned out great! My family really likes it. Definitely will do this one again
Linda D Noack says
Hi, I wanted to know if I can correct my issue. I am on day 7 of making the sourdough starter and I misread your notes on how to make the starter. I was removing 1/2 cup of starter in the morning and then adding 1/2 cup of flour and 3/4 cup of filtered water to the starter. I think mine is a bit runny but it is definitely bubbling. Can I go ahead and add more flour and a little less water now and get it to a good consistency? thanks
Vaishali says
Yes, absolutely. Your starter isn't going to go bad just because you added more water. Add more flour and let it come back to a thicker consistency. 🙂
Linda D Noack says
Thank you, I just added extra flour. I'm so excited to make some bread. I have made waffles out of the discard every day. I printed up your sourdough recipes and am going to get going on them this week.
Trina says
I have been working on my starter for a month. The weather is getting warmer so it finally rose like it should. I am trying this recipe now but I don't have 1 1/2 cups starter. I cut back on the amount of flour and water but not sure if I did it right. I guess I will find out in four hours. Also what causes a starter to go past it's prime.
Mila says
Just got my starter going yesterday and can't wait to try this recipe....thank you very much. Can I use only white all purpose flour in this recipe? Also if I don't bake one week or I will be away, do I just refrigerate the starter or freeze it to temporarily stop it from growing?
Collin says
Could I substitute the whole wheat flour with rye flour?
Vaishali says
Rye would make it a tad more dense and heavier than whole wheat, but since the proportion of all purpose flour is much bigger it could work. Let me know how it goes.
Sharon RC says
I started making our own bread several months ago and my husband doesn't want the bought bread anymore. I have to go mostly gluten free but did start using a sourdough starter. I have a simple recipe that turns out really well and I use a bread machine. So easy to get a loaf going and it takes under a little over 3 hours to complete. I add to my starter and refrigerate it until ready to make another loaf. I let it sit out for a couple hours before starting a loaf.
Christina says
Can I ask how you use this recipe in the bread maker? Do u just add ingredients and start the bread process? I’ve only made bread with prepackaged yeast once and now my son is asking To make it with his own starter. He is 13. He is not gluten free, I am. Do u also make gluten free bread?
Anonymous says
Would love to know what that recipe is. I don't want to take all day making bread. I use the machine but not with sourdough
Chris says
I'd like to know your recipe also please.
I'm on my second try of this and it still does not seem right.
Would love to just put everything in the bread machine.
Ingrid says
Would you please share your bread machine recipe that you make.
Sarah says
Sadly I totally failed at this recipe! My starter was nice and healthy or at least so I thought, but the dough just kept getting stickier and stickier as I kneaded it so I put it in the refrigerator to rest overnight then shaped it and put it in the pan to rise in the morning. It rose almost to the top of the pan and then I moved it, but when I put it down part of the dough fell, any guesses what I could have done wrong? It's like the whole thing deflated. I read one article that said I could reknead and reshape the dough so I tried that but then it never rose again.
I probably just don't know bread well enough at this point, I am using a starter branched off from a friend's and I have successfully baked one round traditional sourdough loaf out of it.
Vaishali says
This is why I say, time and again, that you need to follow instructions especially if you're new at baking. The dough just needs a two-hour first rise, so putting it in the refrigerator overnight --where it will continue to rise, albeit slowly -- might have resulted in too long a rise time, especially if your starter was strong. If your dough was sticky, you can try it with less water next time--the weather where you are, the humidity could all make a difference to how much liquid your bread needs. And finally, remember practice makes you a better baker, so stick with it.
chris says
I just made this for the second time cuz my first one failed the dough seems way too sticky and I'm afraid to put too much more flour in as the recipe calls for I'm at the maximum flower this time and even put another small handful because it was still very very sticky.
I'm usually not into videos most cooking is simple but this if you're not used to baking bread would be nice to have a video to see the consistency it supposed to be.
Did you make your round out of this recipe and just form round and bake it at the same temperature ,not in the Dutch oven like some of them do?
Vaishali says
Try kneading it for longer next time or try using less water or a combination of both. Dough can remain sticky if not kneaded long enough for the gluten strands to develop.
Nicole says
I started a starter last week and am looking forward to trying this. If I want to do an overnight rise, can I just refrigerate it for the second rise?
Thanks!
Carmen says
You should be able to do that with any yeast bread, including sourdough. It's what I did because it got too late. I will let you know how it goes!
Diane says
Has anyone used this with bread flour instead of all purpose? Wondering how it would change it?
Deepti vishwanath says
Hi Vaishali am new to sourdough concept..i made my starter with 100%hydration. Now i want to try my hands on baking a loaf. I saw your recipe felt very nice and relatively easy in comparison to other recipies. But your quantity is more .
Can you please guide me here how to go with small quantity of flour and starter.. hope you can help me here..
Anonymous says
Hi pls reply
Anonymous says
This recipe is amazing, thank you!
I fed my sourdough starter the night before and started the recipe around 7am and had the bread out around 4. Turned out amazing! Wife and kids love it!
Maria Aggelina says
I will give it a try tonight.Im tired of giving store bought bread to my kids. Than you so much for this recipe. Greetings from Greece.
SB says
I have made my bread. It has a very good taste. However the crust is very tough and chewy. Is there a way to make it softer and more pleasing to the pallet?
Vaishali says
Hi, you can use nondairy milk instead of water for a softer crust--replace all or part of the water with soymilk or almond milk.
Amy Patrick says
As soon as it comes out of the oven, rub the top generously with butter. Soft crust every time!
Deborah says
Yes! I'm a regular bread maker and ALWAYS brush my buns and loaves with a honey butter mix right after they come out of the oven. This softens the crust as well as gives it a mild sweetness. This tip makes a HUGE difference in how quickly they disappear. Dont brush it on before, it deflates the bread and tends to make soggy.
chris dattilio says
Hi ,I'm new to this and Soo many questions.
Can this be made with discard?
It's listed under 5 recipes to use the discard for but doesnt say discard or unfed starter in ingredients like others do.
Also ,can u use discard from day two the same as discard day 6 ?
Can I take the discard and put in fridge a day or two till I use it?
Thank you!
Vaishali says
Yes, so long as the starter has been fed about 5-6 days prior to baking and is strong.
Carmen says
You can use discard right away while it is still active. If you put it in the fridge, you will have feed it to activate it again. If you put a little blob of starter in a cup of water and it floats, it is ready to bake.
Susan says
Can I use a sourdough starter I already have? It's not thevsame as your recipe, but similar.
Lee says
I have made it with my starter which is not the same. Turned out fine.
Kenleigh says
If I only want to make one loaf at a time, is it possible to refrigerate half of the dough at some point in the process to bake later? At what point in the process would be the best to do this? Thanks!
Lee says
I just cut the recipe in half and only mix up for one loaf
Carmen says
You will want to freeze it to bake later. It will continue to rise, albeit very slowly, in the fridge.
Jayan says
I am enjoying making of sourdough starter as per your recipe. I had lost my mother starter as i missed feeding her.Thanks
Lynda says
What size loaf pans do you use for this recipe?
Marya Wall says
If I want to make something with my starter every day or a couple things in one day, should I have doubled my starter to start with? Or will it eventually be a lot of starter? I'm new to all of this, I thought I'd only be using like a couple Tablespoons for each recipe but looks like it's a cup or more each.
Vaishali says
Replace the amount you remove. So if I use a cup of stater I'd feed it a cup of flour and the proportionate amount of water.
Carmen says
I generally keep less than a cup of starter in the fridge. I put my starter in the fridge fed and when I take it out, I let it come to room temp and feed it again. THEN I feed it for the recipe I am going to bake, whether it's 1/3 cup, which is typical for a rustic or classic loaf or 1-1/2 as for this one. I start the night before and then check in the morning to see if it is active. If it isn't, I feed it again. When I take out the amount for my recipe I put the starter right back in the fridge as I bake once a week.
Ken says
I recently created both a rye sourdough starter and a wheat sourdough starter. I named them after my Grandfathers brother and sister Jim and Emma. Jim fought in WW1, then came home to care for his sister who had mental health issues, which I now believe was ADHD. I was recently diagnosed after quitting a lifetime habit of smokeless tobacco. So I figured that since Jim and Emma never got to have any kids of their own to carry on their legacy I would name my starters after them
Elena says
That is a beautiful tribute! I am named after my Opa's sister who survived the war, but not without her own wounds, and never had children of her own. But Opa's eldest sister died just about a month before he was born, a victim of the Soanish Flu. I think I know what my starter's name is now going to be.
Thank you so much for the inspiration!
Vaishali says
That is a beautiful plan, Ken. Thanks for sharing your story.
Hillary says
Hello,
Making your starter for the first time and am on day 4. Wondering if you could clarify what it means that the starter is “strong”. Does that mean not runny?
Also, once the starter is done, would you cut the ingredient proportions for the bread recipe in half if using a bread machine?
Thank you! I was thrilled to find a sugar free recipe,
Carmen says
Depending on where you live, starter takes roughly 10 days to 2 weeks to get active. (The wild yeast that creates your starter actually comes from YOUR air)
Even though there are recipes for starters, it doesn't really matter how "runny" it is. The amount of liquid only comes into play when you are baking and your liquid ratio can affect the success of your bread.
I generally keep my starter at a medium wetness - thicker than pancake batter but not too hard to stir.
The way you know your starter is ready for baking: Put about 1/2 teaspoon in a glass of room temp water. If if floats it is active or "strong" - same thing. Voila!